

Limit Attempts
User Guide
WordPress | 6.4 * |
Limit Attempts | 1.3.0 * |
Htaccess | 1.8.1 * |
Captcha | 5.1.8 * |
reCaptcha | 1.74 * |
Contact Form | 4.2.5 * |
*When using other versions some differences are possible to occur
** Screenshots were taken from a PC
Table of Contents
2.2. Block IP or Email Address For
2.3. Reset Failed Attempts After
2.5. Deny List IP Address or Email After
2.6. Non-Existing Username Login Attempts Action
2.8. Failed Login and Password
2.14. Block Email Address After
4. Email Notifications Settings
4.2. Send Email Notifications to
4.3. Block/Deny List Notifications
4.4. Restore Default Email Notifications
5.1. Remove Log Entries Older Than
5.2. Remove Stats Entries Older Than
5.4. Update Allow - & Deny List After
7.1. Limit Attempts Pro License
You can download the “Limit Attempts” plugin here:
https://bestwebsoft.com/products/wordpress/plugins/limit-attempts/.
1. Introduction
Note: Сlick the “Save Changes” button in order to apply any changes. |
1.1. Open your WordPress Admin Dashboard and find the menu on the left.
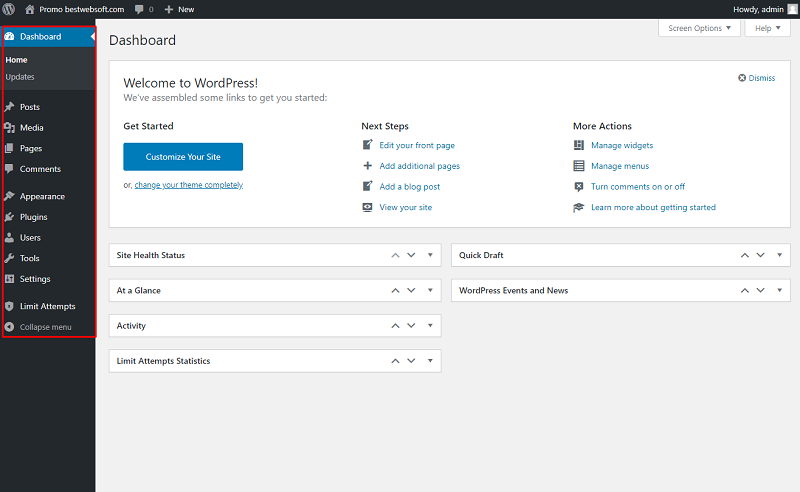
1.2. Open the ”Limit Attempts” > “Settings” page.
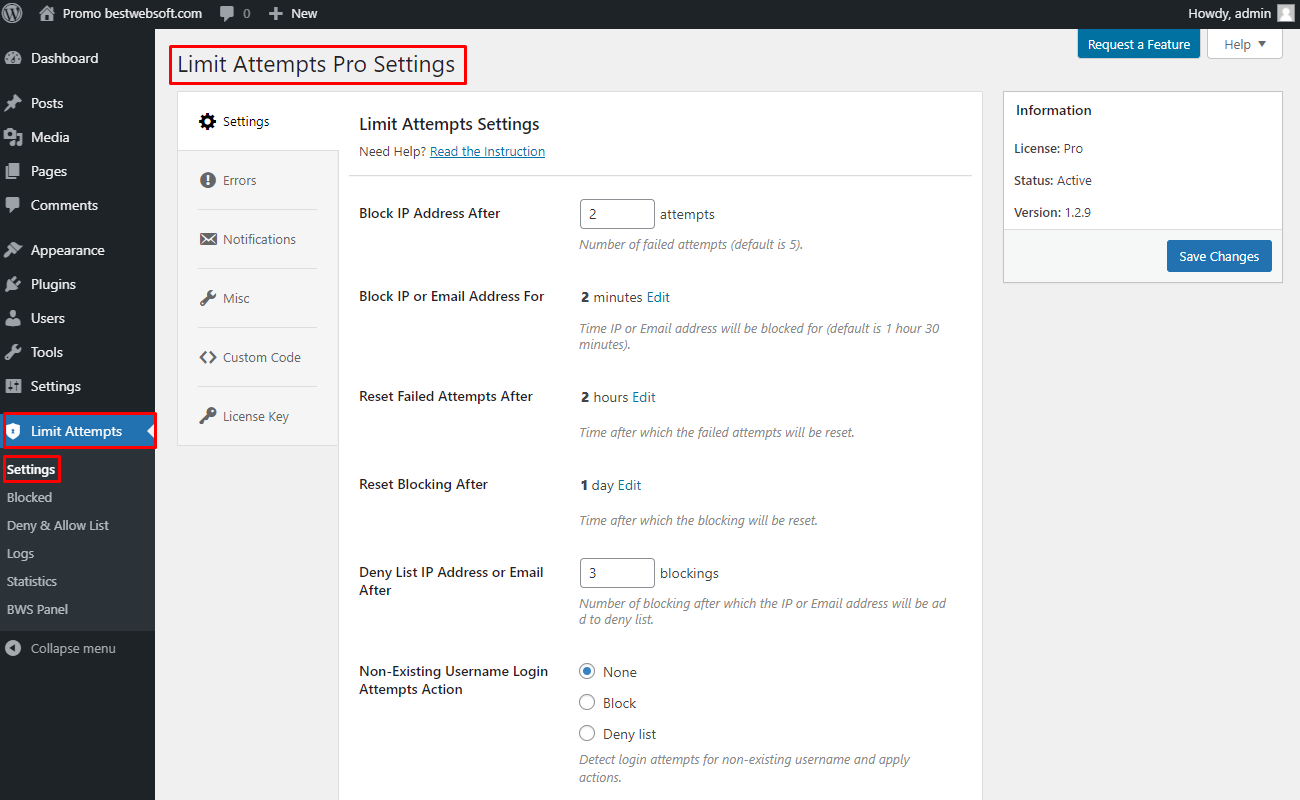
2. Settings
Use the “Settings” tab to change the global settings of the plugin.
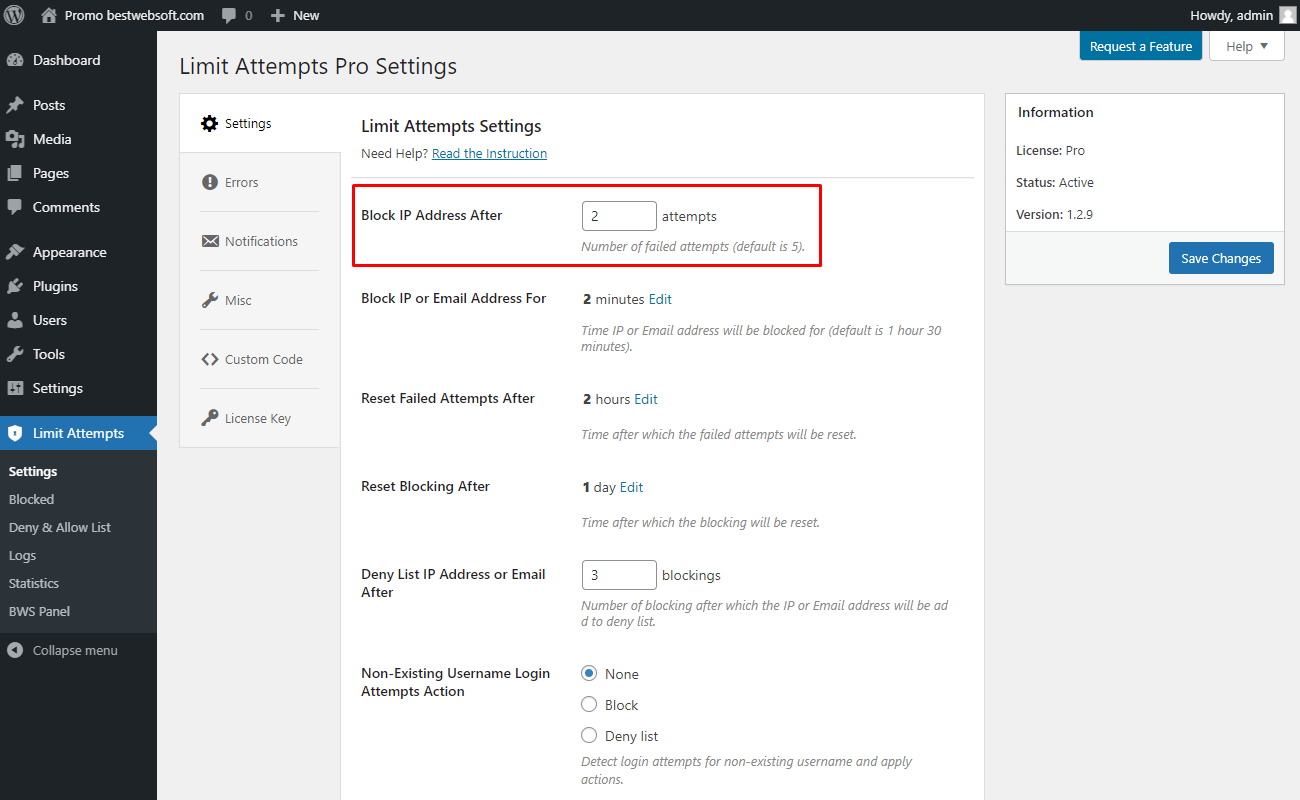
2.1. Block IP Address After
Use the “Block IP Address After” option to set the limit of the user’s failed login attempts. The user’s IP address will be blocked automatically on reaching this limit.
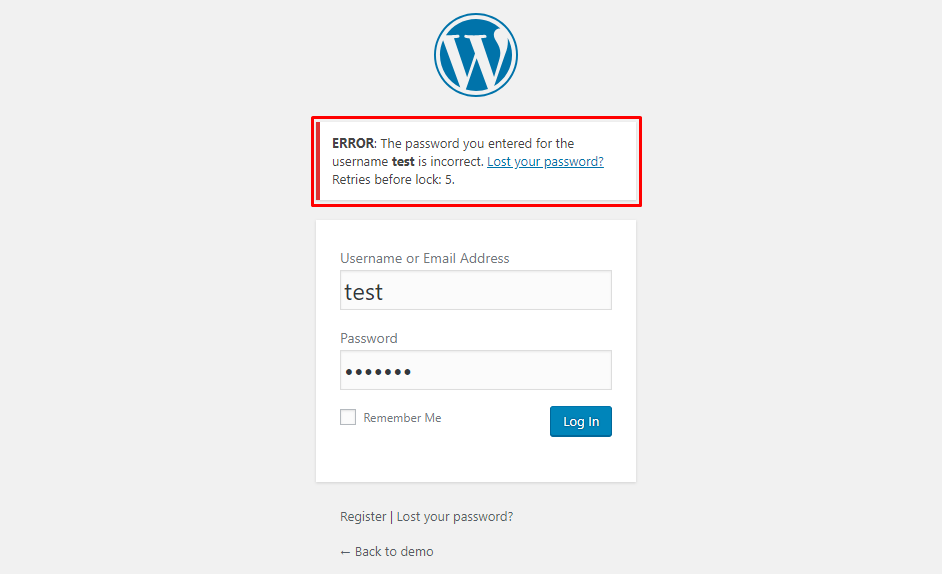
2.1.1. The message, informing a user of the remaining retries number will look on the login page as follows.
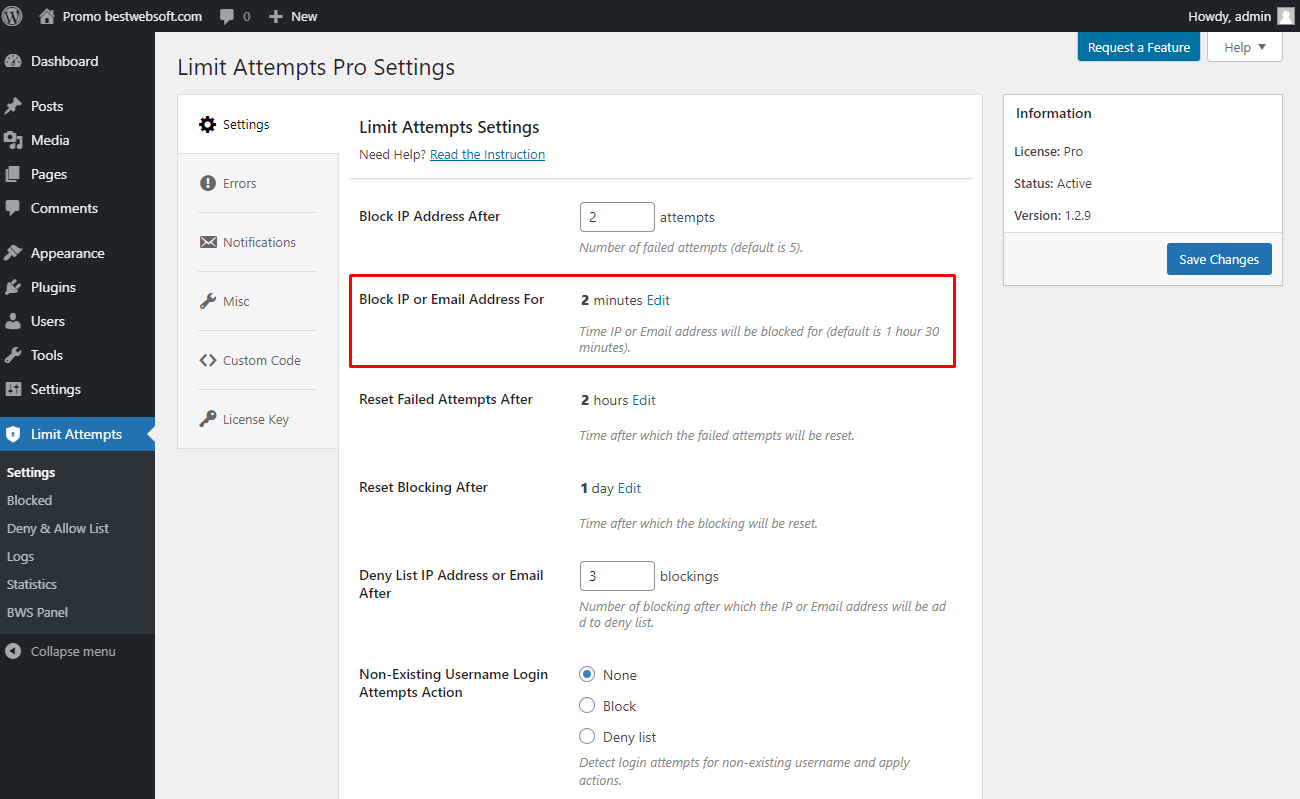
2.2. Block IP or Email Address For
Use the “Block IP or Email Address For” option to block the IP or email address for a specified time period.
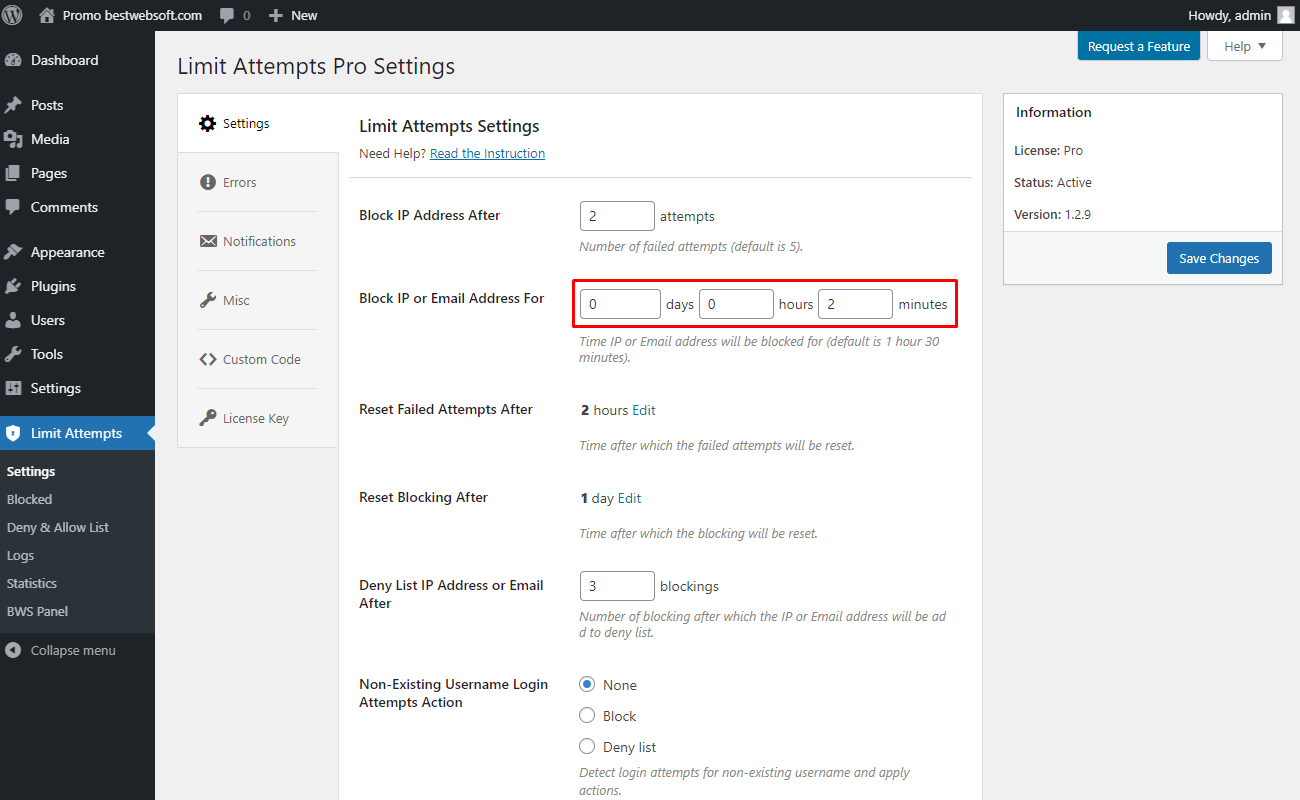
2.2.1. To block the IP or email address for a specified time period enter the desired time in Block IP or Email Address For” option boxes.
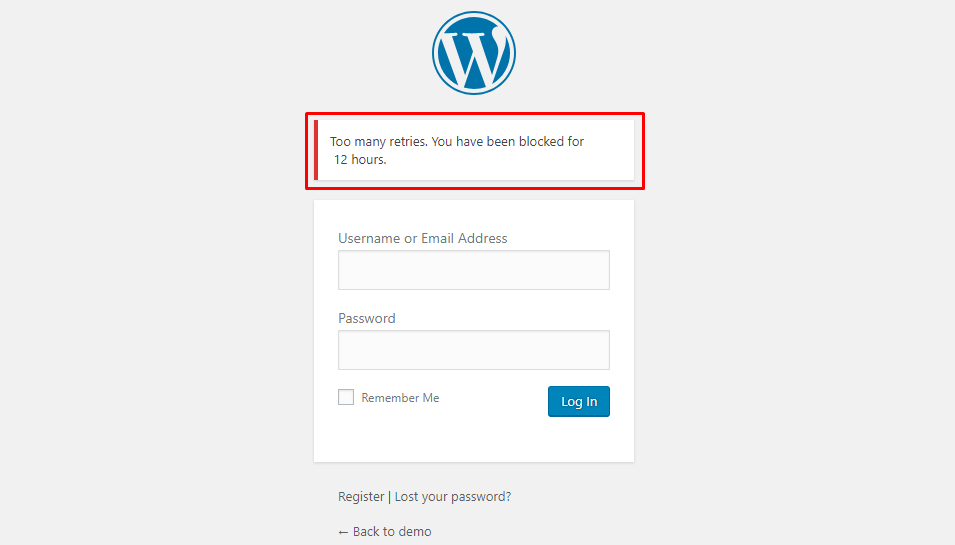
2.2.2. The message informing of being blocked may look on the login page as follows.
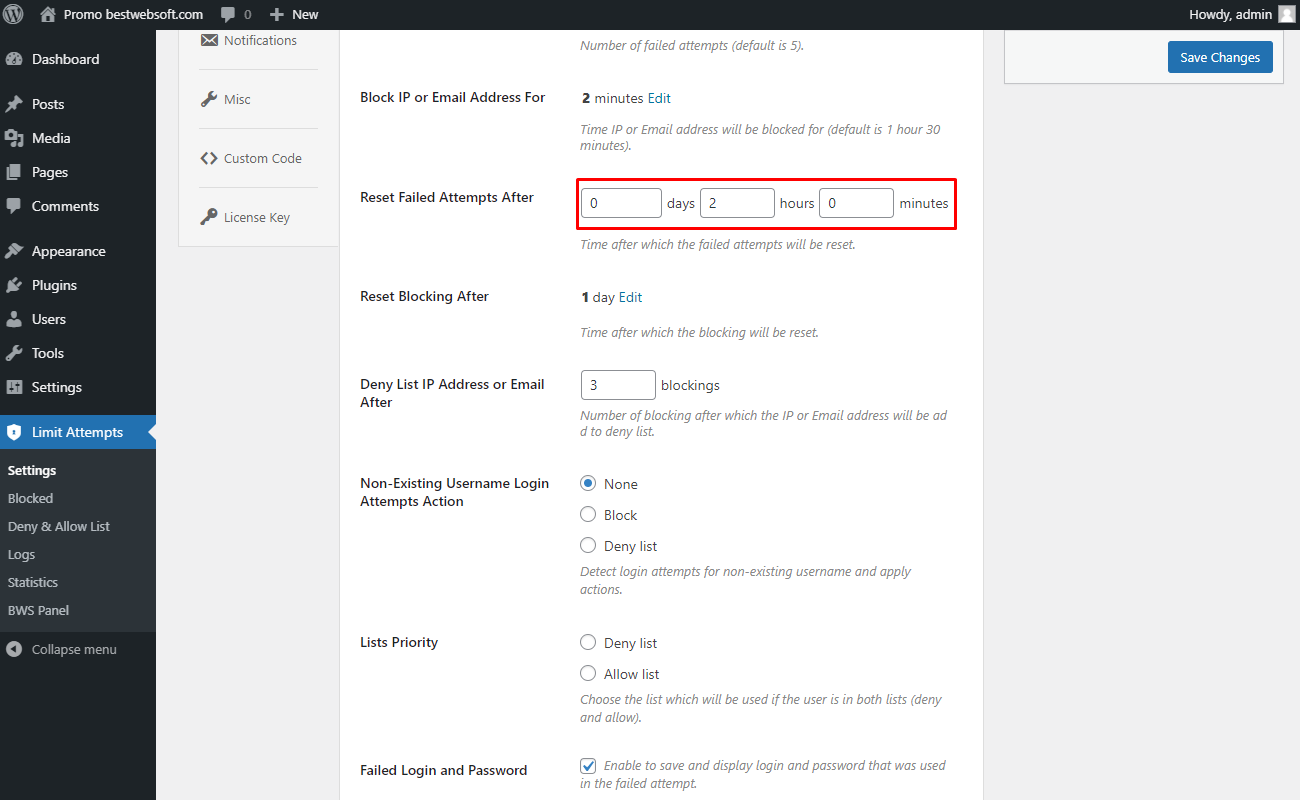
2.3. Reset Failed Attempts After
Use the “Reset Failed Attempts After” option to set the time after which the failed attempts will be reset.
2.3.1. To set the time after which the failed attempts will be reset enter the desired time in the “Reset Failed Attempts After” option boxes.
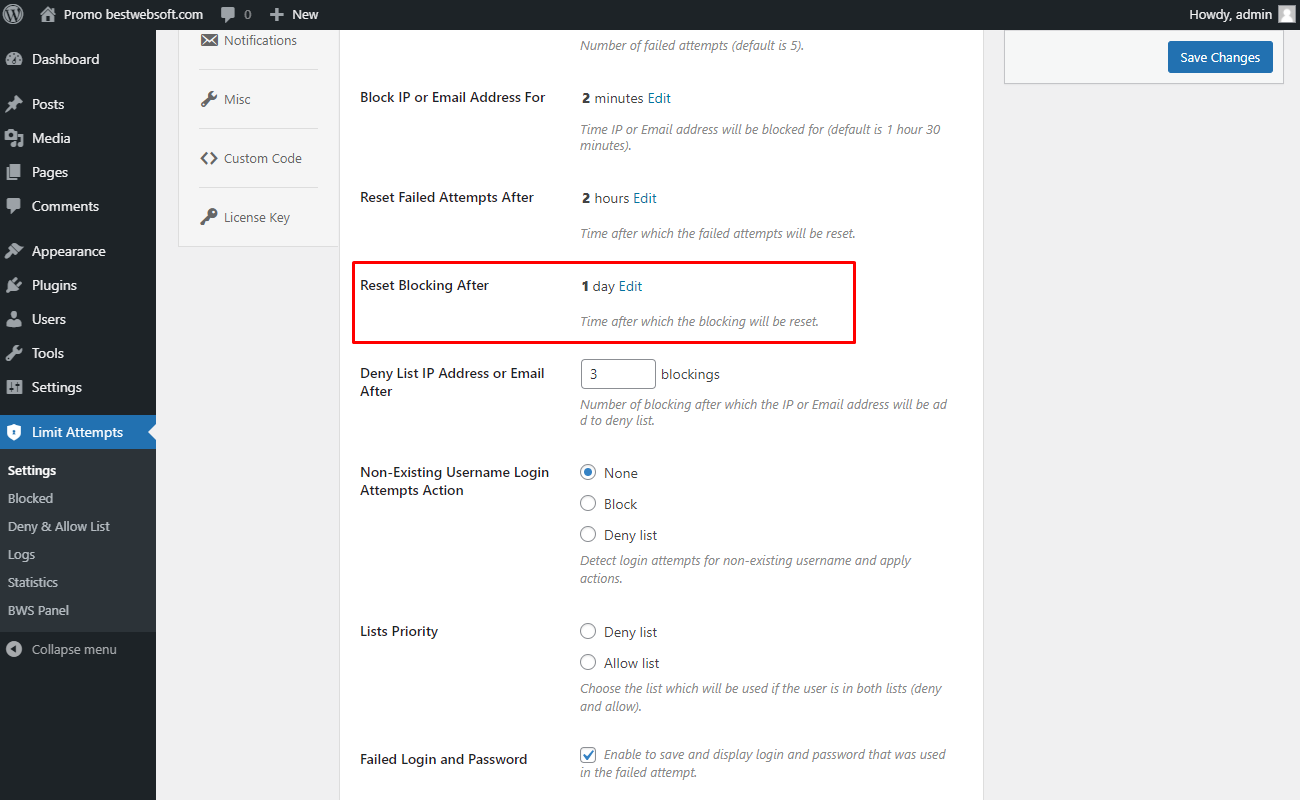
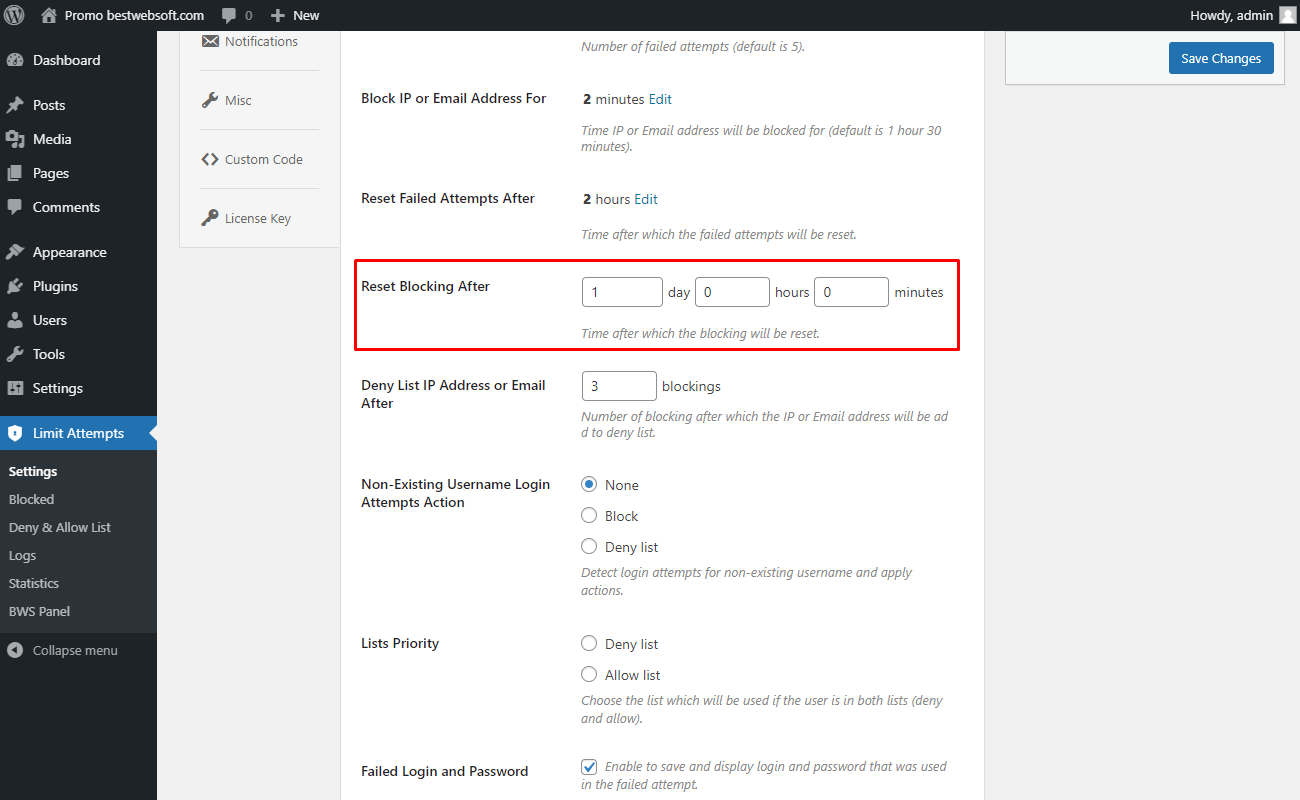
2.4. Reset Blocking After
Use the “Reset Blocking After” option to set the time after which the blocking of the IP or email address will be reset.

2.4.1. To set the time after which the blocking of the IP or email address will be reset, enter the desired time in the “Reset Blocking After” option boxes.
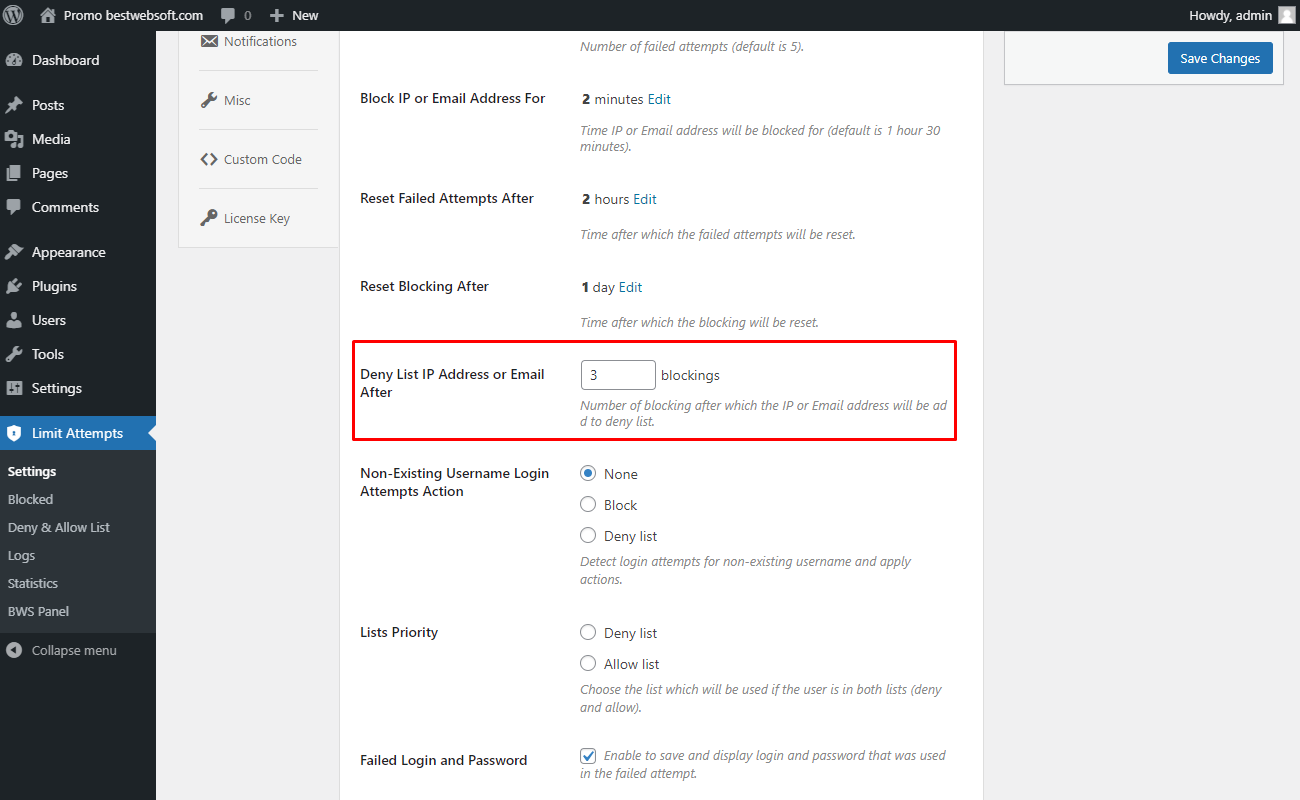
2.5. Deny List IP Address or Email After
Use the “Deny List IP Address or Email After” option to set the limit of blocking after which the user’s IP or email address will be deny listed.
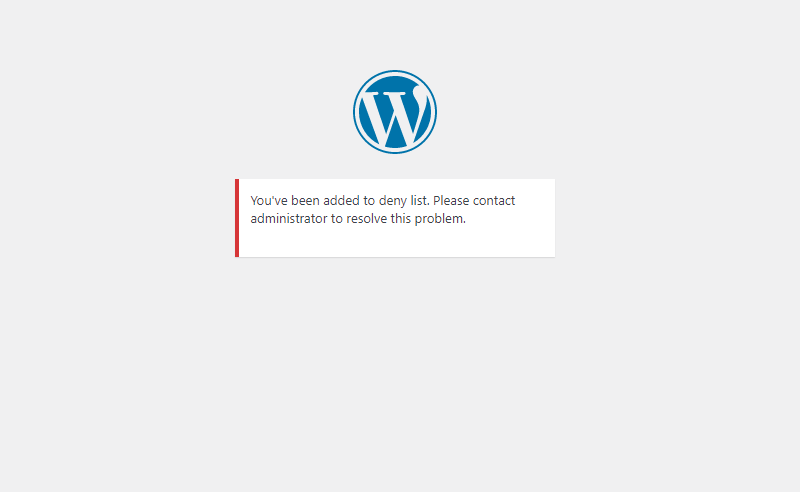
2.5.1. The message, informing a user of being deny listed will look on the login page as follows.

2.6. Non-Existing Username Login Attempts Action
Choose the preferred action which is to be performed for the cases when a non-existing username entrance attempt is detected.
Note: If the “Default” position is set, the plugin will block and/or deny-list the IP addresses applying the settings of the options, described in the options of §§ 2.1. - 2.5. |

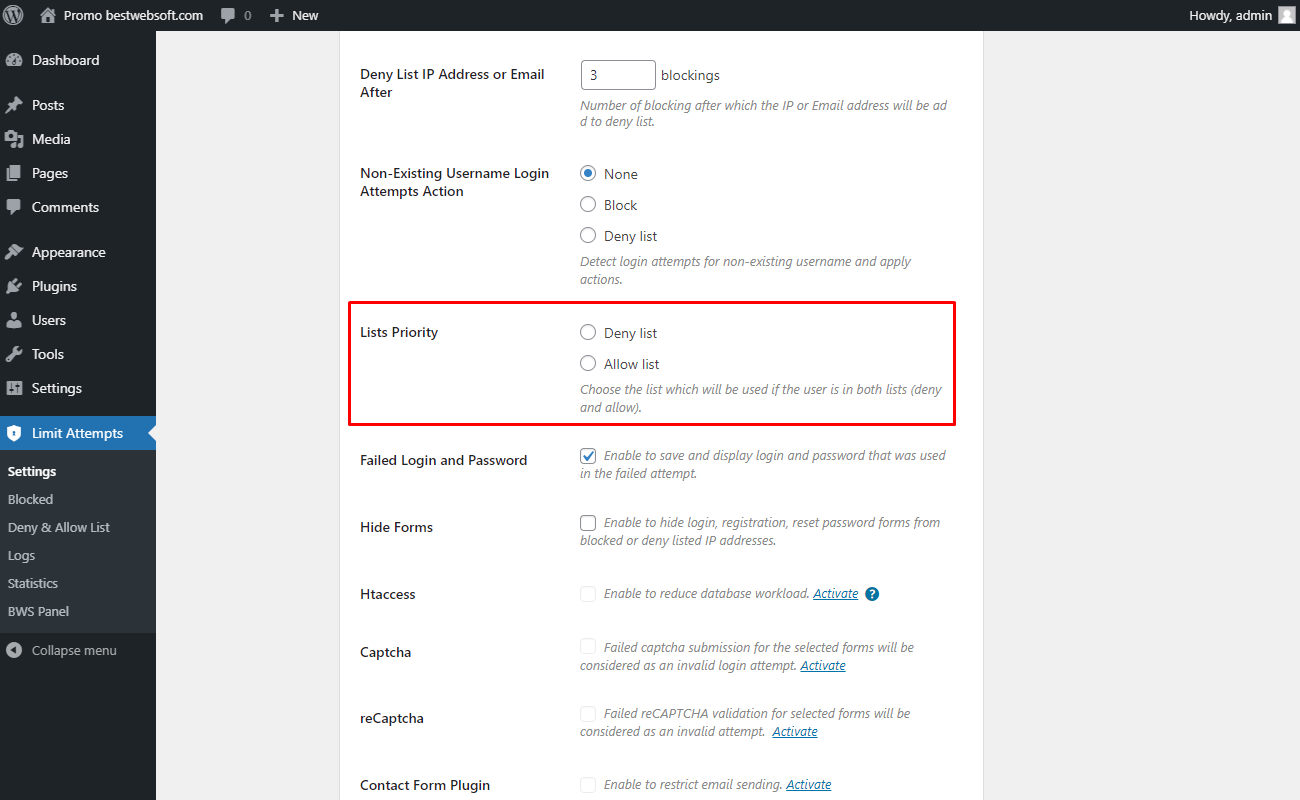
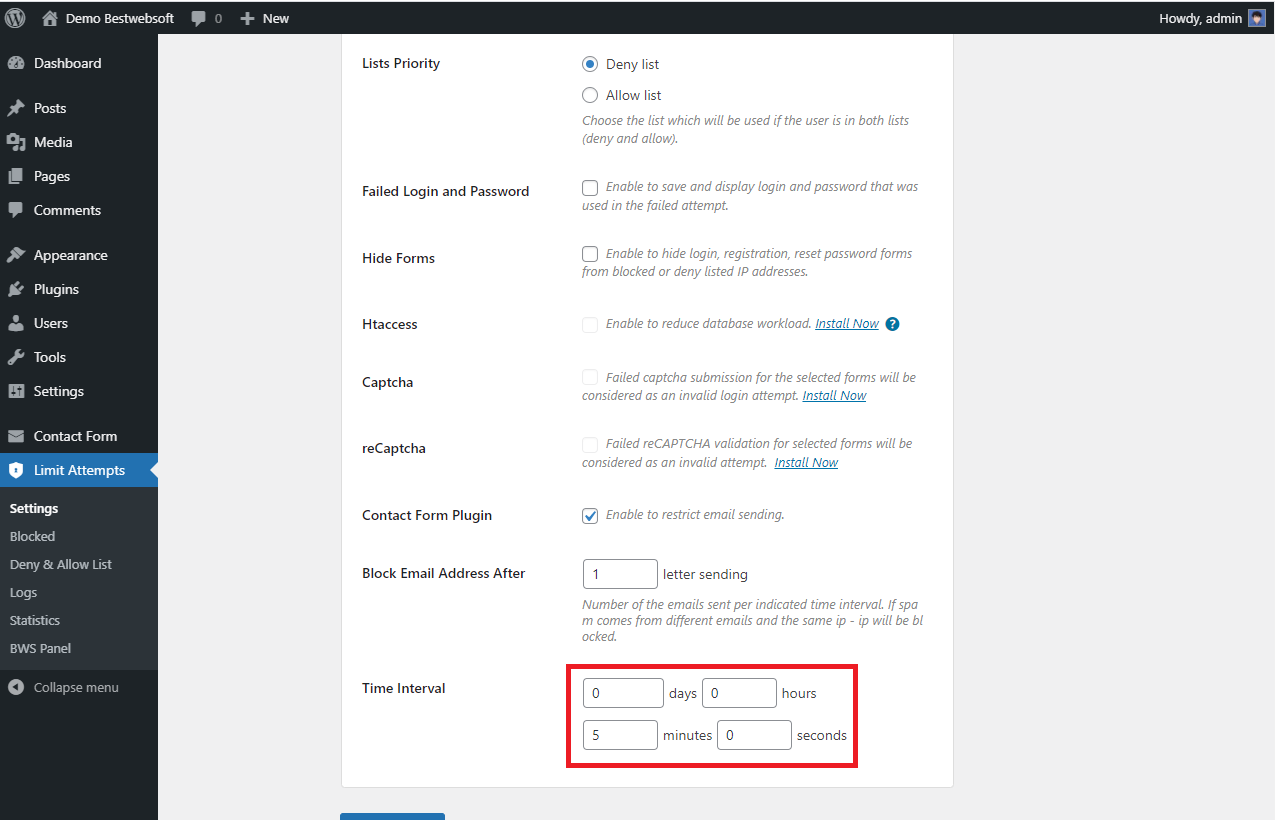
2.7. Lists Priority
Use the “Lists Priority” option to set the priority for Deny list or Allow list for the cases when a user’s IP or email address is both deny-listed and allow-listed. If the “Deny list” position is set, the user will be blocked even if the IP address is added to the Allow list too.
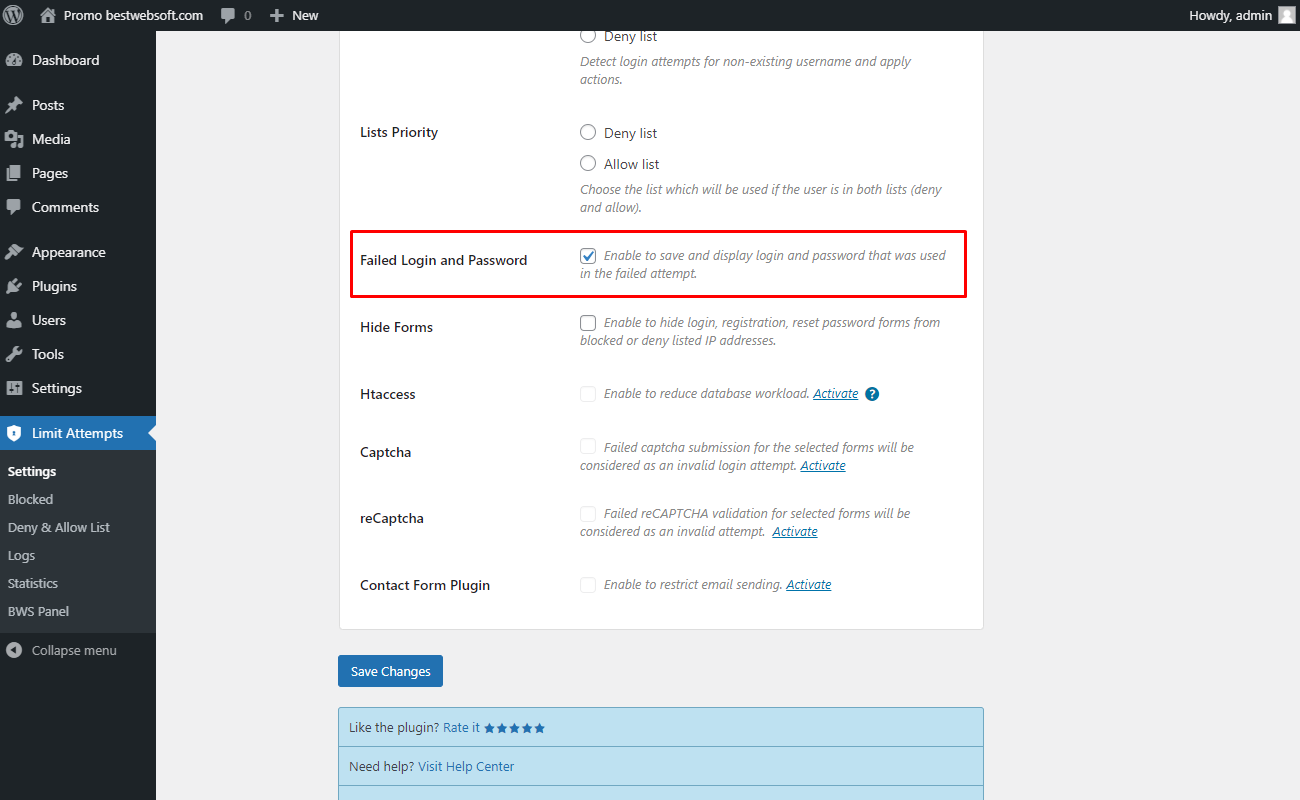
2.8. Failed Login and Password
Enable the “Failed Login and Password” option to collect logins and passwords used in the failed attempts.
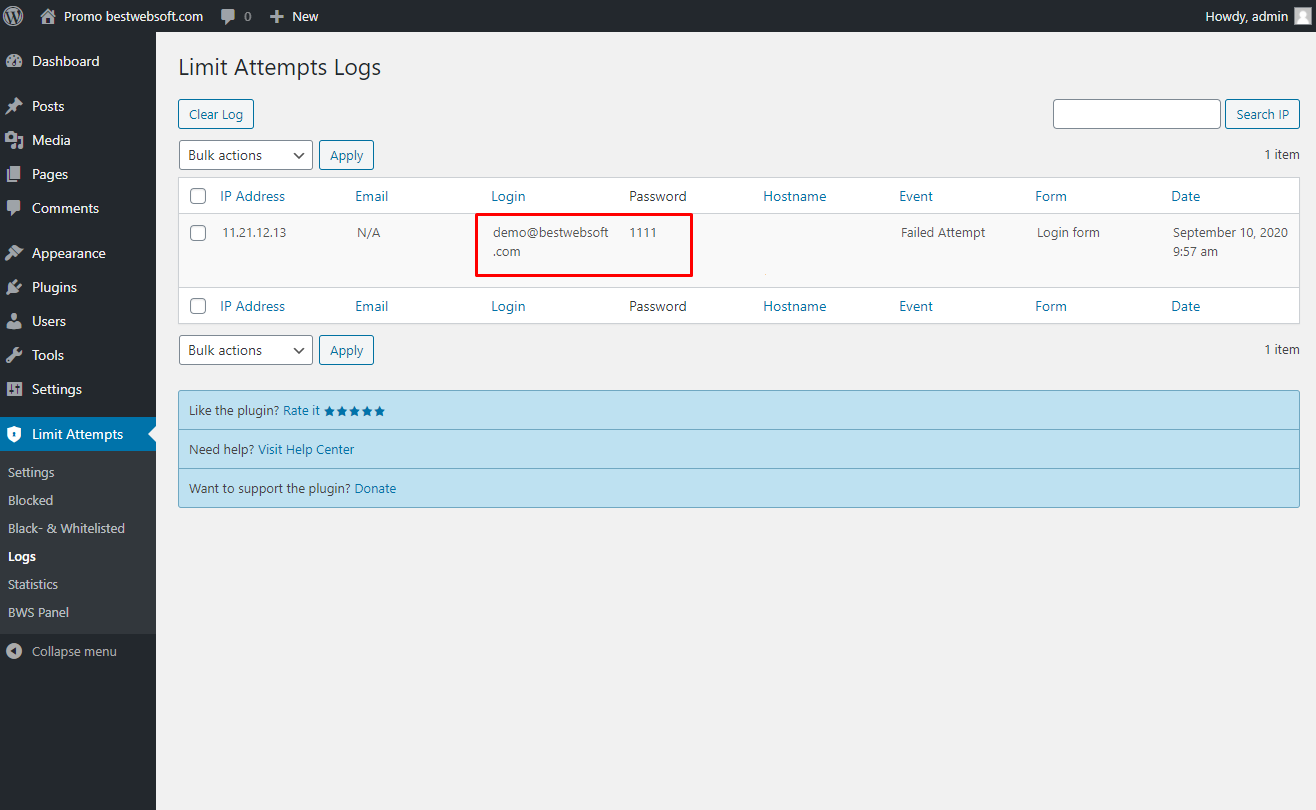
2.8.1. The failed logins and passwords will be displayed on the “Limit Attempts Logs” page in the “Login” and “Password” columns respectively.
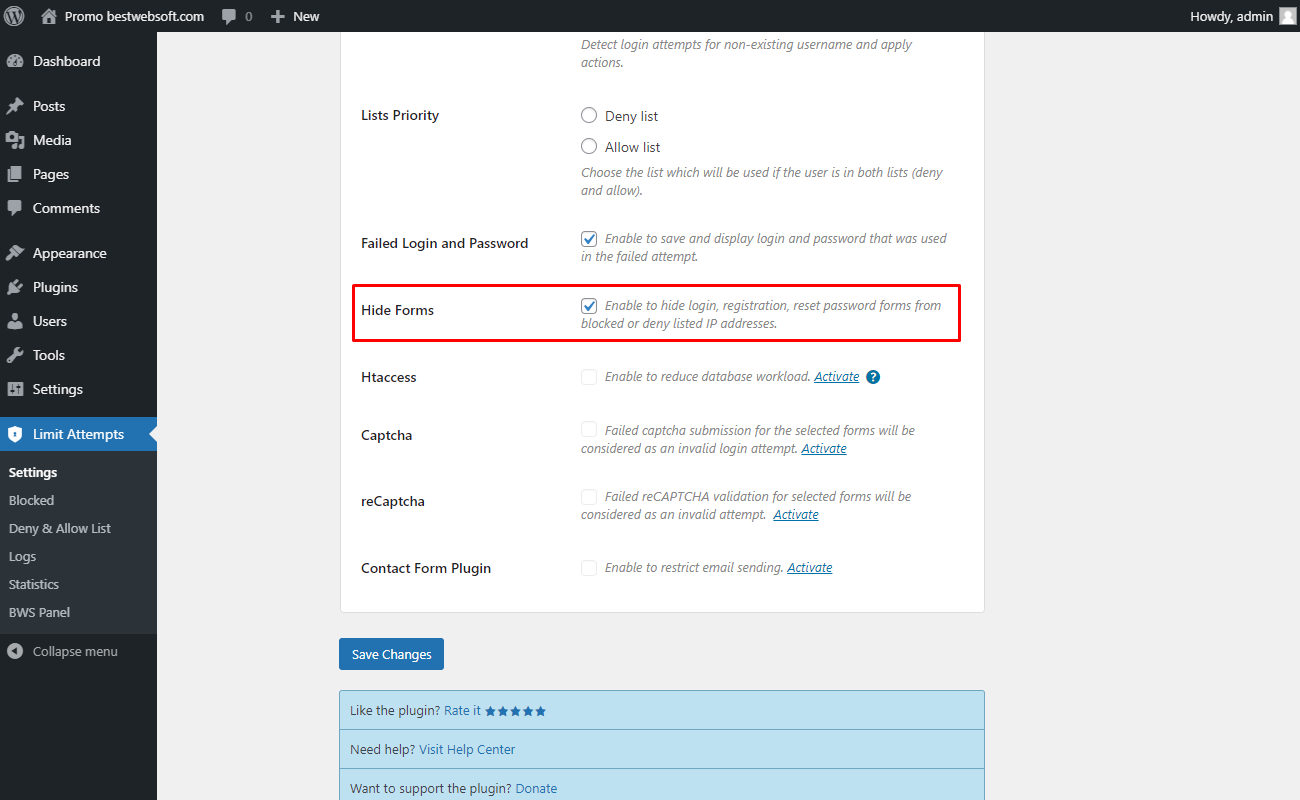
2.9. Hide Forms
Enable the “Hide Forms” option to hide the “Login”, “Registration” and “Reset Password” forms from blocked or deny listed IP addresses.
2.9.1. The sample page with a hidden form may look as follows.
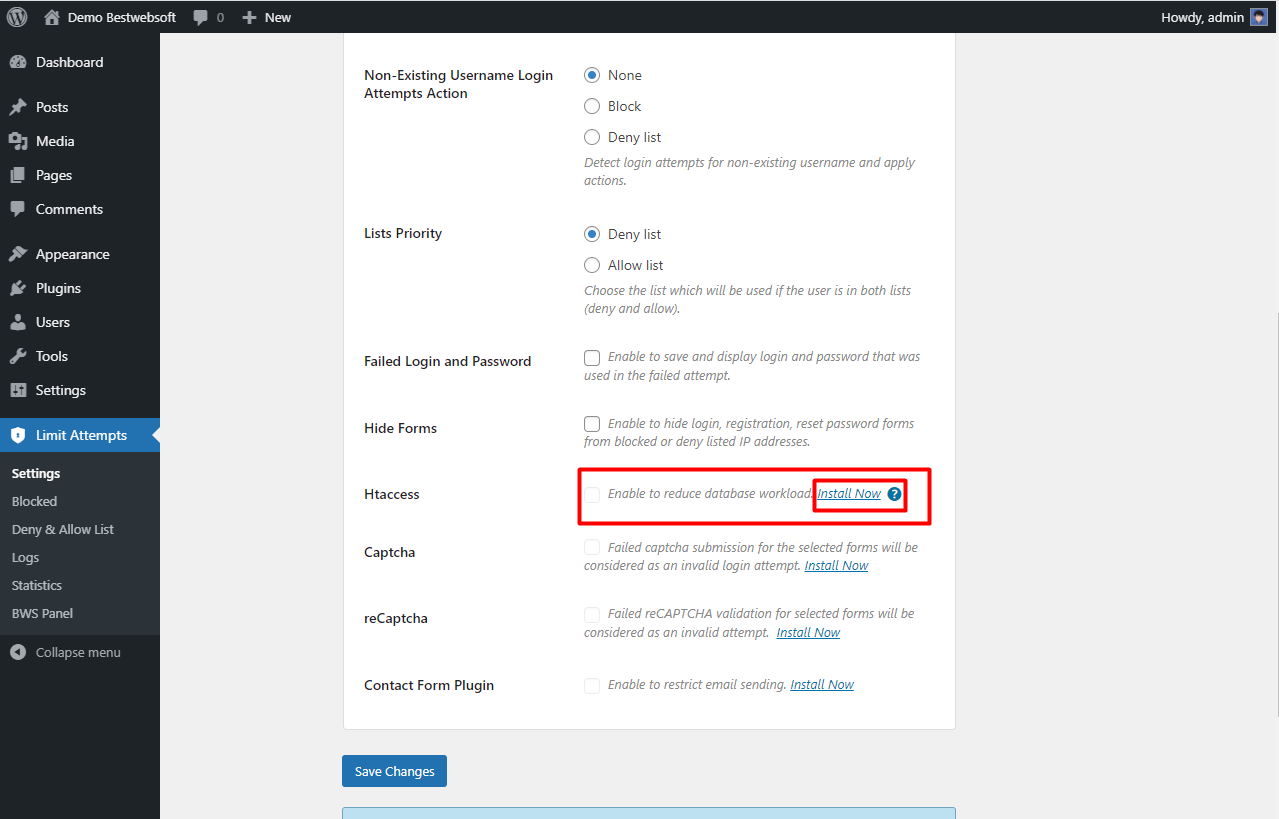
2.10. Htaccess Plugin
Note: Install and activate the Htaccess Plugin to enable this option. |
The “Limit Attempts by BestWebSoft” plugin is compatible with the “Htaccess by BestWebSoft” plugin. Download and install the plugin by clicking the “Install Now” link next to the “Htaccess Plugin option or follow the link: https://bestwebsoft.com/products/wordpress/plugins/htaccess/
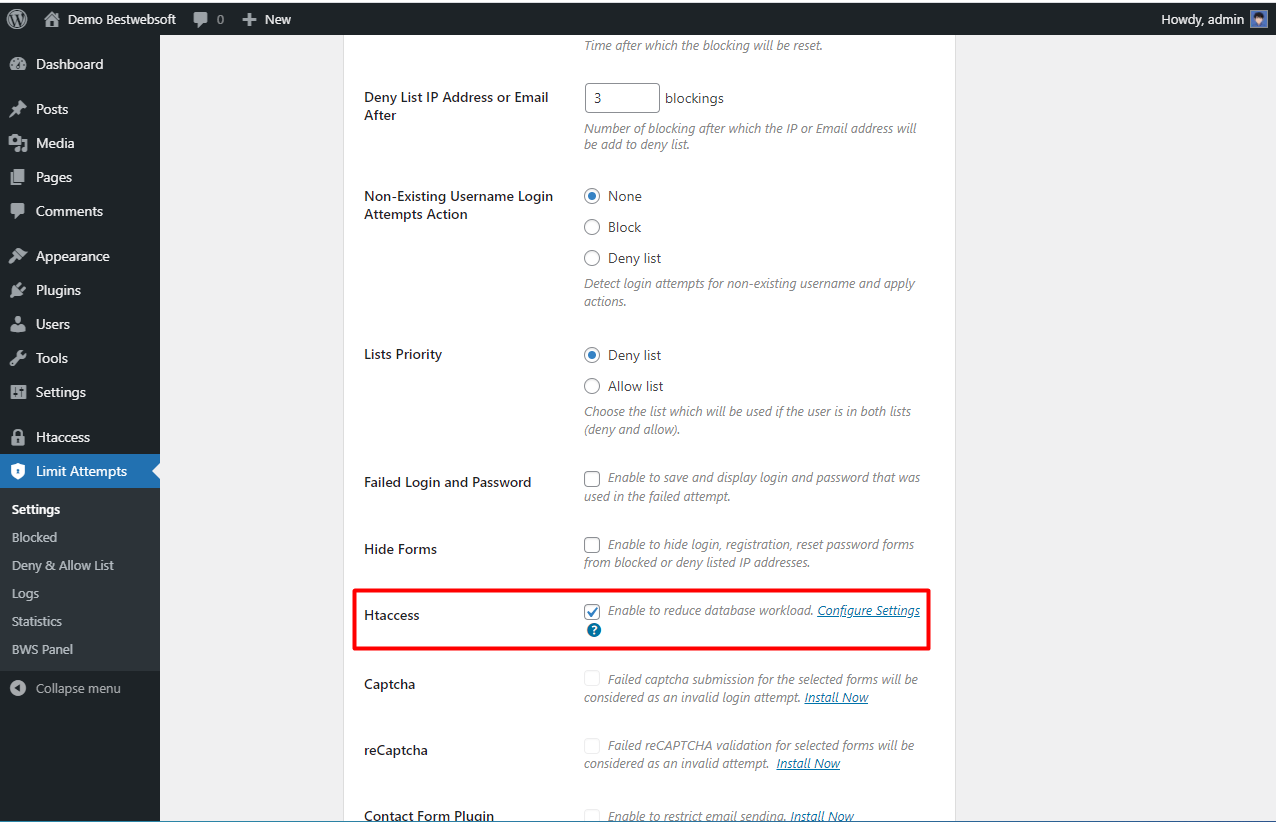
2.10.1. After a successful installation and activation enable the “Htaccess Plugin” option.
Note: All the IP addresses from the “Blocked” and “Deny” lists will be added to the “Deny from” section of the “Htaccess Settings” page. This will reduce the workload of the database. |
2.11. Captcha Plugin
Note: Install and activate the “Captcha by BestWebSoft” plugin to enable this option. |
The “Limit Attempts by BestWebSoft” plugin is compatible with the “Captcha by BestWebSoft” plugin. Download and install the plugin by clicking the “Install Now” link next to the “Captcha Plugin” option or follow the link: https://bestwebsoft.com/products/wordpress/plugins/captcha/
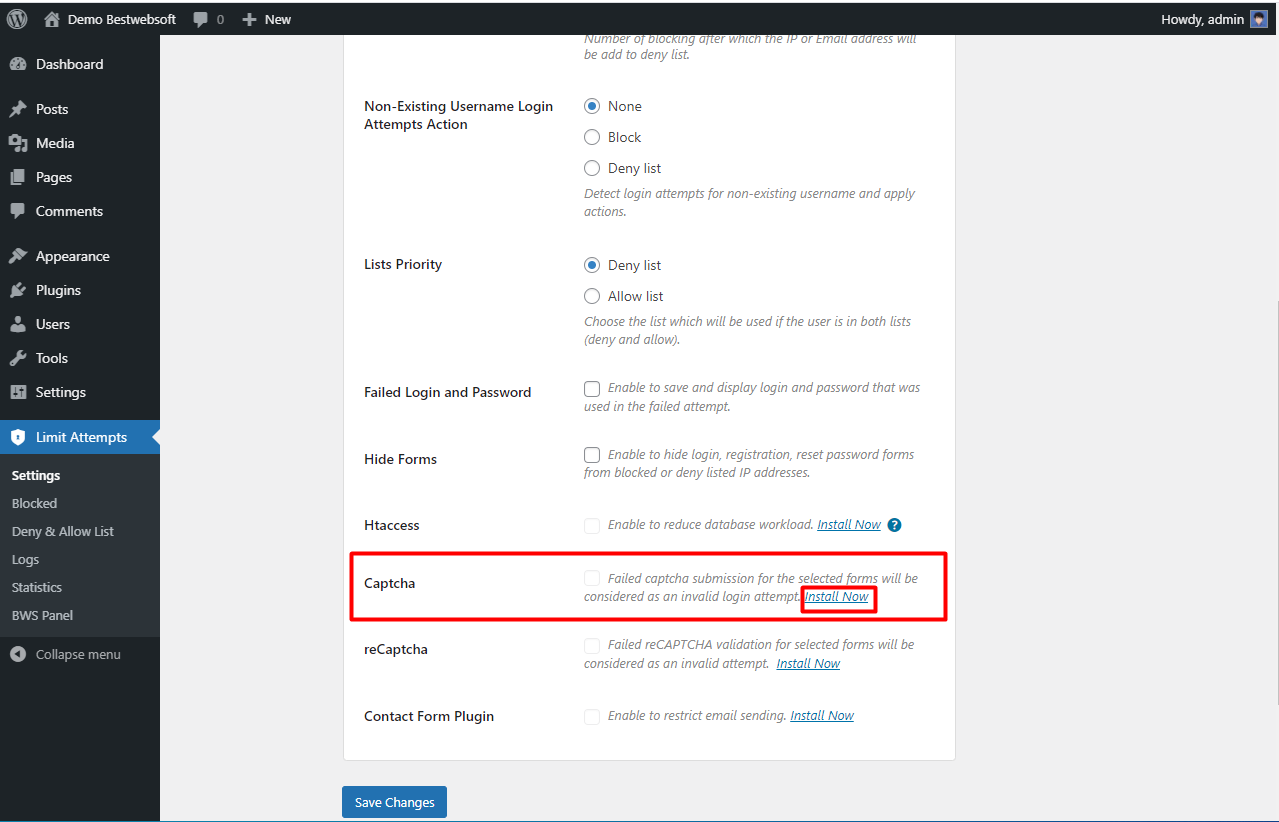
2.11.1. After a successful installation and activation of the Captcha Plugin choose the forms, on which the incorrect Captcha entry will be considered as a failed attempt.

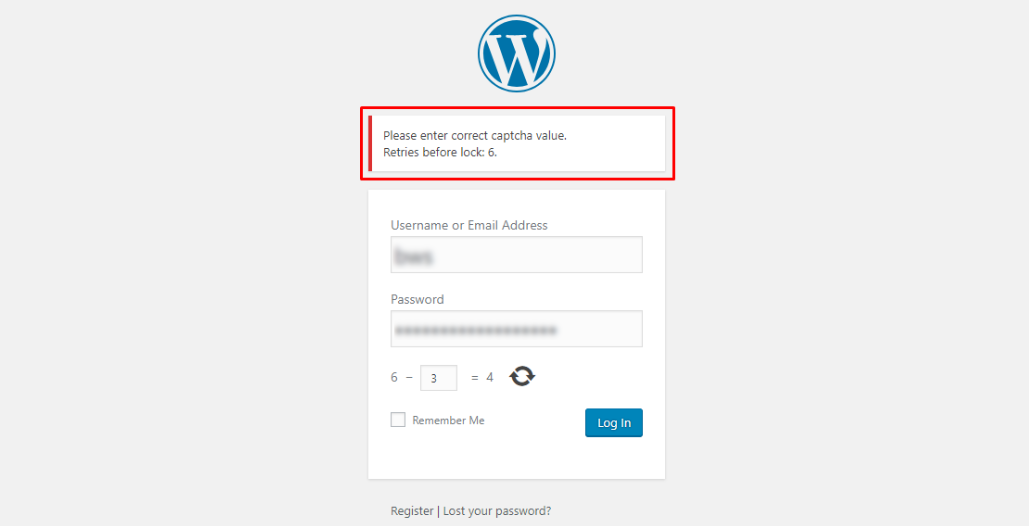
2.11.2. In case of incorrect Captcha entry, the notification informing the user of a false attempt and the number of left retries may look on the chosen form as follows.
2.12. reCaptcha Plugin
Note: Install and activate the “reCaptcha Plugin” plugin to enable this option. |
The “Limit Attempts by BestWebSoft” plugin is compatible with “reCaptcha by BestWebSoft”. Download and install the plugin by clicking the “Install Now” link next to the “reCaptcha Plugin” option or follow the link: https://bestwebsoft.com/products/wordpress/plugins/google-captcha/
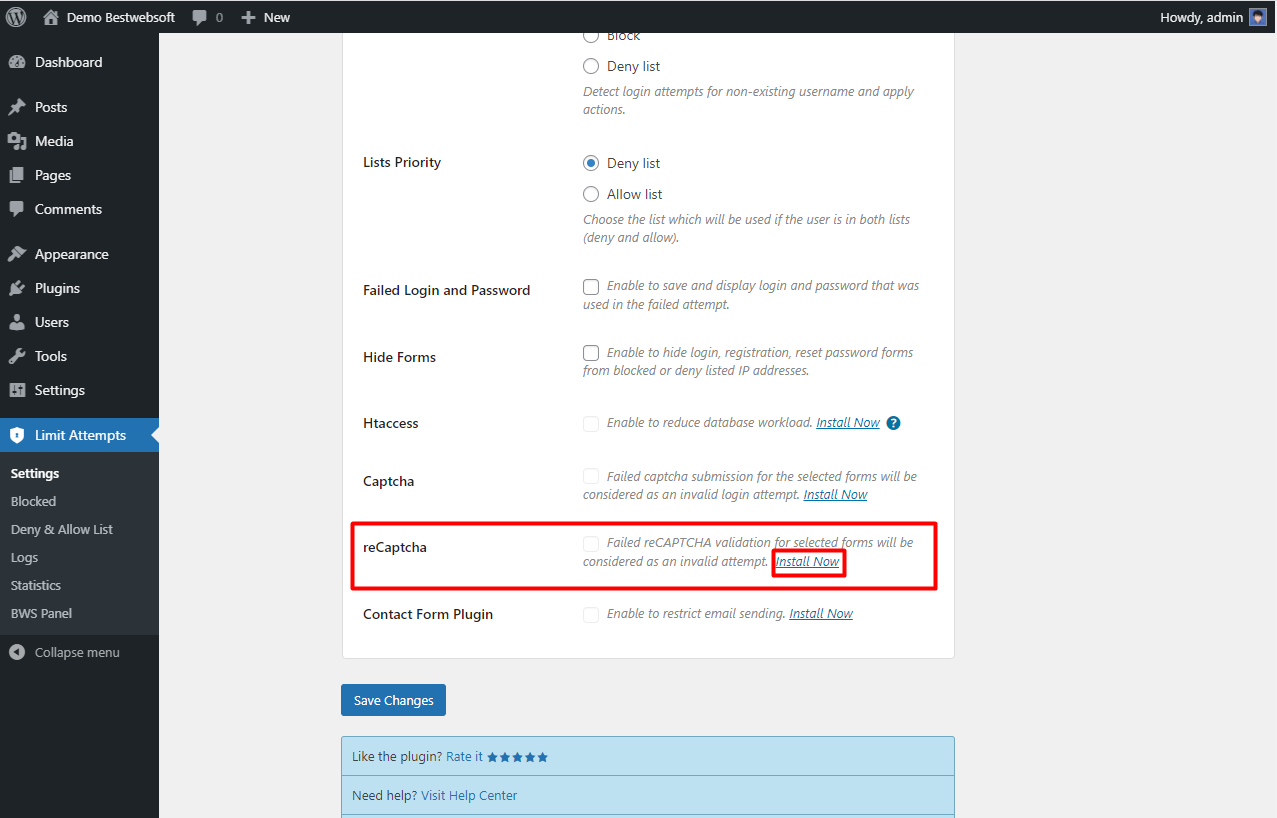
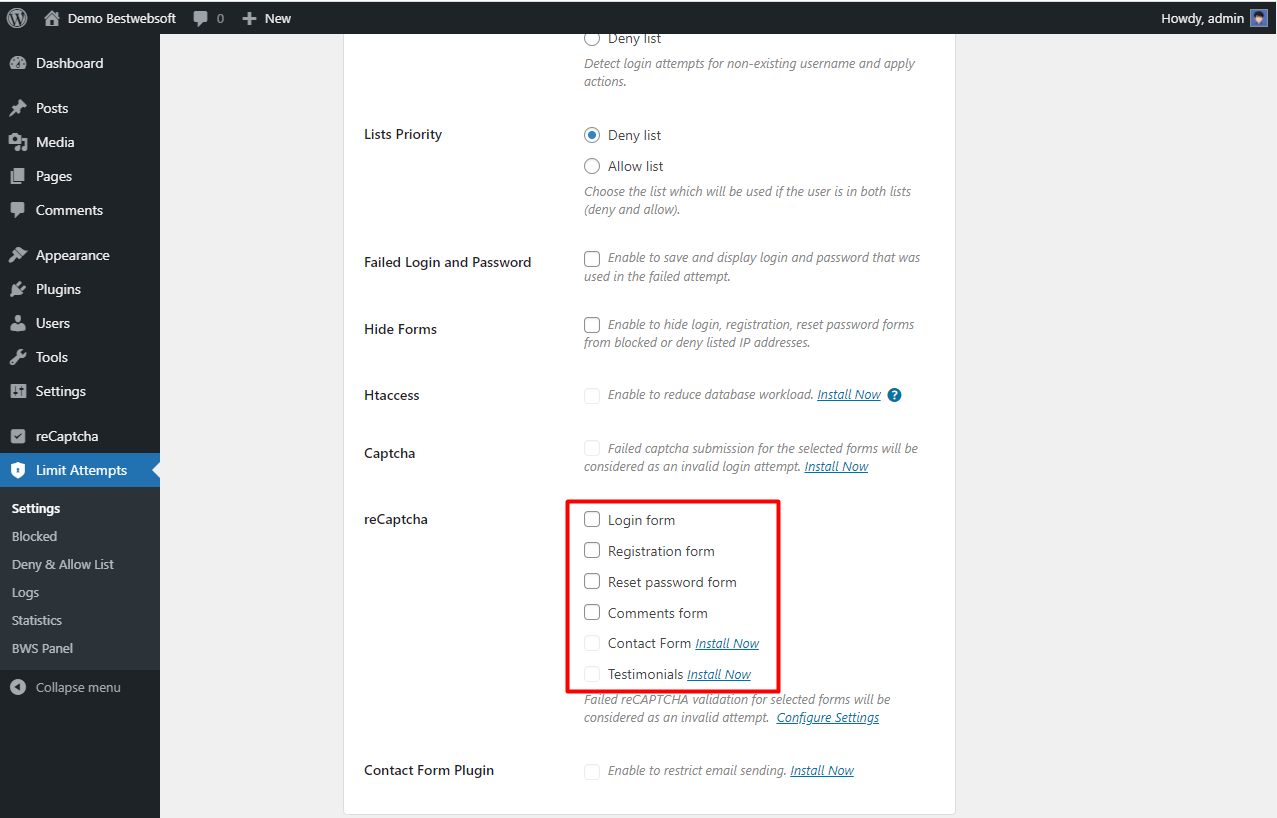
2.12.1. After a successful installation and activation of the reCaptcha Plugin choose the forms, on which the incorrect reCaptcha entries will be considered as failed attempts.
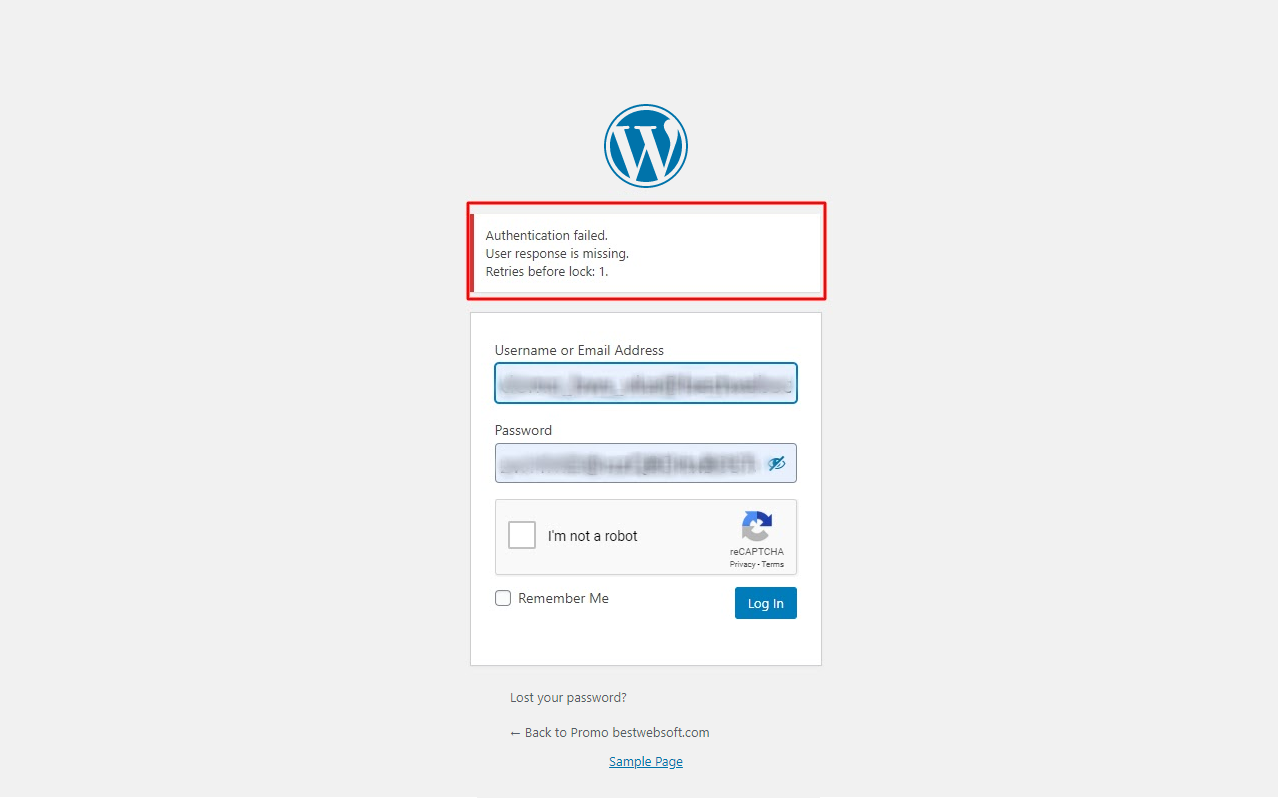
2.12.2. In case of incorrect reCaptcha entry, the message informing the user of a false attempt and the number of remaining retries may look on the chosen form as follows.
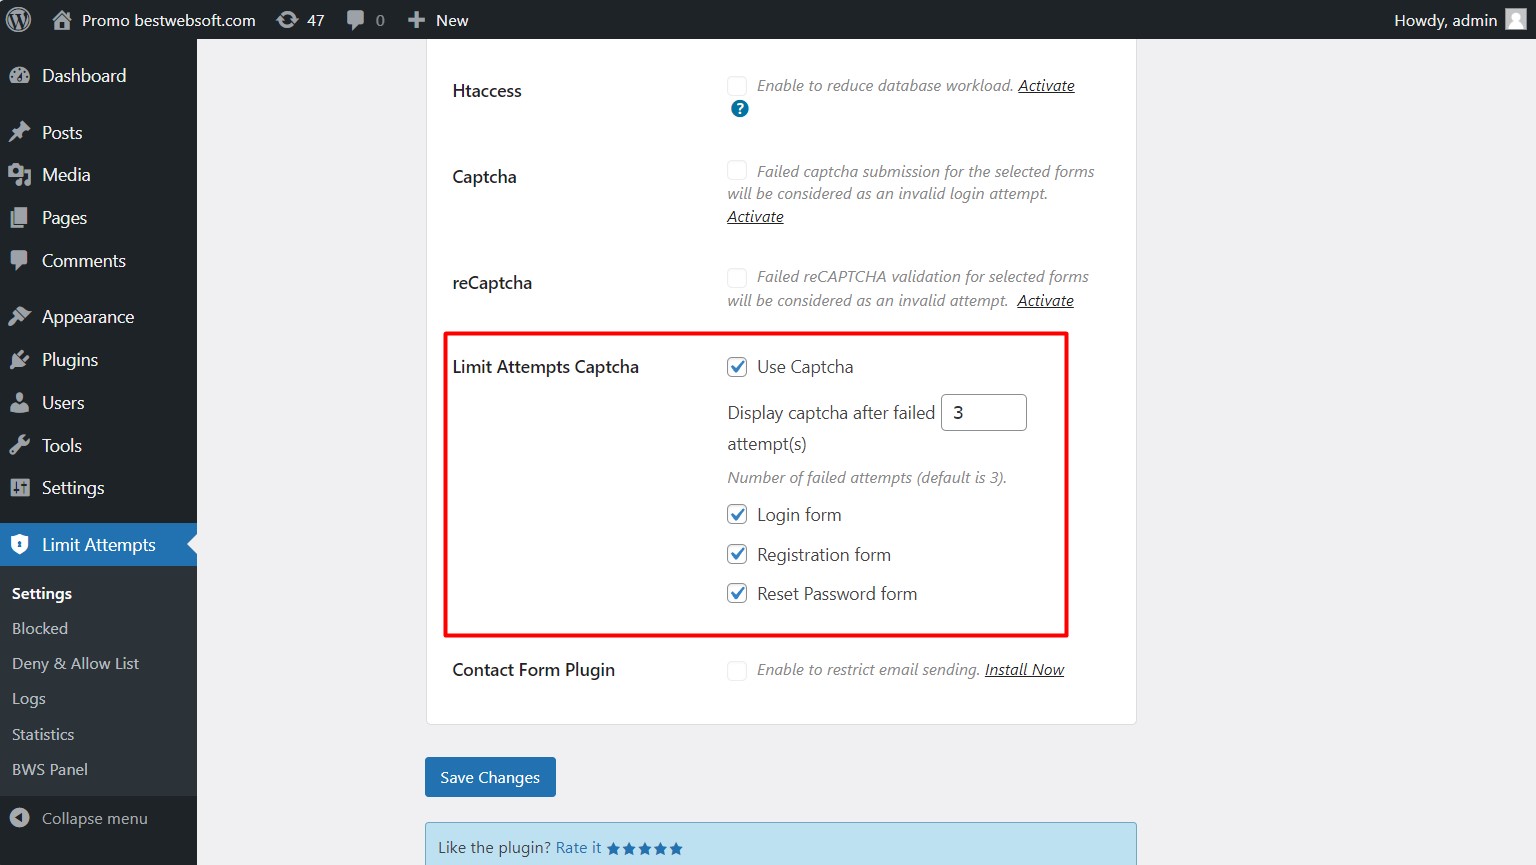
2.13. Limit Attempts Captcha
Use the “Limit Attempts Captcha” to activate internal plugin captcha for default forms without using additional plugins. Set up the failed attempts for captcha display and enable necessary forms for captcha display.
2.14. Contact Form Plugin
Note: Install and activate the “Contact Form Plugin” plugin to enable this option. |
The “Limit Attempts by BestWebSoft” plugin is compatible with “Contact Form by BestWebSoft”. Download and install the plugin by clicking the “Install Now” link next to the “Contact Form Plugin” option or follow the link: https://bestwebsoft.com/products/wordpress/plugins/contact-form/
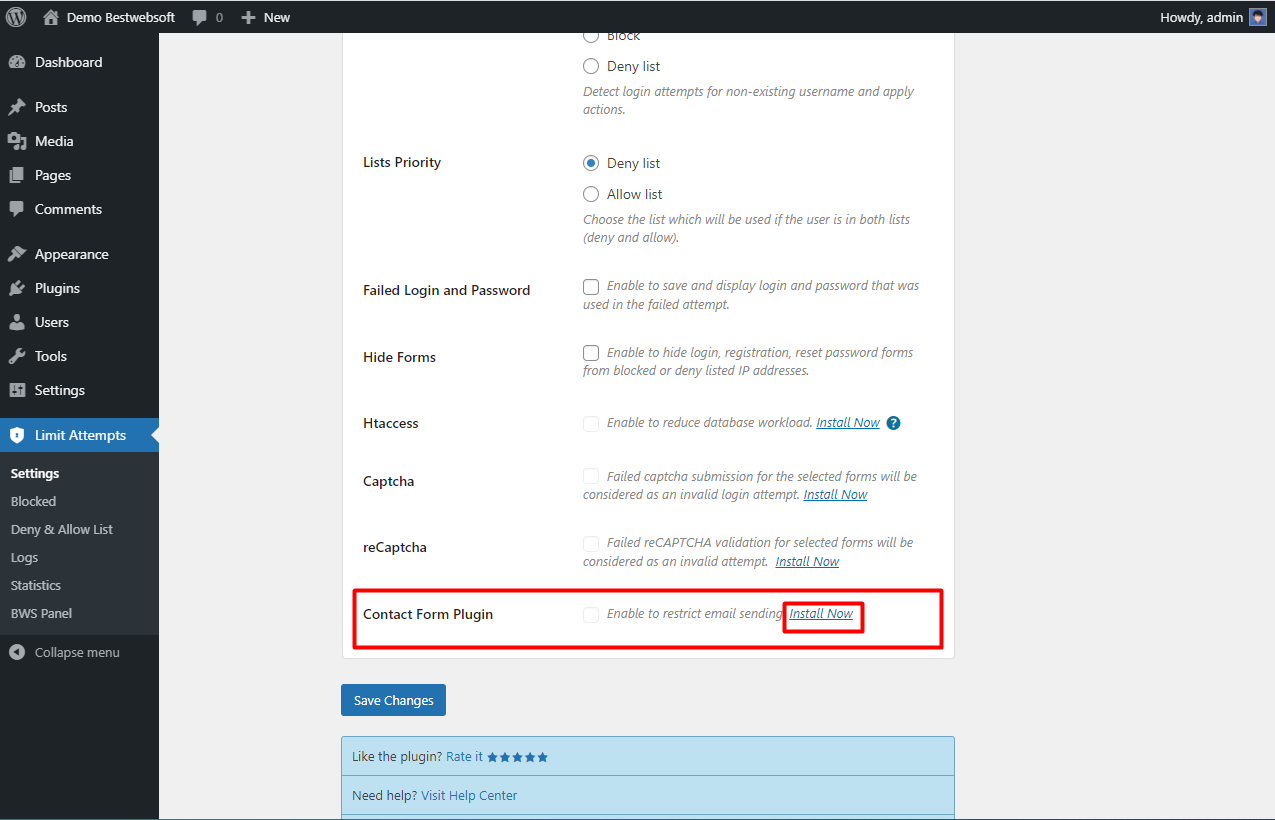
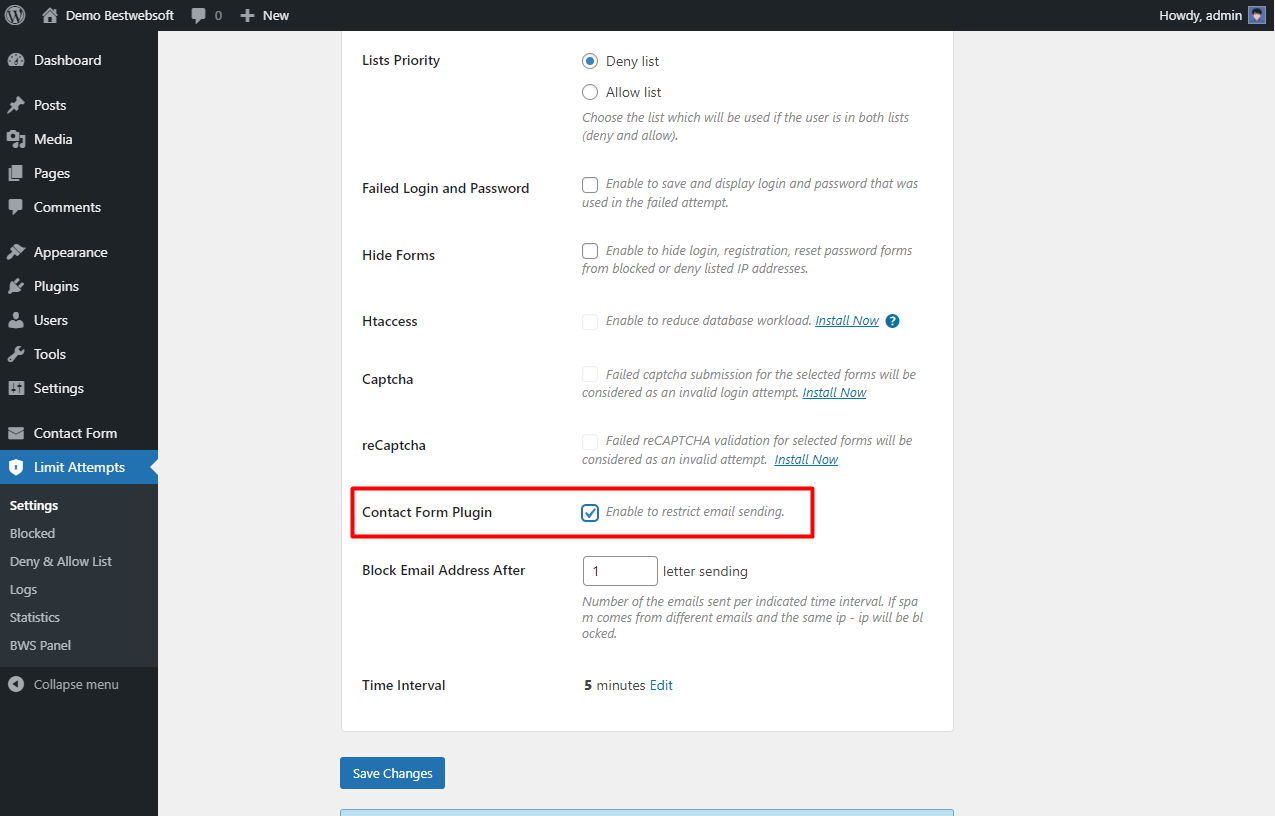
2.14.1. After a successful installation and activation enable the “Contact From Plugin” option to restrict email sending.
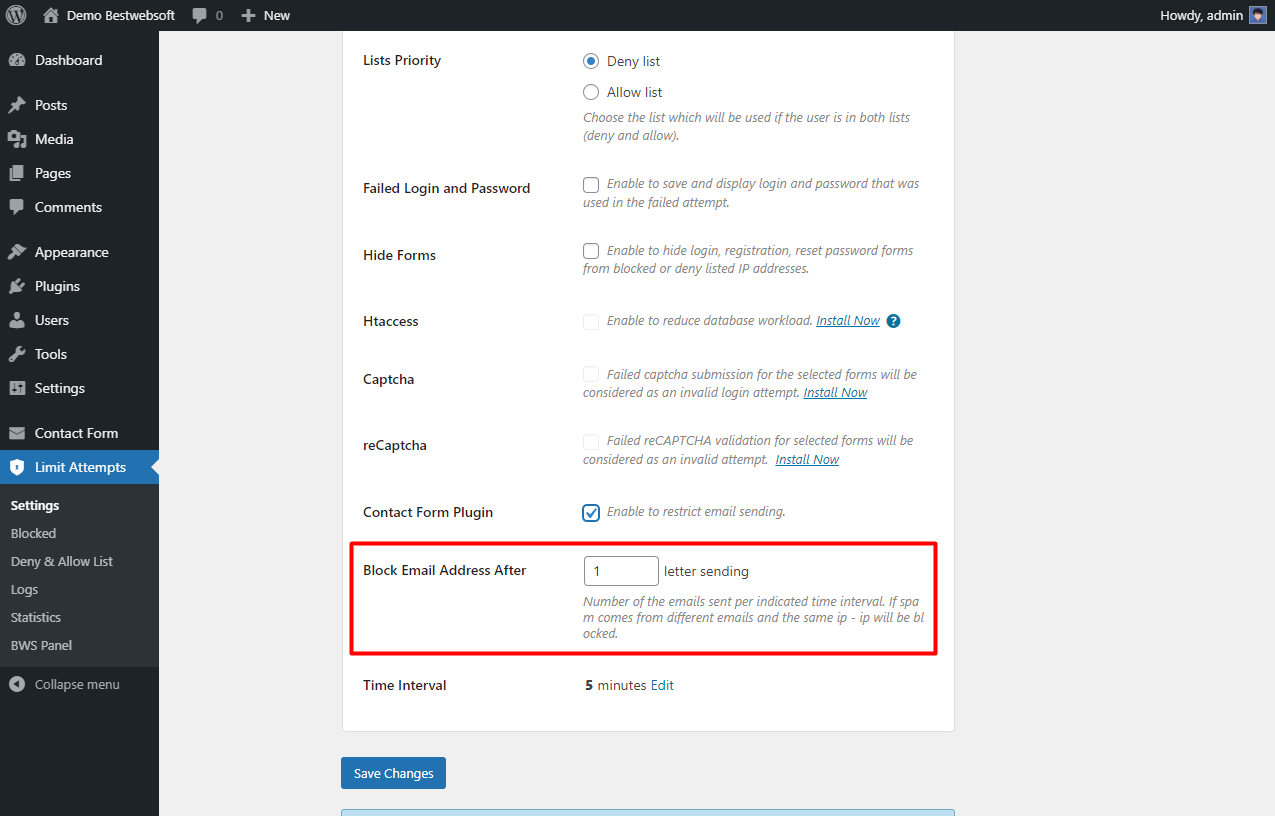
2.15. Block Email Address After
Use the “Block Email Address After” to block an email address after a set number of messages sent per a specified time interval. If spam comes from different emails and the same IP - IP will be blocked.
2.16. Time Interval
Use the “Time Interval” option to set the time range wherein the user can send the defined number of emails
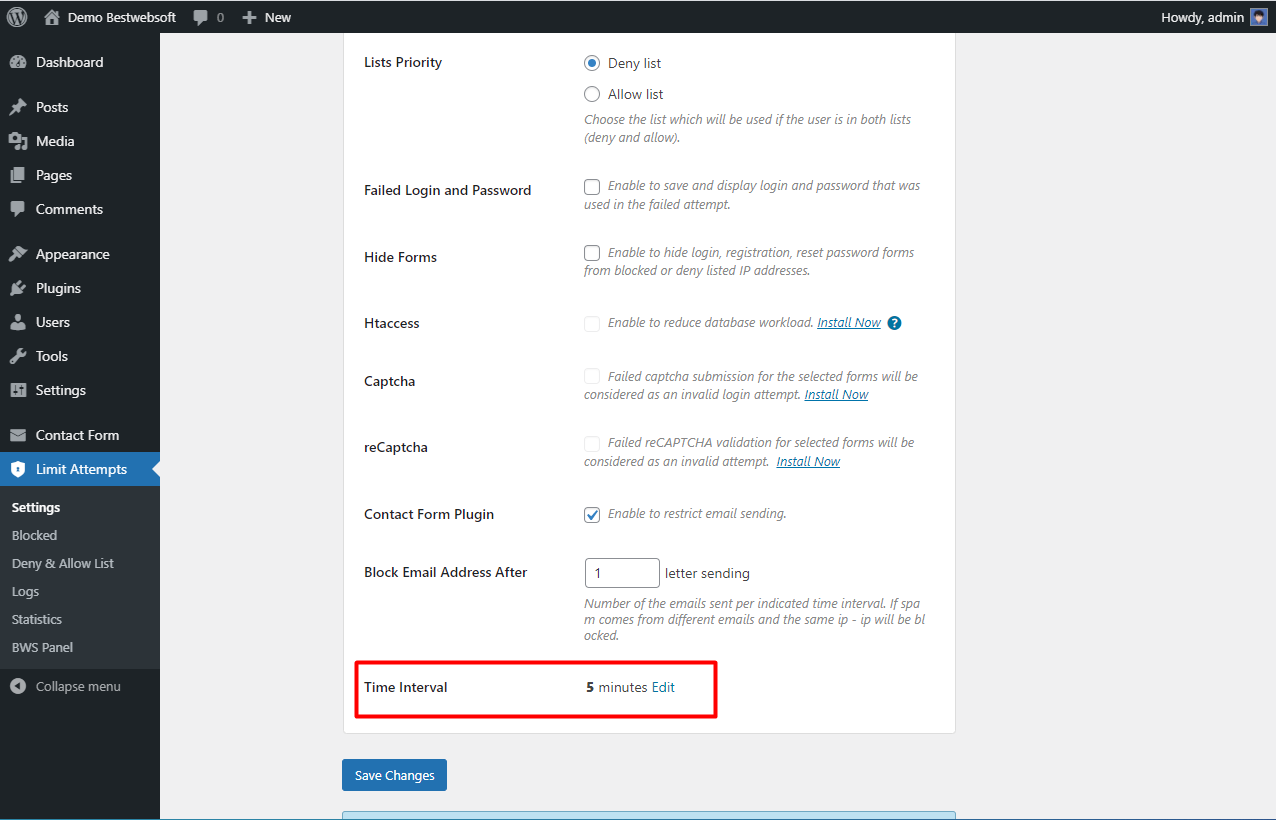
2.16.1. Enter the desired time range in the “Time Interval” option boxes.
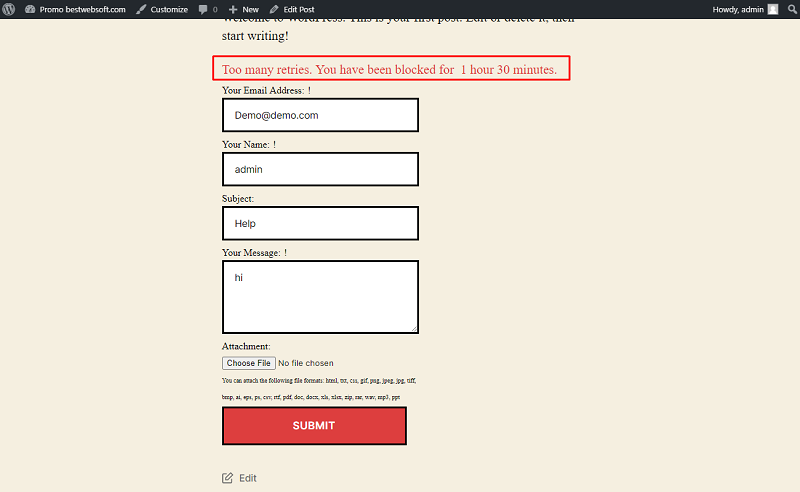
2.16.2. After the number of emails goes out of range the message on Contact Form may look as follows.
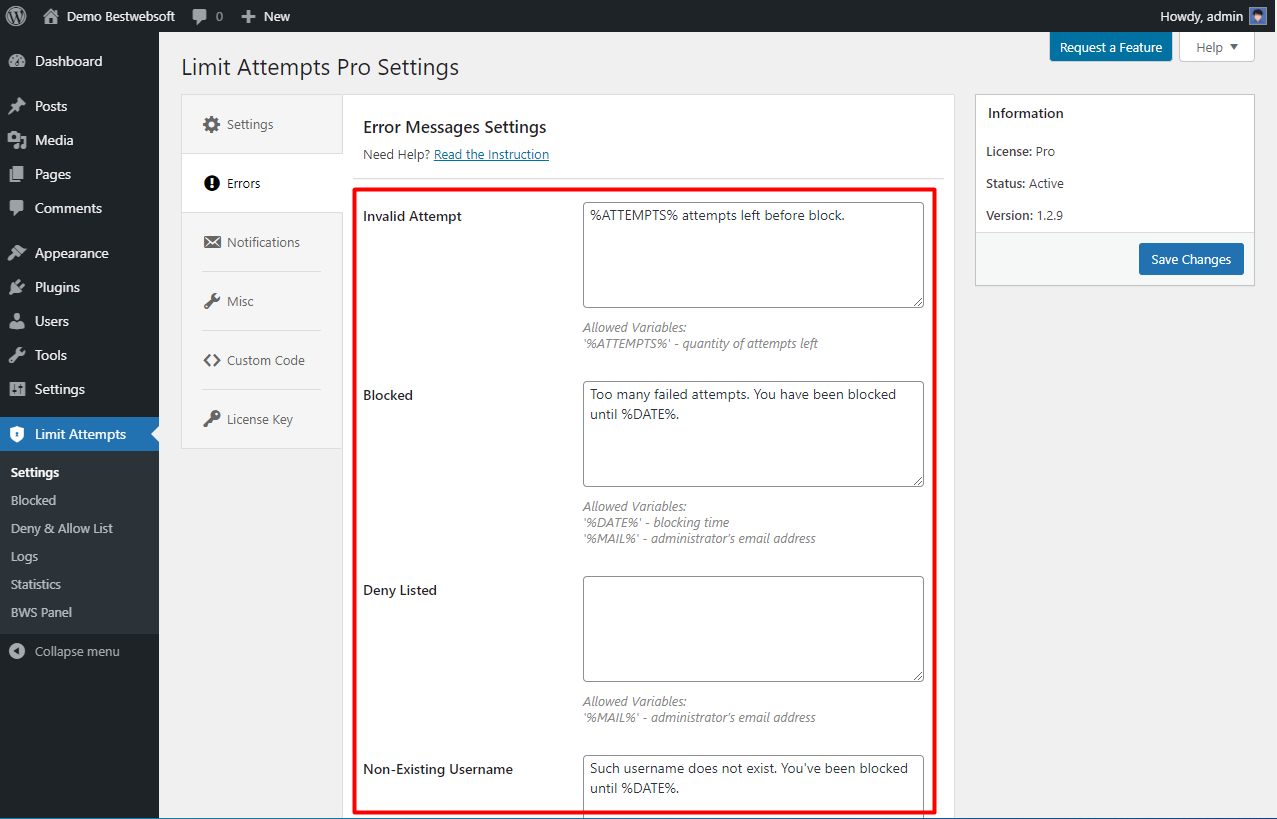
3. Error Message Settings
Use the “Error Message Settings” tab to customize error messages.
3.1. Customize Error Messages
Use the “Invalid Attempt”, “Block”, “Deny Listed” and “Non-Existing Username” options to change the text of error messages.
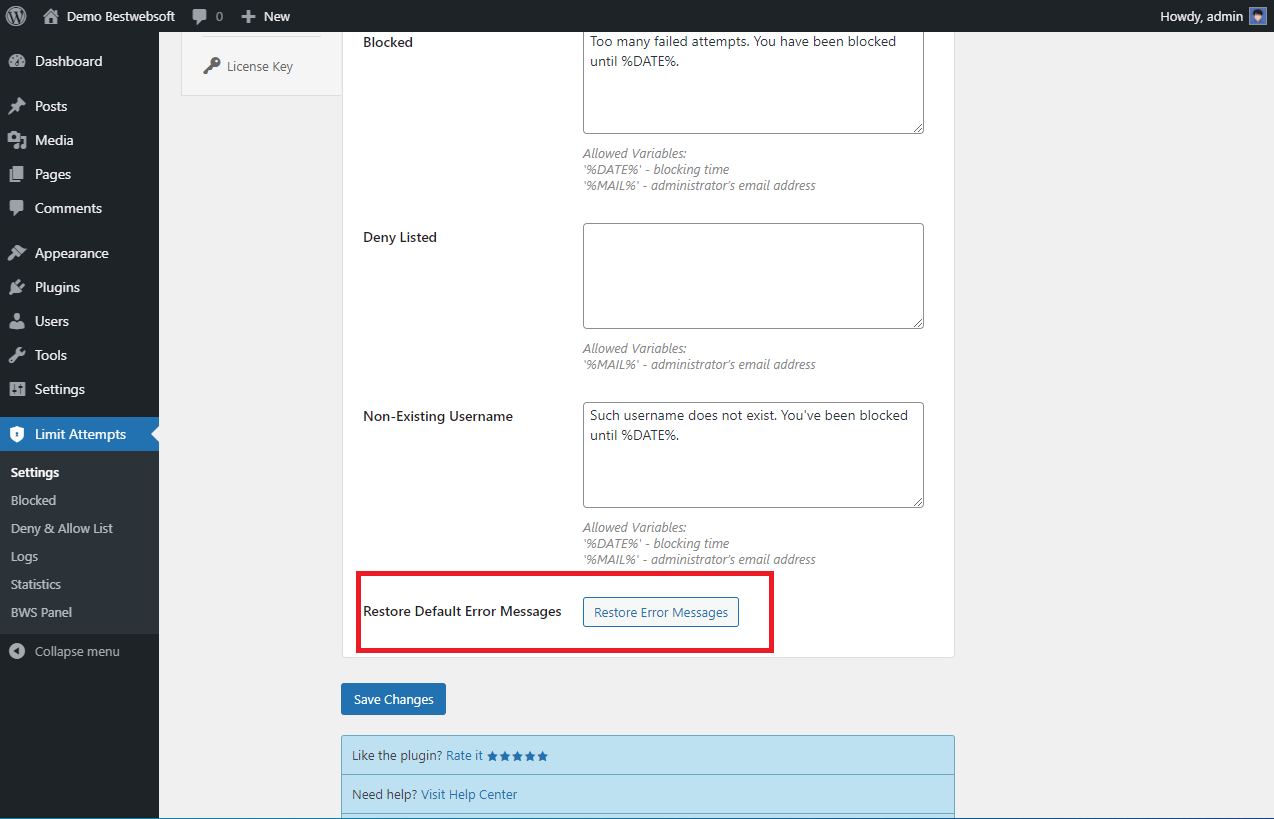
3.2. Restore Default Error Messages
Click the “Restore Error Messages” button to restore the default error messages.
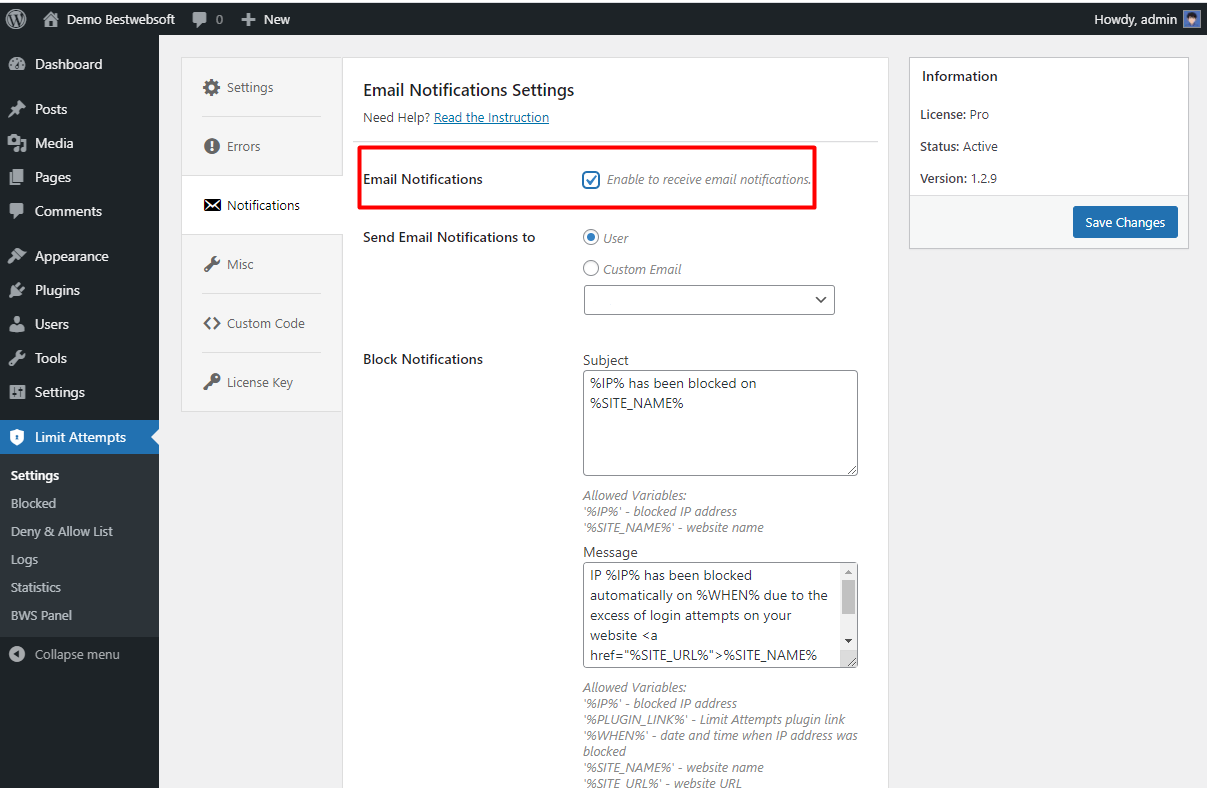
4. Email Notifications Settings
Use the “Email Notifications Settings” tab to make settings regarding the email notifications of user blocking.
4.1. Email Notifications
Enable the “Email Notifications” option to receive email notifications when a user is blocked.
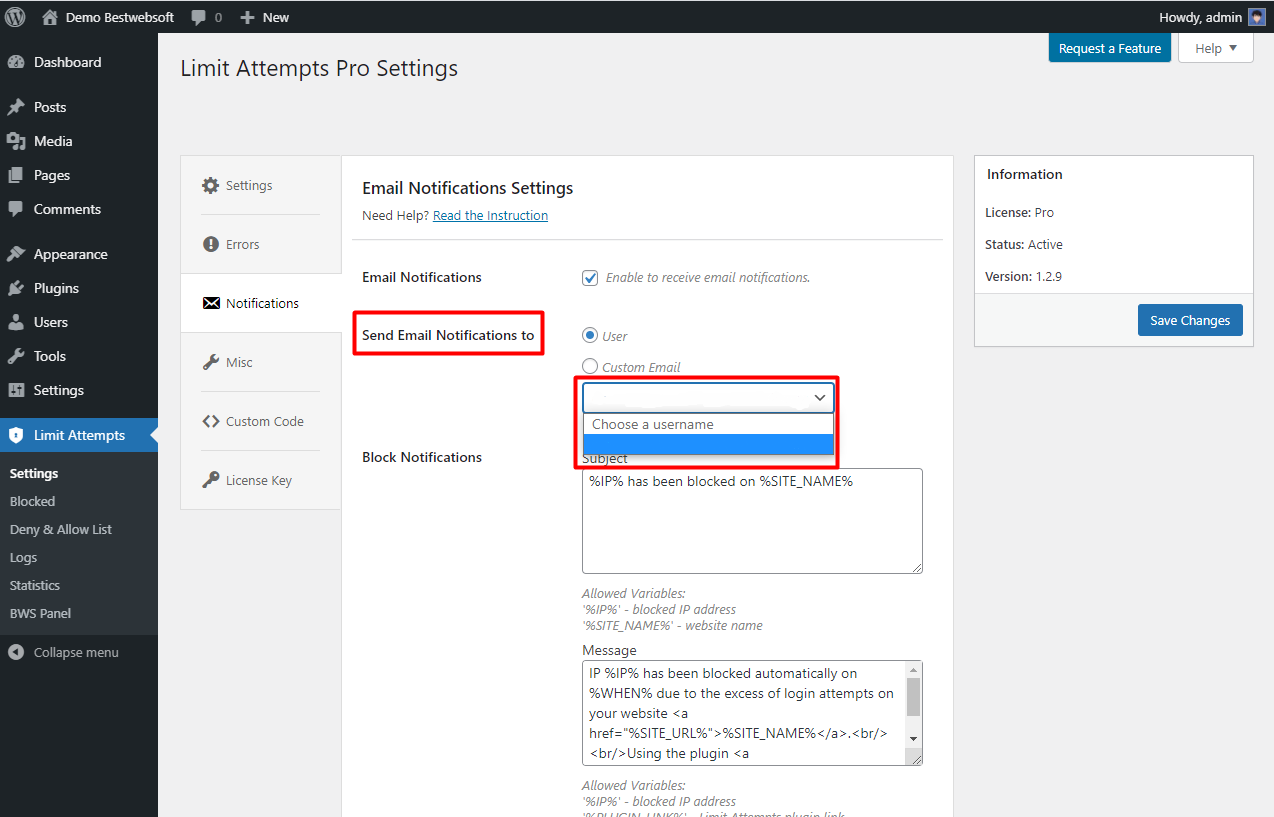
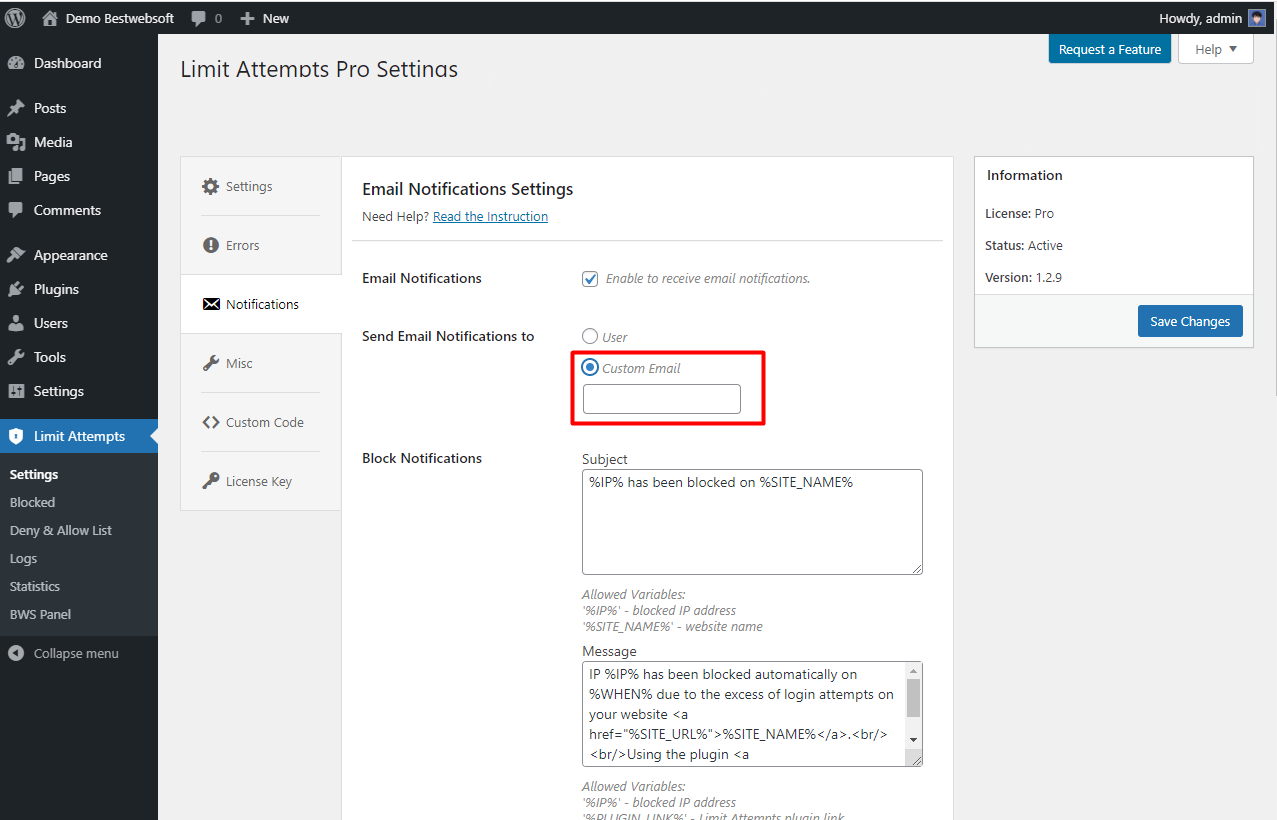
4.2. Send Email Notifications to
Choose the recipient email address using the “Send Email Notifications to” option.
4.2.1. Enter a custom email if you want to use a specific email address.
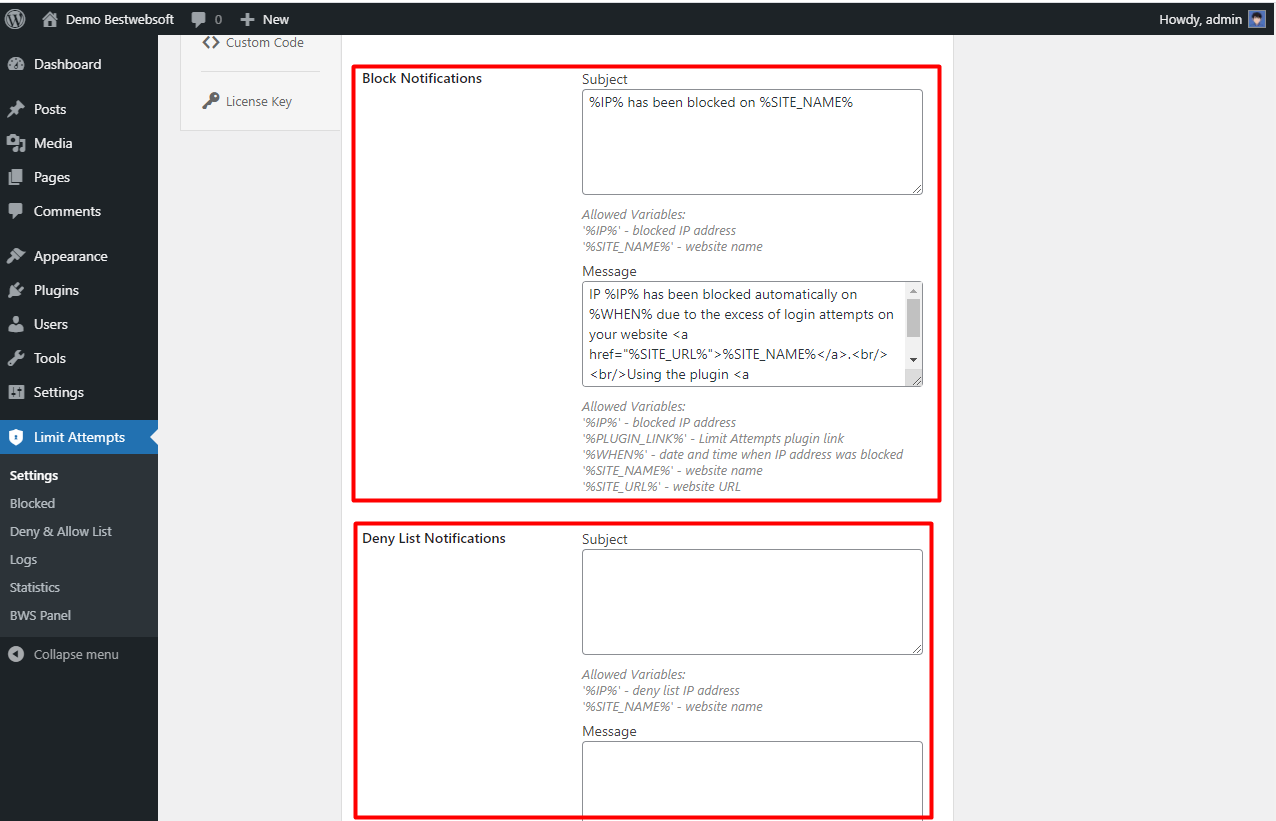
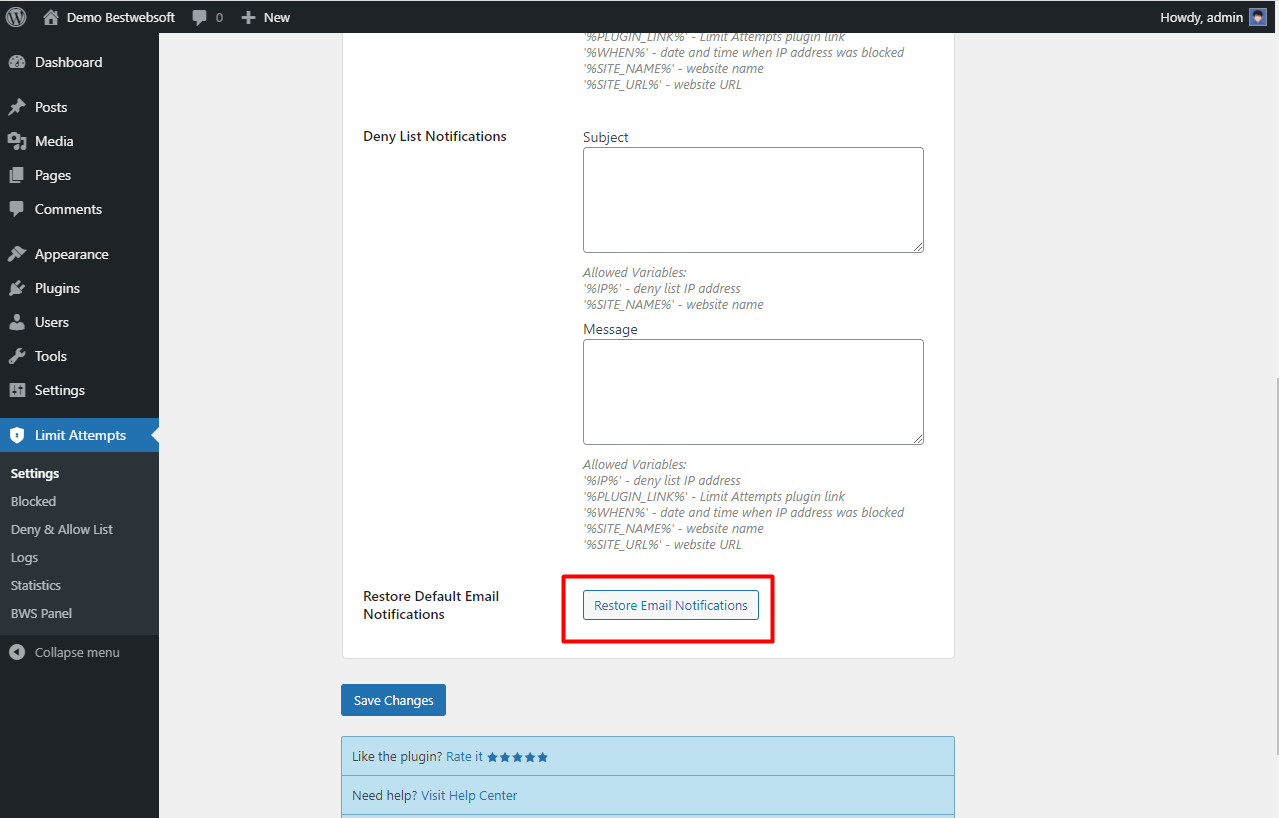
4.3. Block/Deny List Notifications
Use the “Block Notifications” and “Deny List Notifications” options to change the subject and message in the corresponding fields.
4.4. Restore Default Email Notifications
Click the “Restore Error Messages” button to restore the default email notifications.
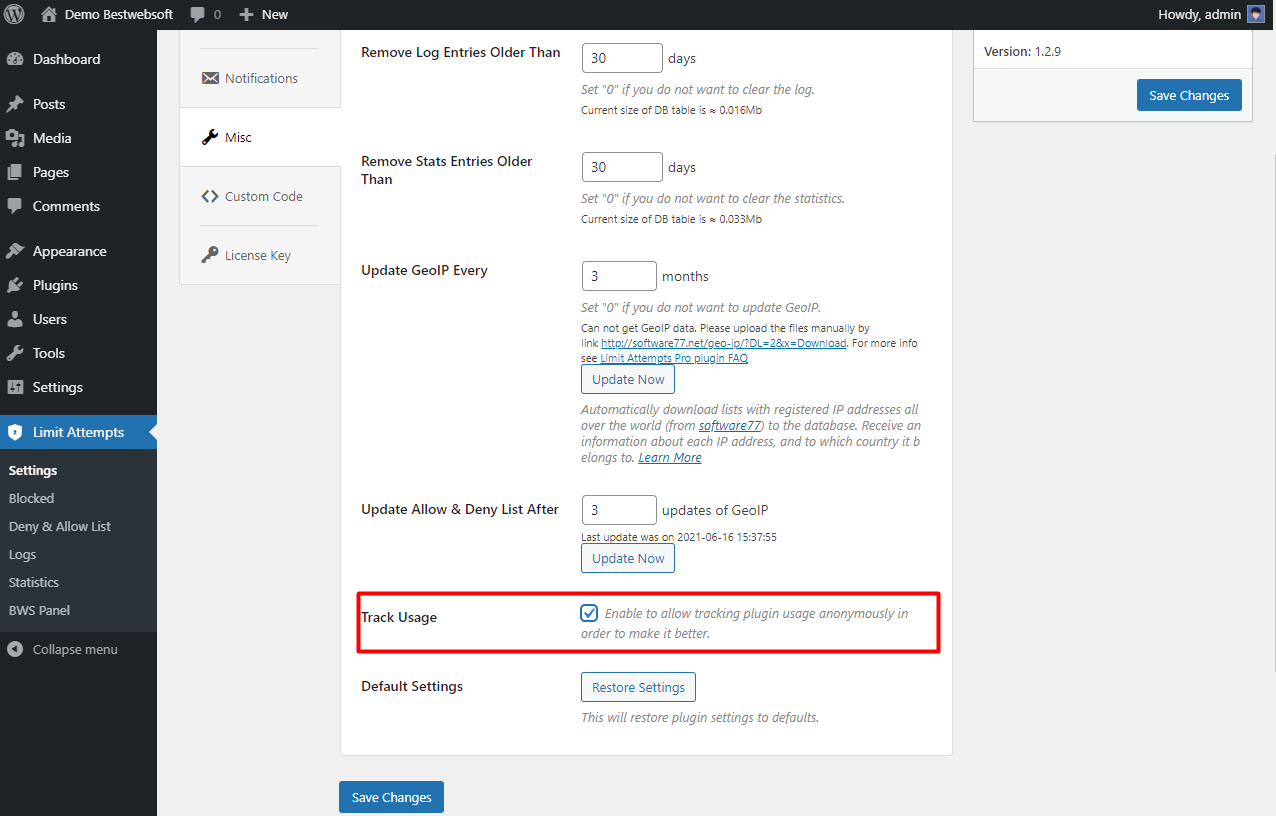
5. Miscellaneous Settings
Use the “Miscellaneous Settings” tab to set the frequency of deleting statistics data/updates, to enable tracking and to restore the settings of the plugin.
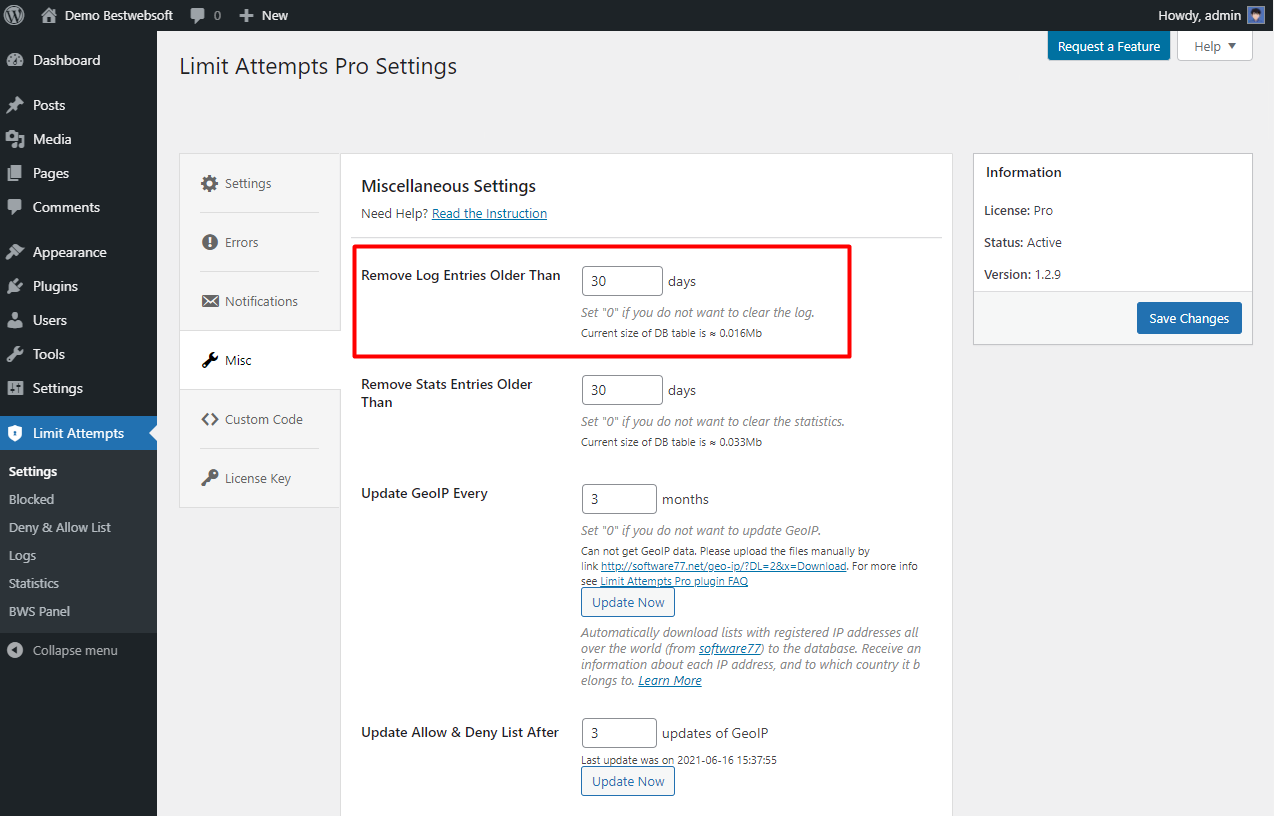
5.1. Remove Log Entries Older Than
Set the number of days after which the log entries will be deleted. Set "0" if you do not want to clear the log.
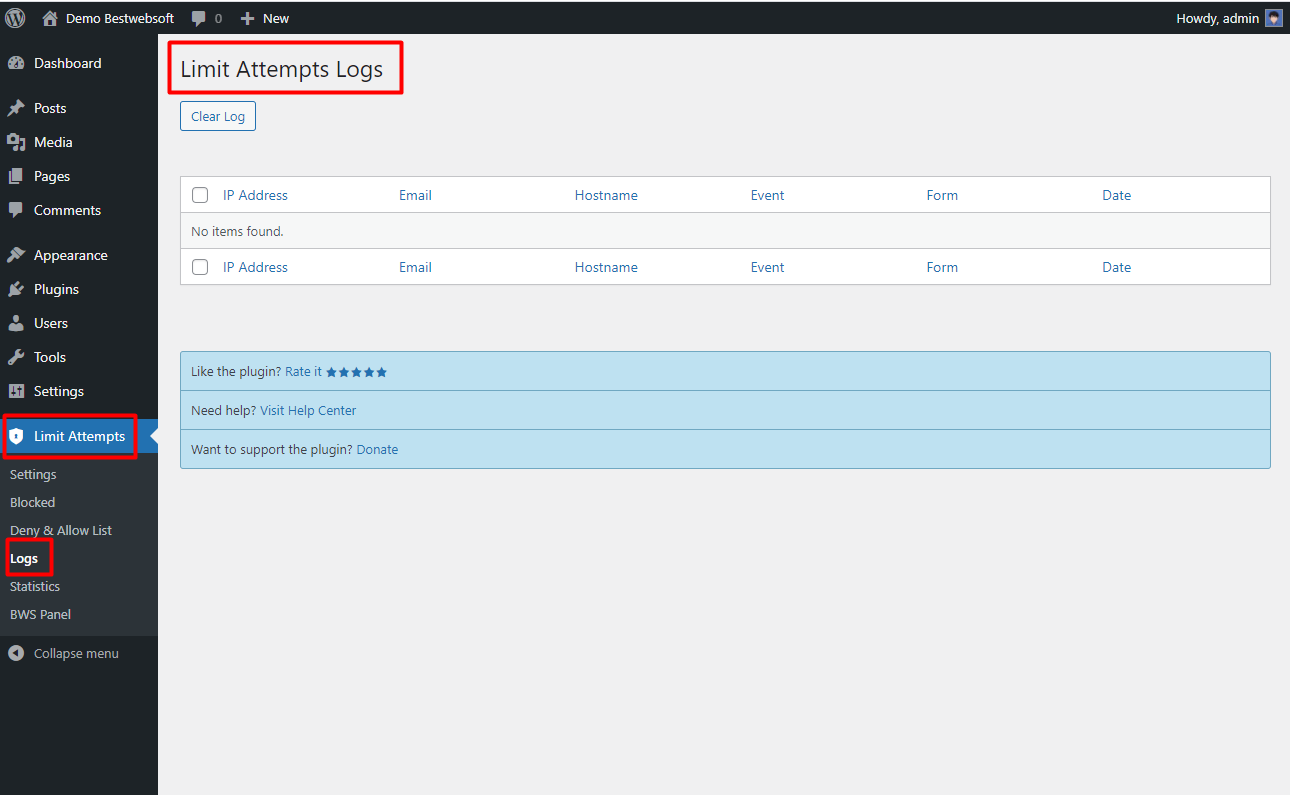
5.1.1. Open the “Limit Attempts Logs” page to view and manage the log entries.
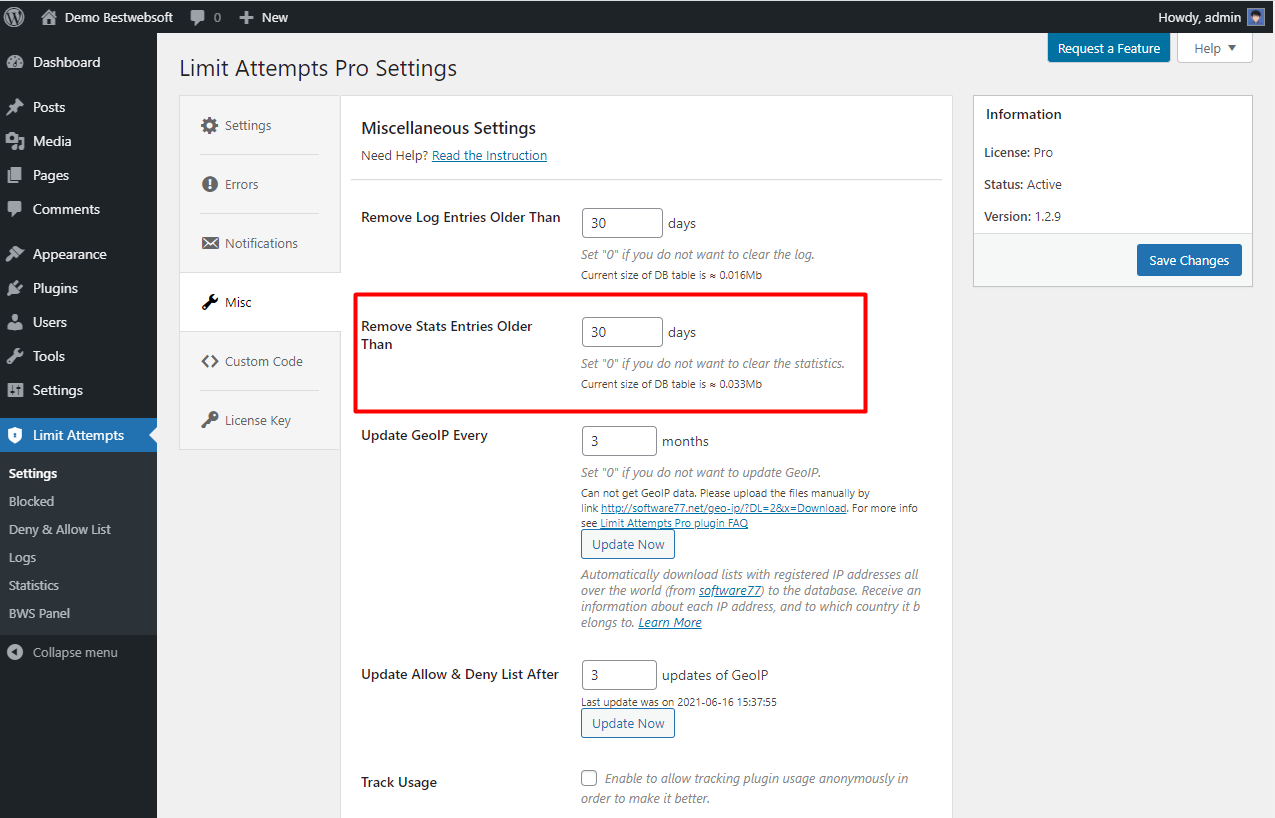
5.2. Remove Stats Entries Older Than
Use the “Remove Stats Entries Older than” to set the number of days after which the stats entries will be deleted. Set "0" if you do not want to clear the statistics.
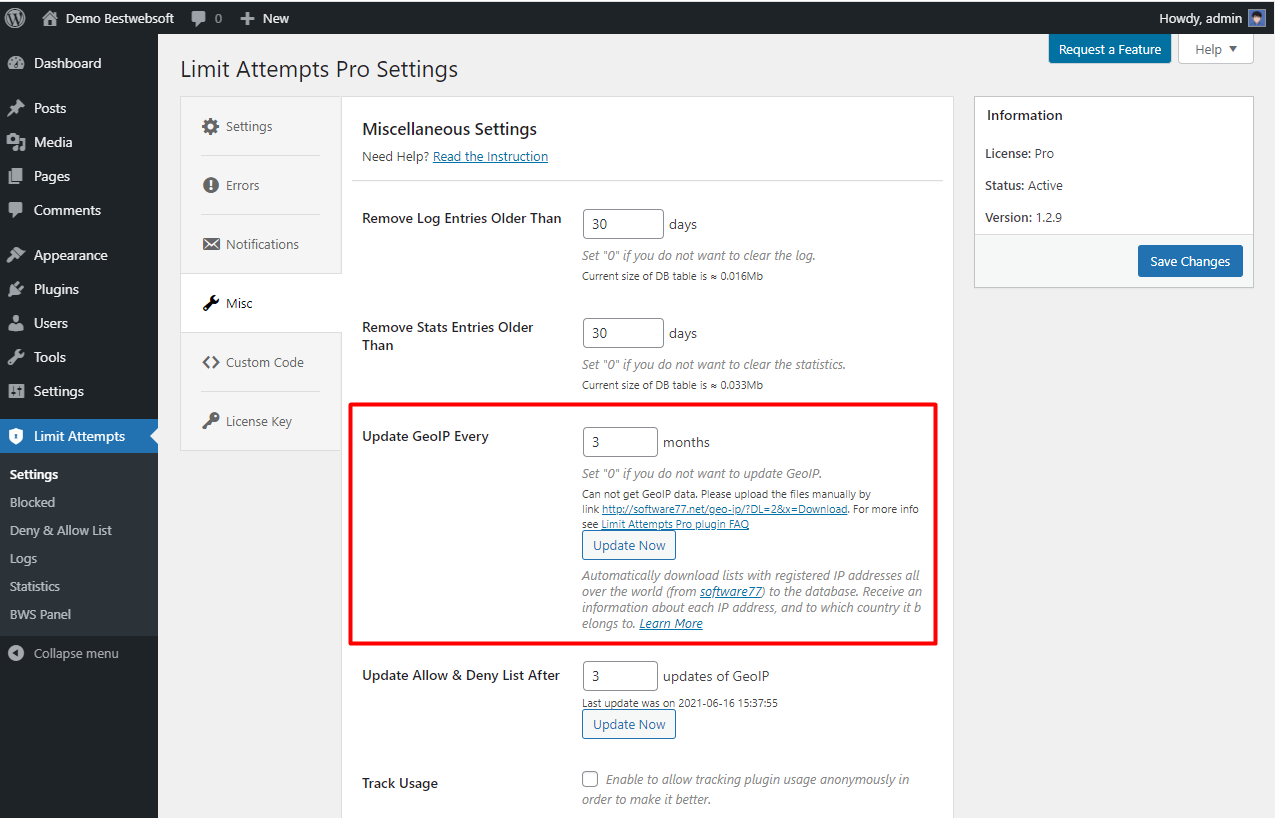
5.3. Update GeoIP Every
Use the “Update GeoIP Every” option to receive information about the geographical location of the defined IP addresses.
Note: GeoIP allows to download lists with IP addresses registered all over the world (from GeoIP) to the database automatically. |
5.3.1. Set the frequency of GeoIP updates by entering the number of months in the appropriate field.
5.3.2. Click the “Update Now” button to update GeoIP manually.
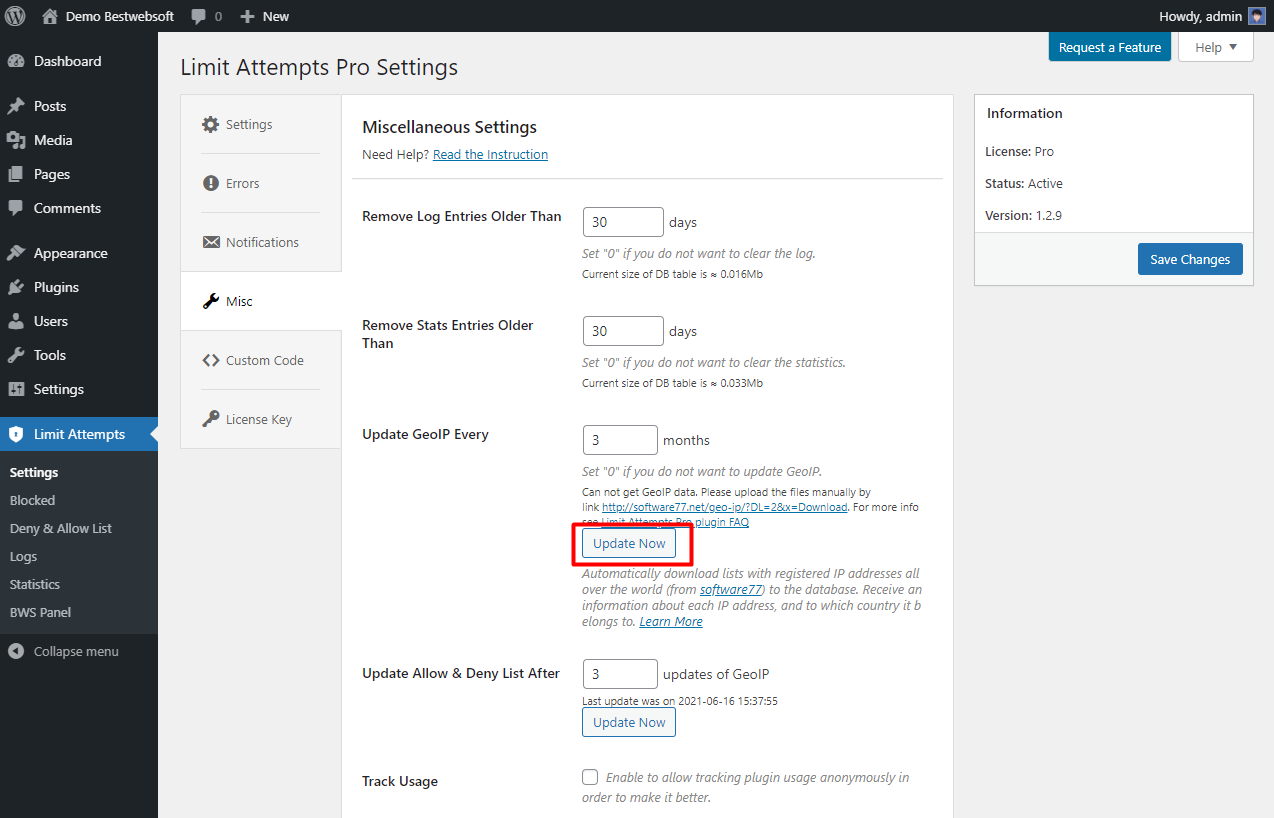
Note: GeoIP must be updated at least once so that you can deny-list or allow-list a country. |
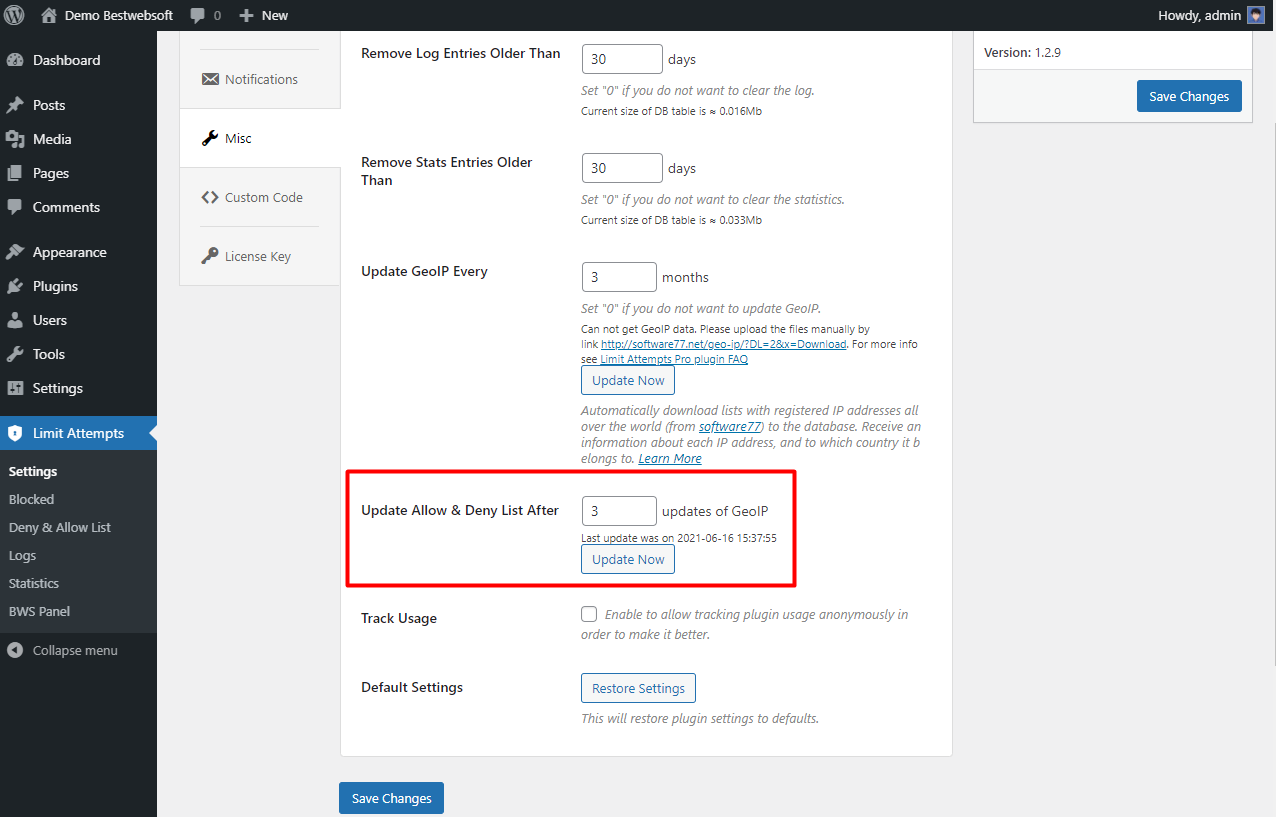
5.4. Update Allow - & Deny List After
Use the “Update Allow - & Deny List After” option to update the list of IP addresses belonging to a particular country, added to the deny or allow list automatically.
5.4.1. Set the frequency of allow - & deny list updates by entering the number of updates into the appropriate field.
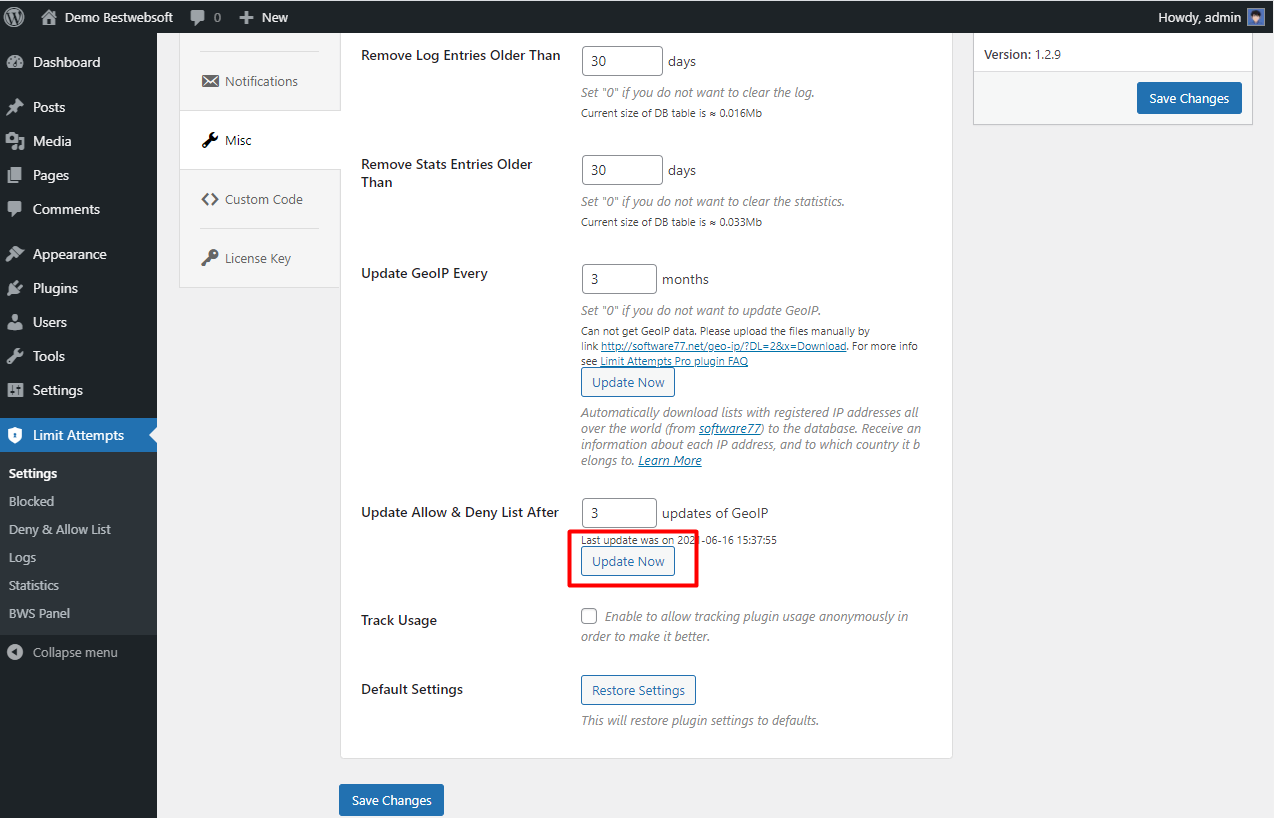
5.4.2. Click the “Update Now” button to update the allow and deny lists manually.
5.5. Track Usage
Enable the “Track Usage” option to allow tracking plugin usage anonymously.
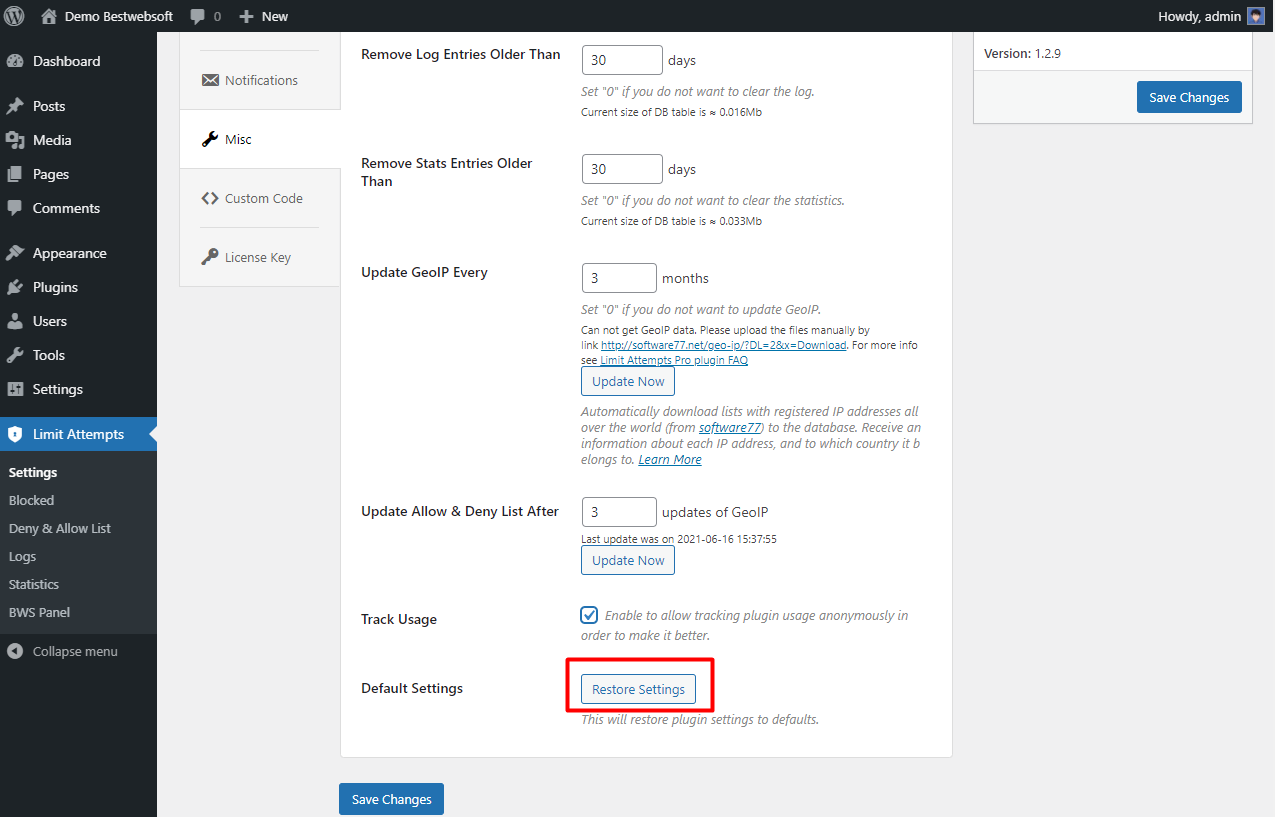
5.6. Default Settings
Click the “Restore Settings” button to reset all the settings made previously and revert them to the default ones.
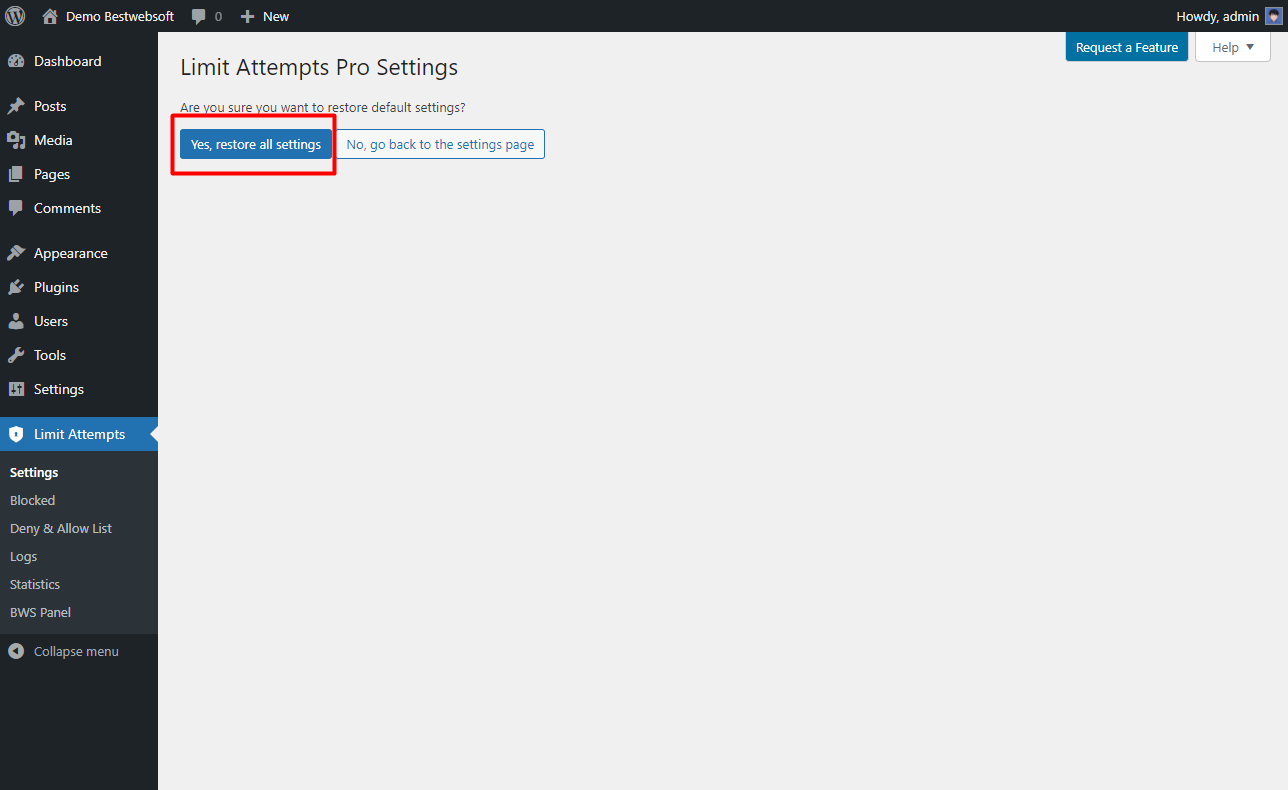
5.6.1. Click “Yes, restore all settings” button to confirm the procedure.
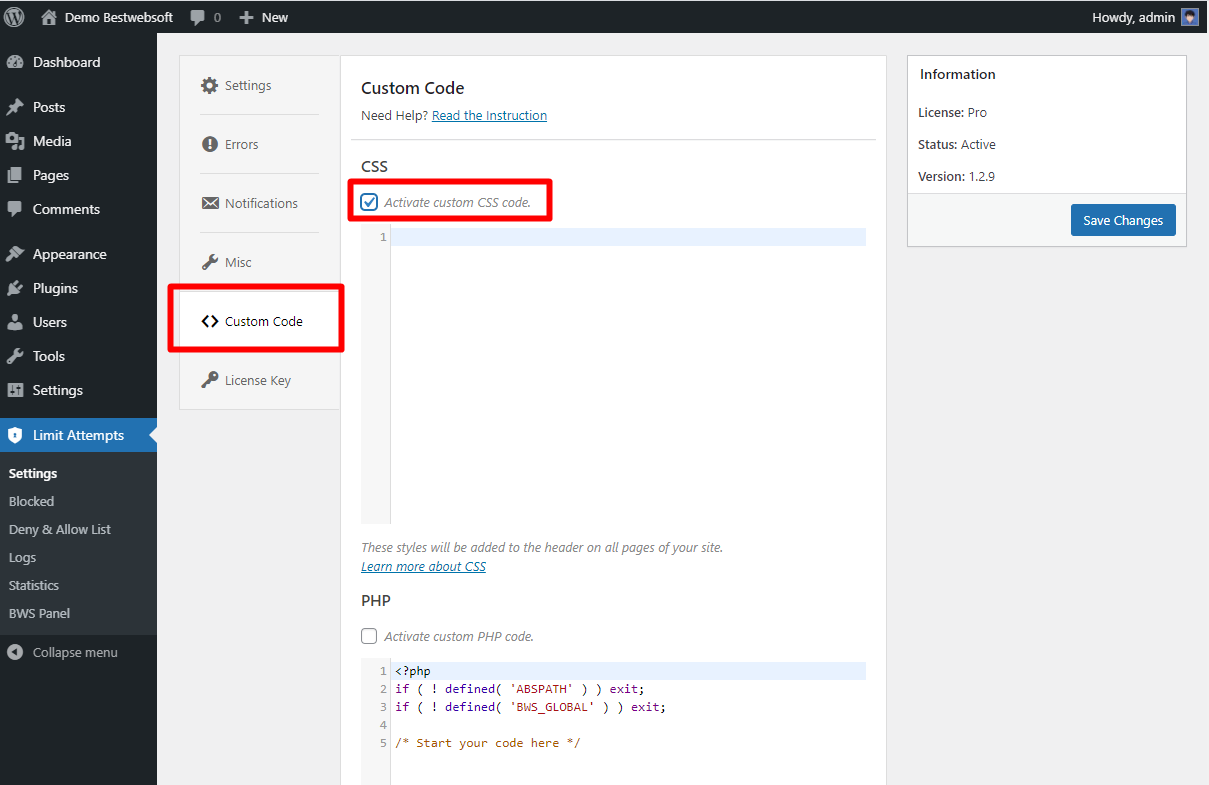
6. Custom Code
Use the “Custom code” tab to insert a CSS, PHP or JavaScript code. To activate the inserted code, enable the “Activate custom … code” option and save changes.
7. License Key
Use the “License Key” tab to activate or check the Pro plugin license.
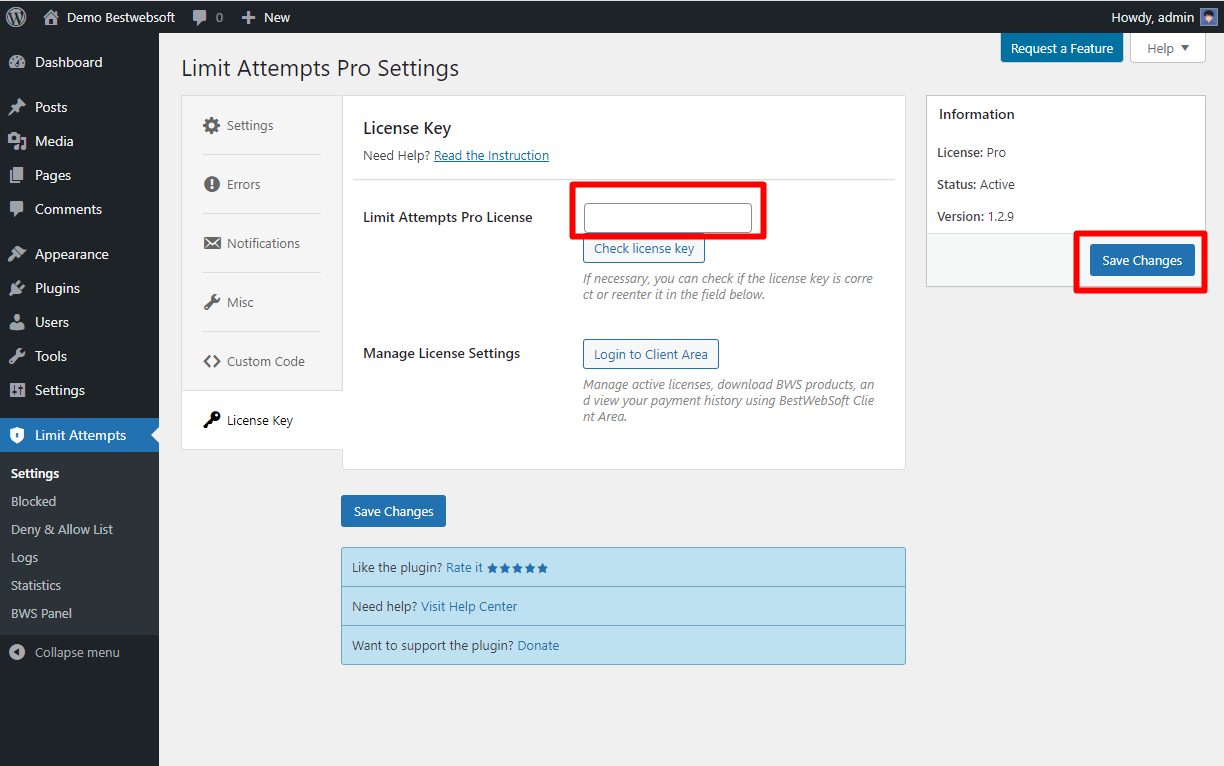
7.1. Limit Attempts Pro License
After a successful plugin purchase, you will receive an email notification with a download link and a license key. Activate Pro license by pasting a license key into the “Limit Attempts Pro License” field and clicking the “Save Changes” button.
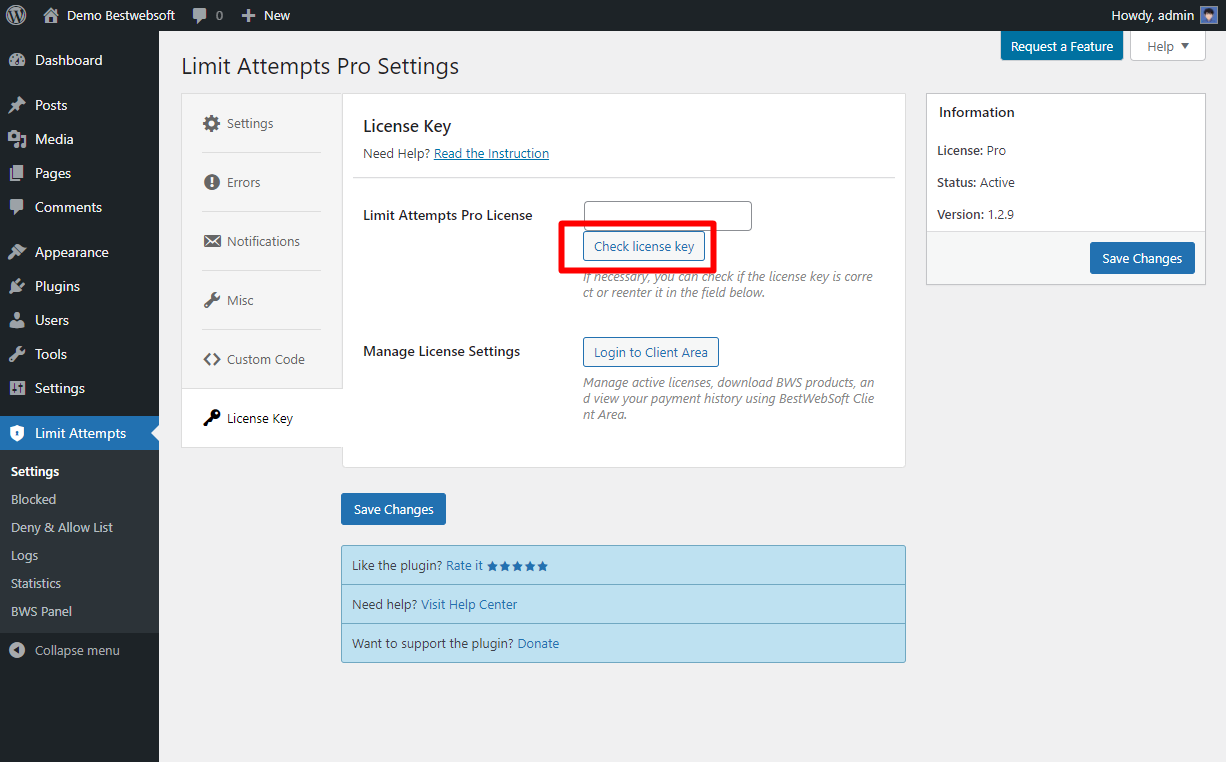
7.2. Check License Key
To check the license key, click the “Check license key” button. If the entered key is correct, the notification “The license key is valid. Your license will expire on XXXX-XX-XX” will be displayed in the upper left corner of the page.
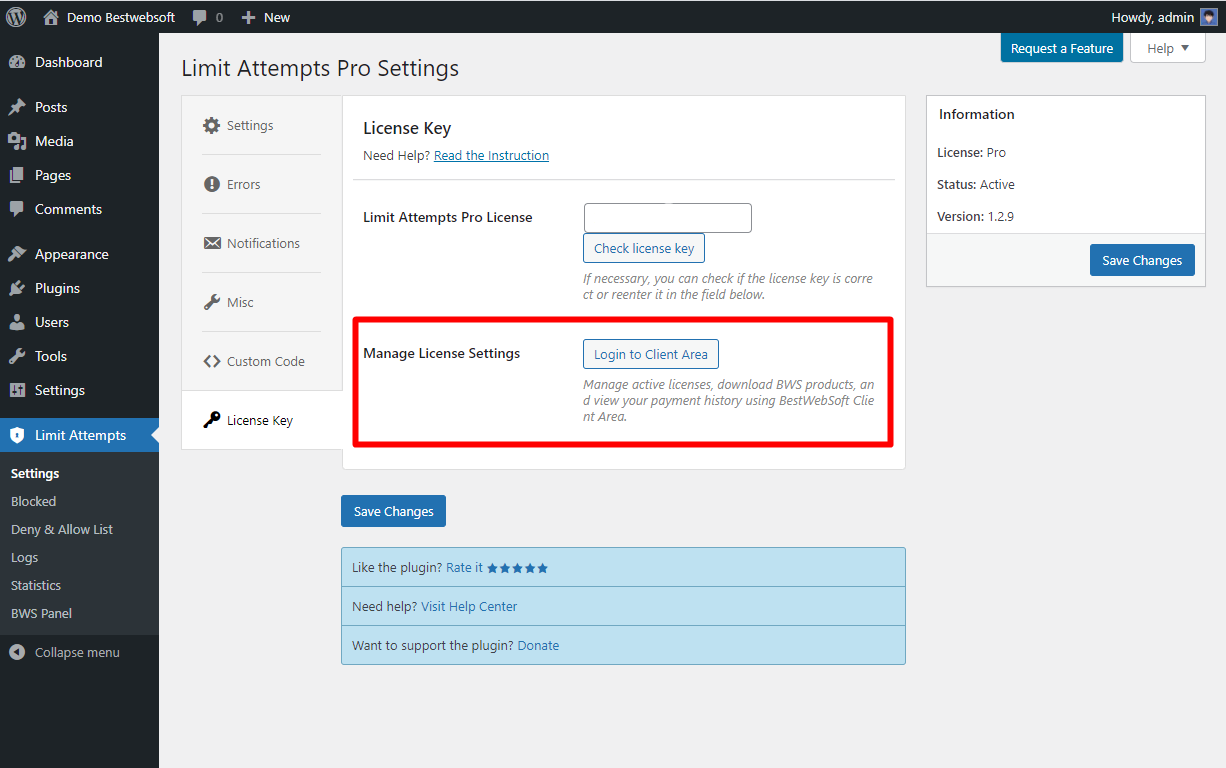
7.3. Manage License Settings
Use the “Manage License Settings” option to change your license settings. Click the “Login to Client Area” button to open your personal Client Area dashboard located on the https://bestwebsoft.com/ website. Browse and download purchased products, change the license domain and copy the license keys.
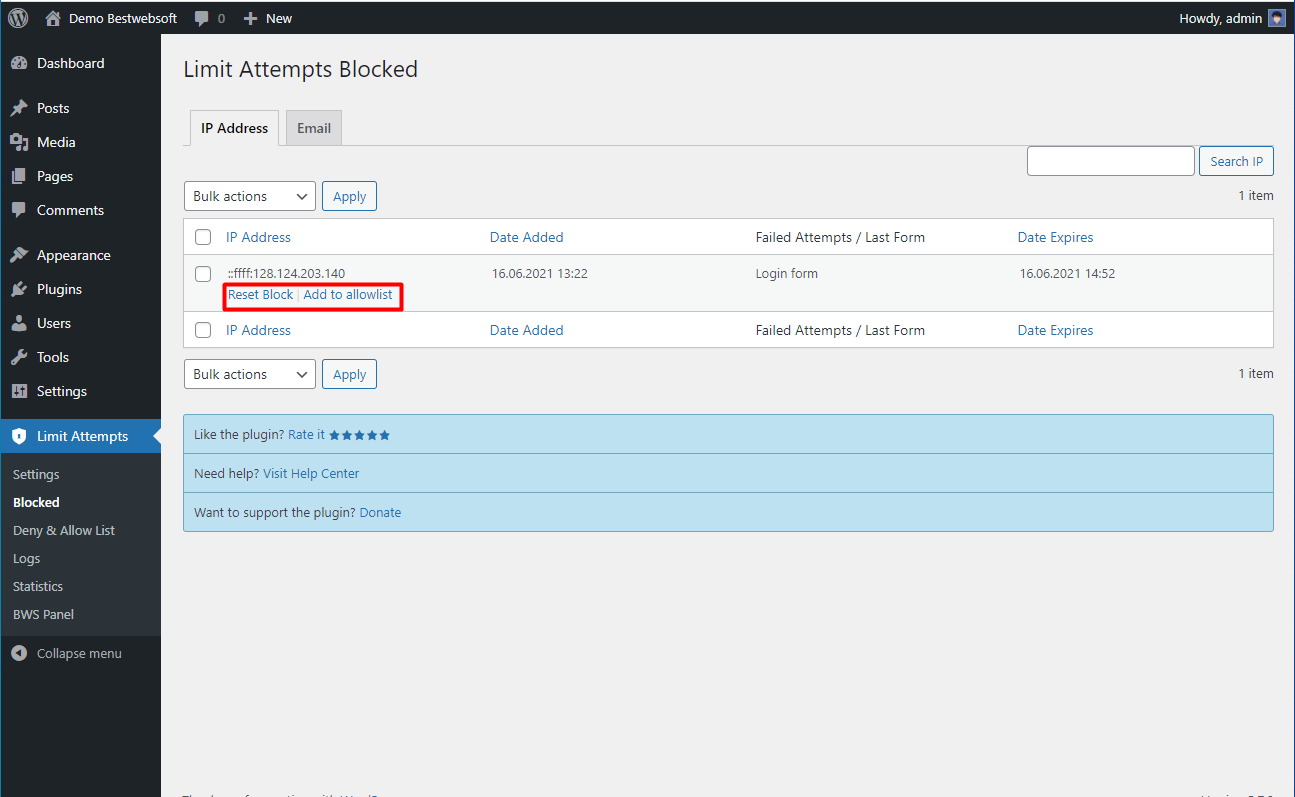
8. Blocked
Use the “Blocked” page to view and manage the list of blocked IPs and email addresses.
8.1. IP Address Tab
Use the “IP Address” tab view and manage the list of blocked IP addresses.
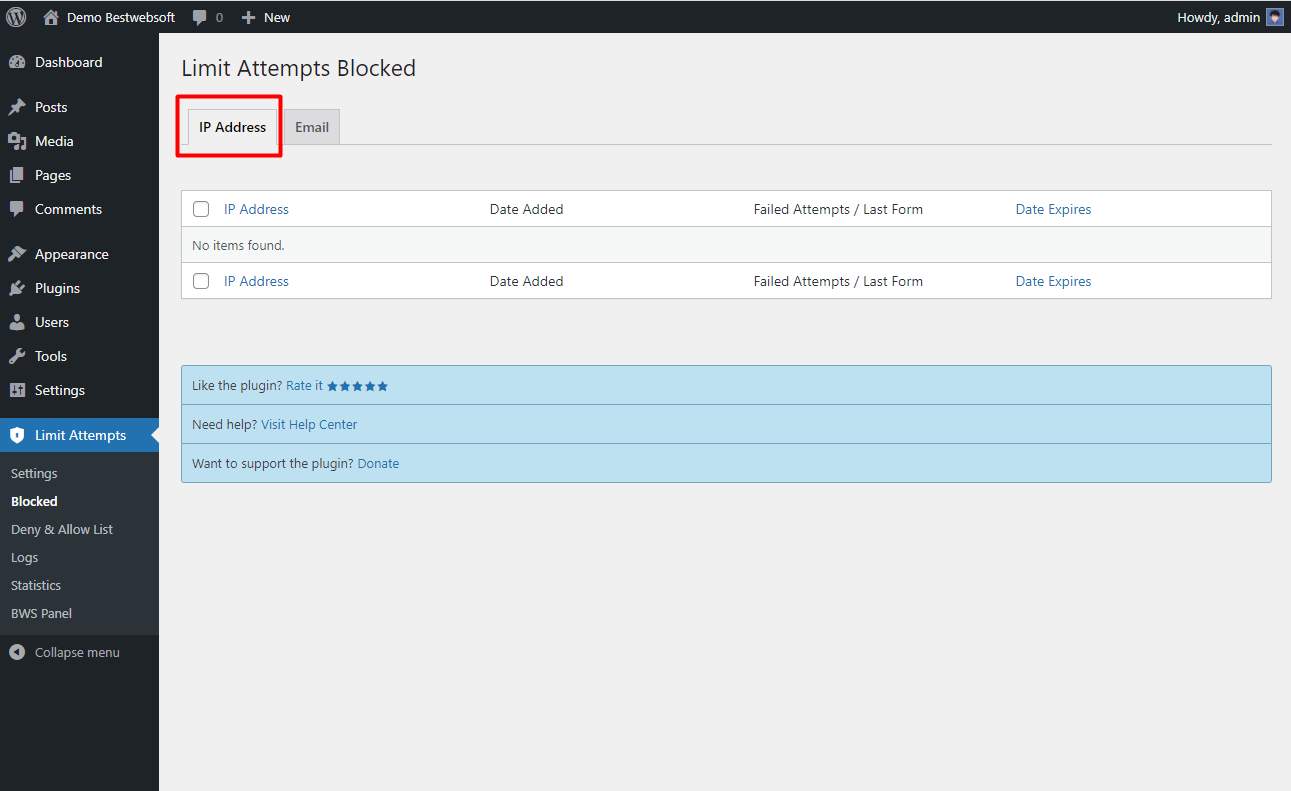
8.1.1. Reset block or add IP to allow list by clicking the “Reset block”/“Add to Allow List” buttons under the chosen IP address.
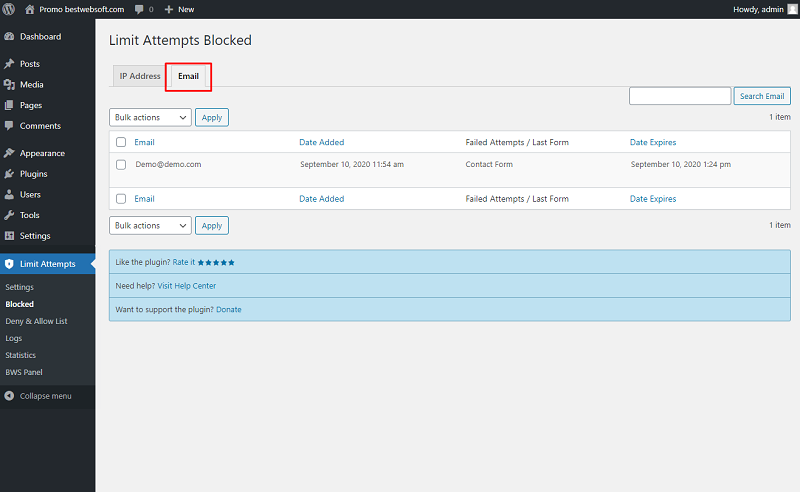
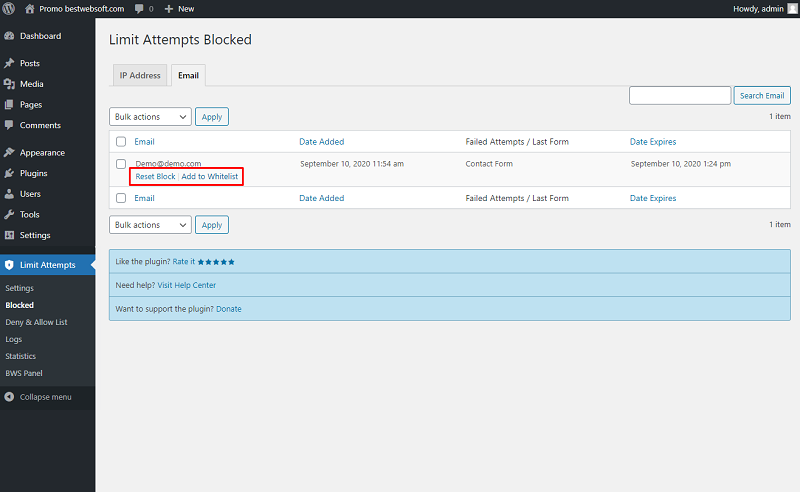
8.2. Email Tab
Use the “Email Tab” tab view and manage the list of blocked email addresses.
8.2.1. Reset block or add email to allow list by clicking the “Reset block”/“Add to Allow List” buttons under the chosen email address.
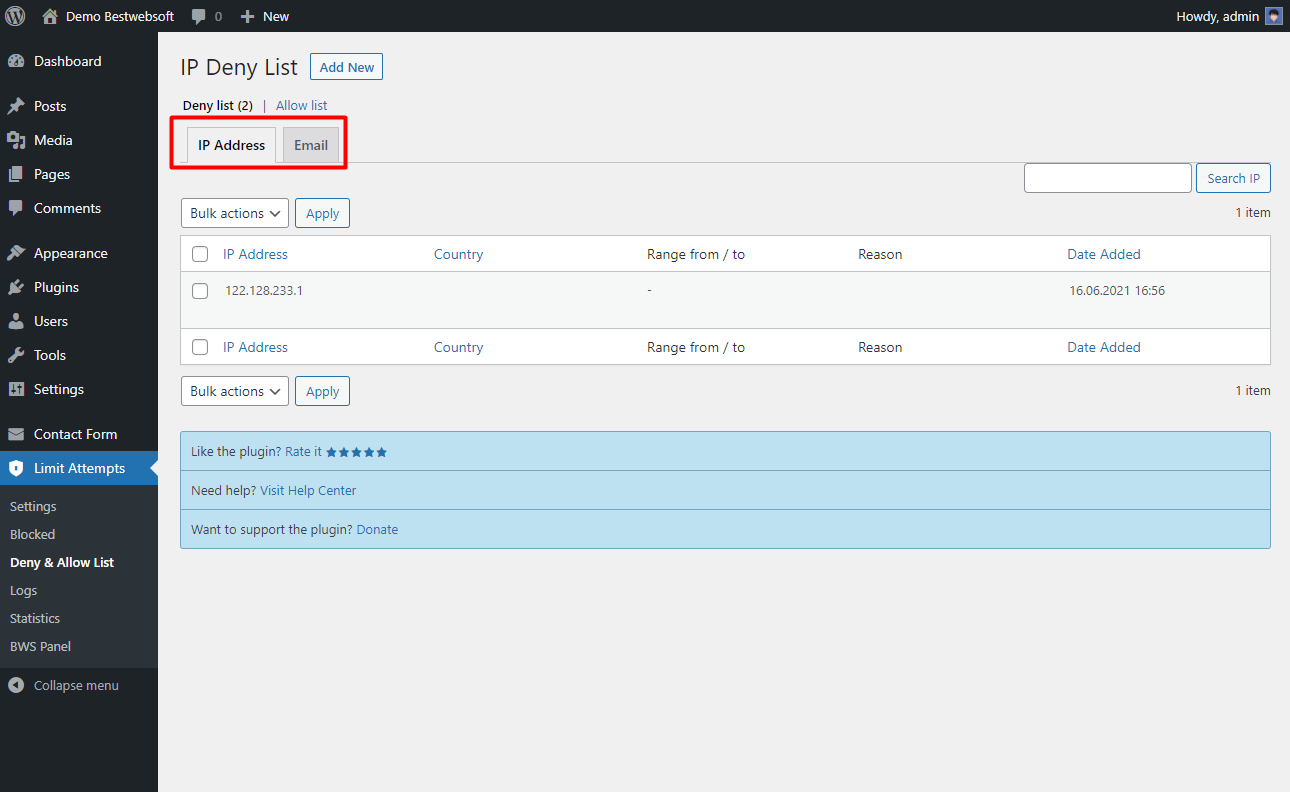
9. Deny & Allow List
Use the “Deny & Allow List” page to add IP addresses to the deny or allow list.
9.1. Switch between the “Deny list” and “Allow list” tabs to view and manage the appropriate lists.
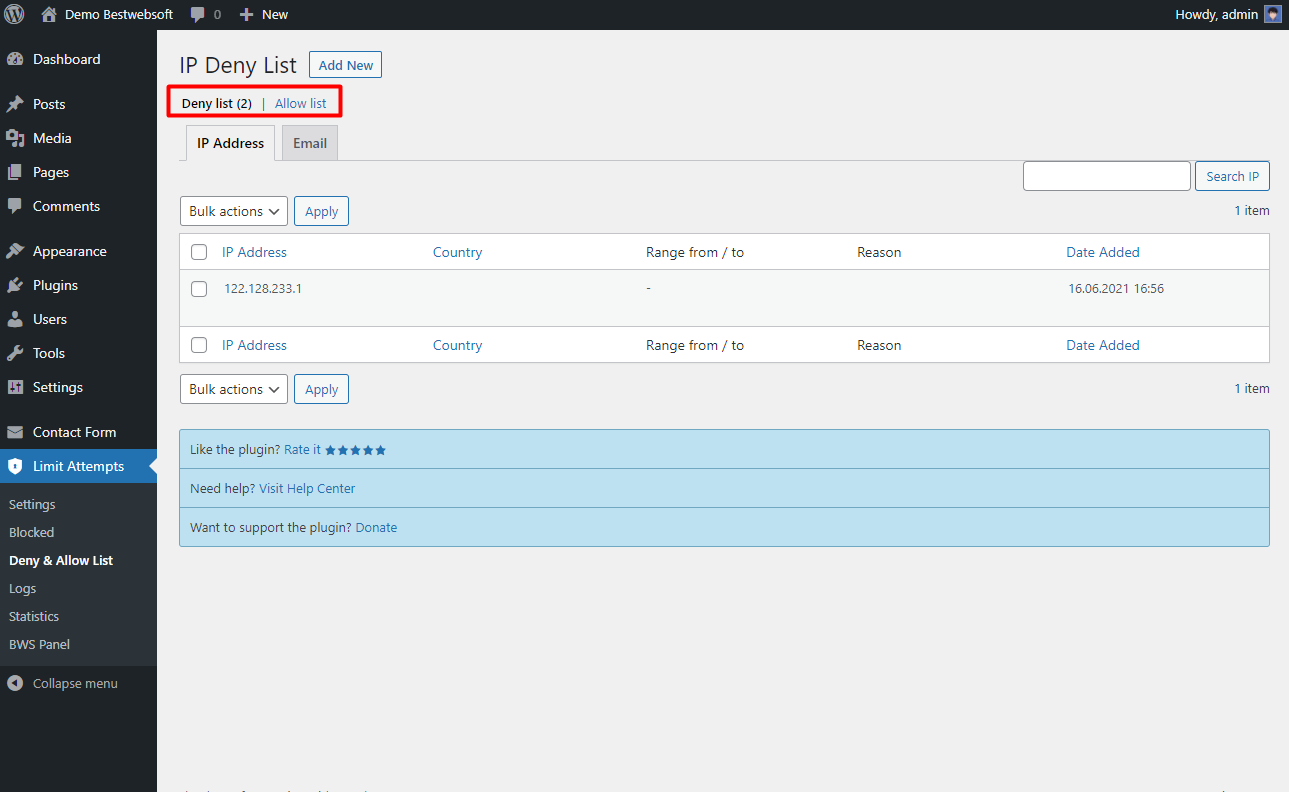
9.2. Switch between the “IP Address” and “Email” tabs to view and manage IPs and emails from Deny list/Allow list.
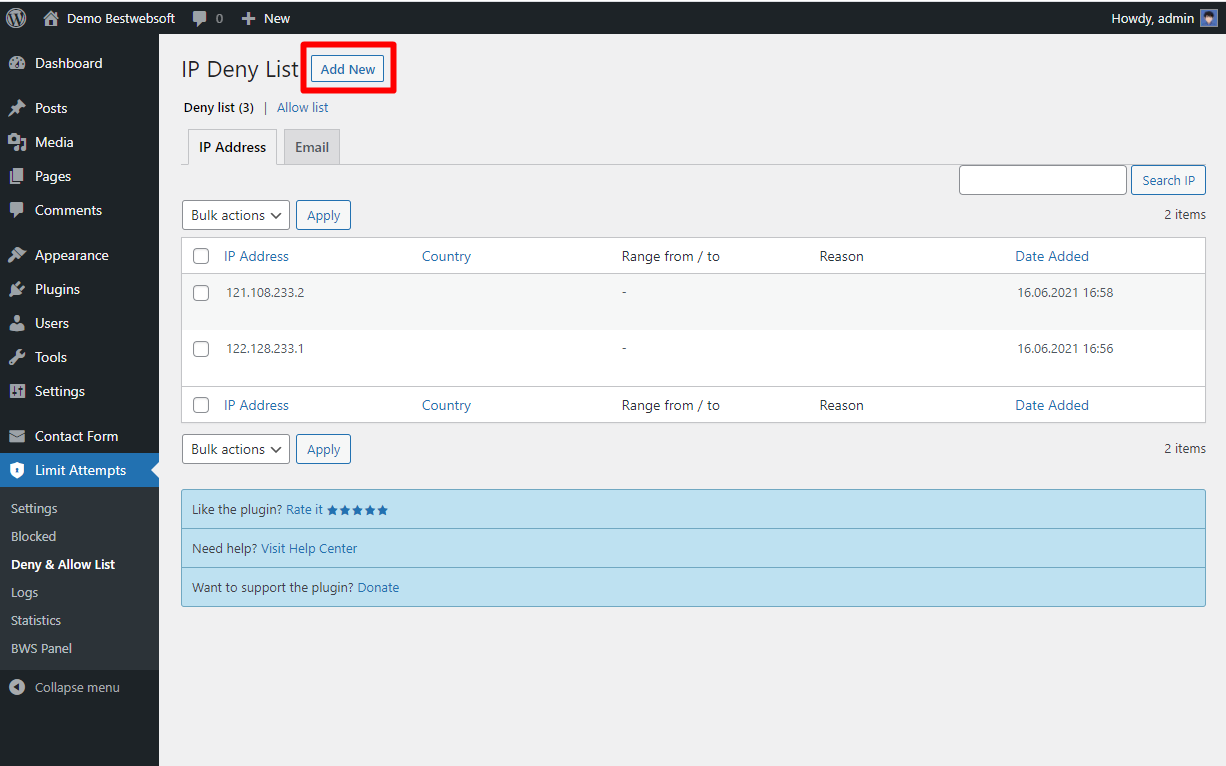
9.3. Click the “Add New” button to add IP address to Deny / Allow list.
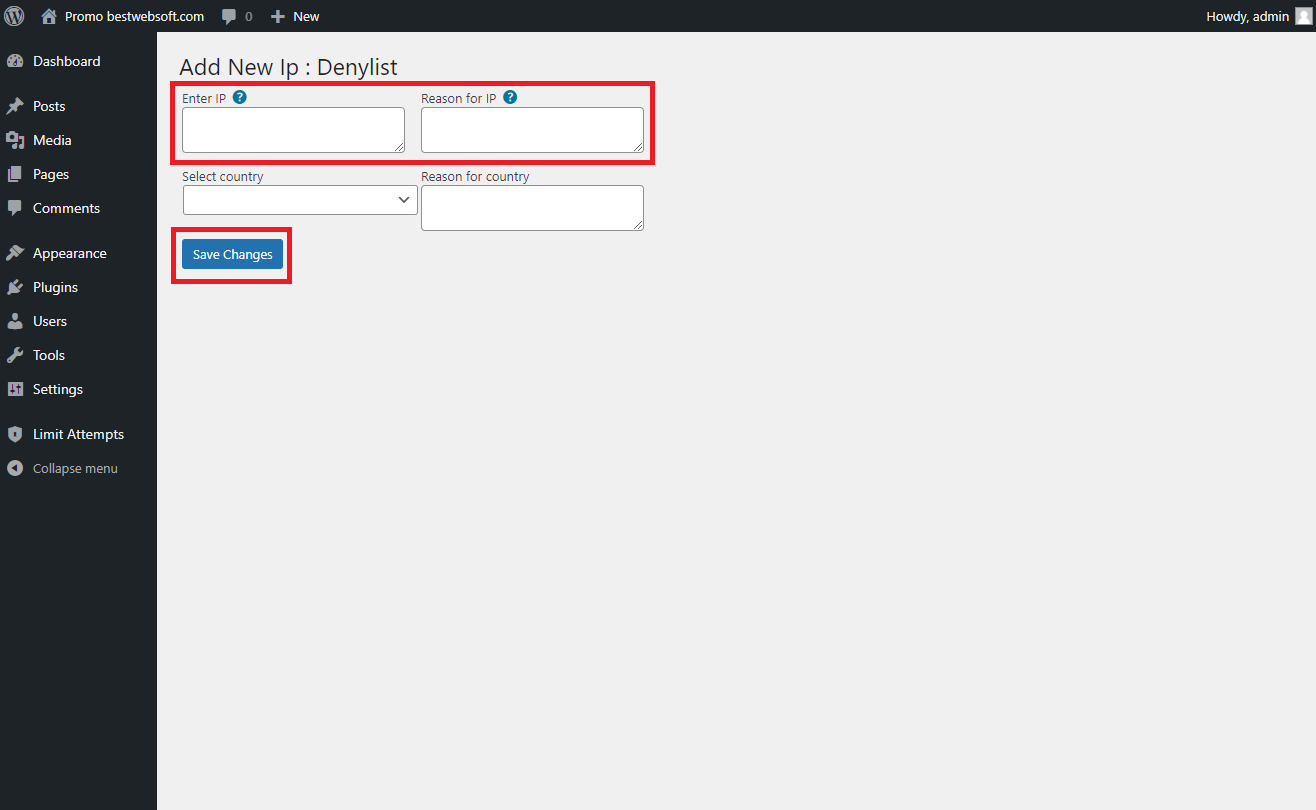
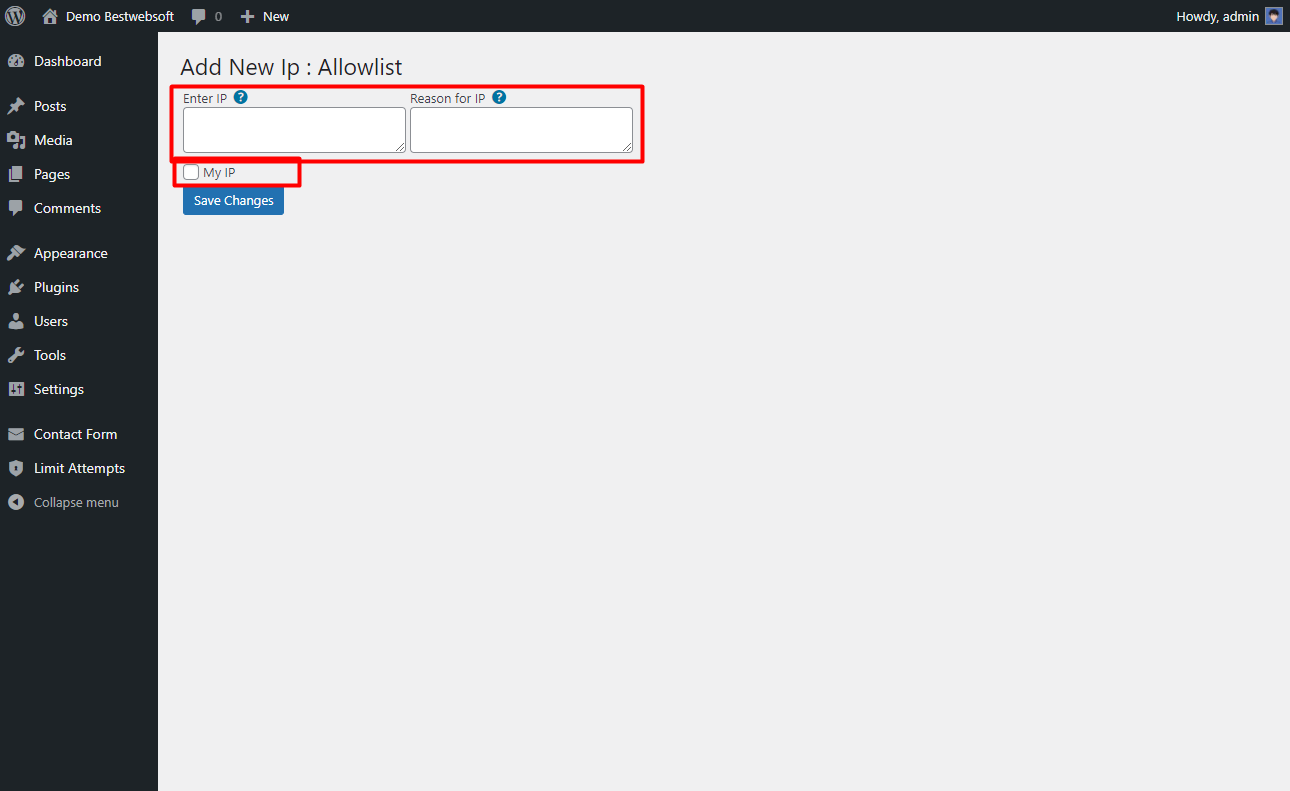
9.4. Enter the IP (or email) address you want to add to Deny list/ Allow list, specify the reason and click the “Save Changes” button.
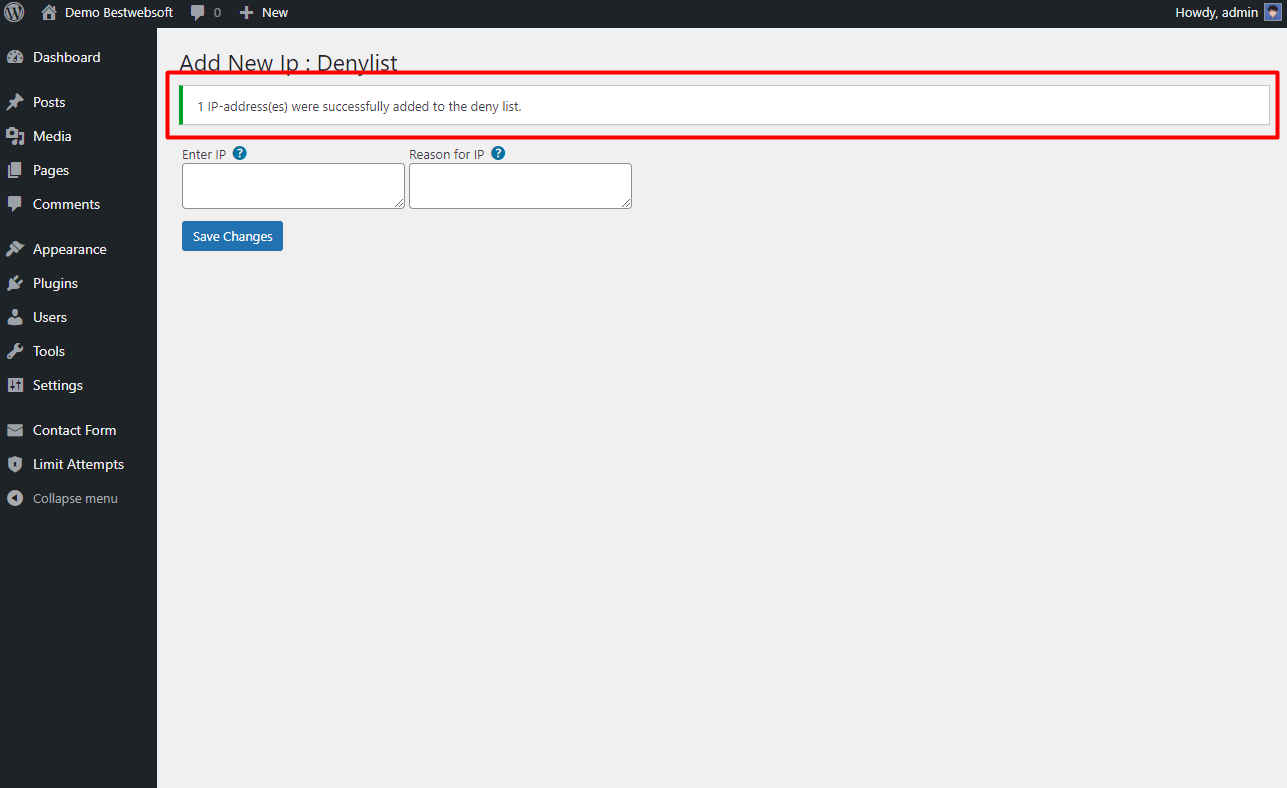
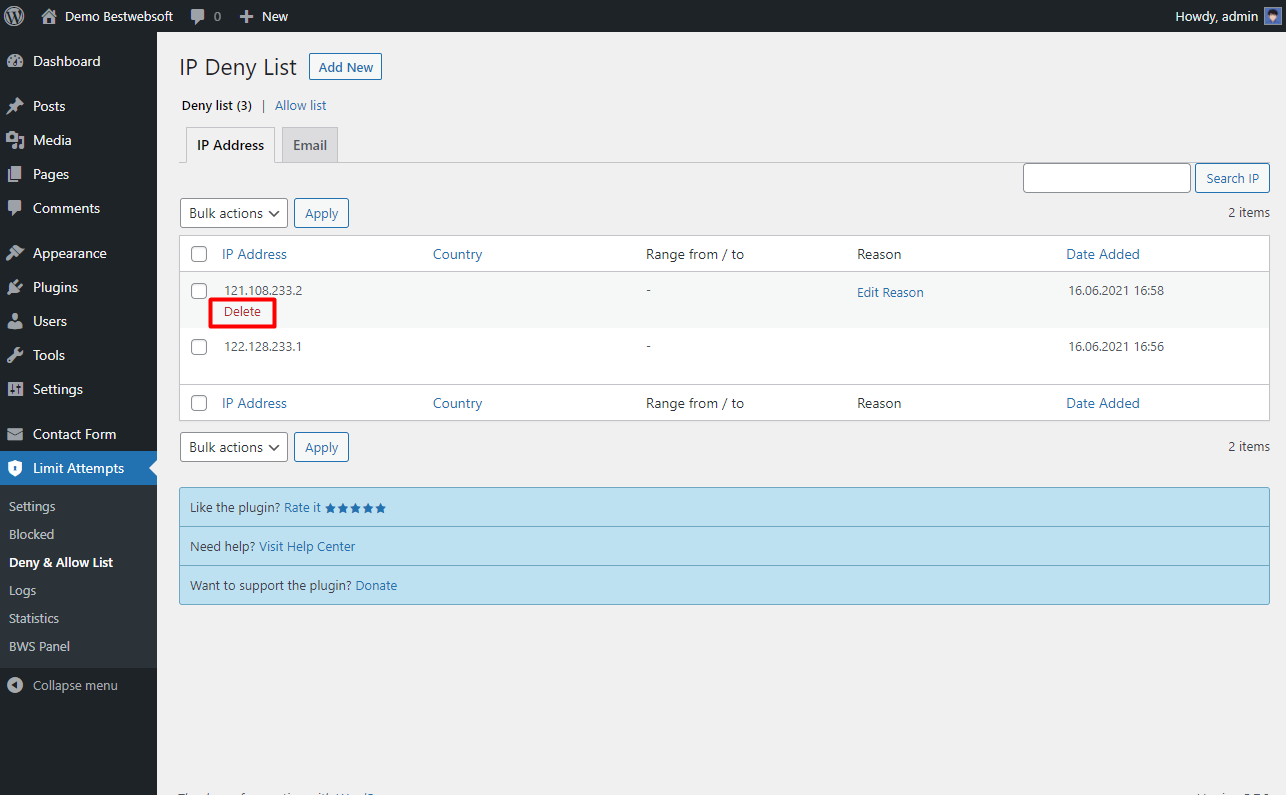
9.5. A notification confirming that the IP address has been added to Deny list/Allow list will appear in the upper left corner of the page. The newly added IP address will be shown on a Deny & Allow List page.
9.6. Hover the cursor over the IP address and click the “Delete” button to remove it from the deny list/allow list.
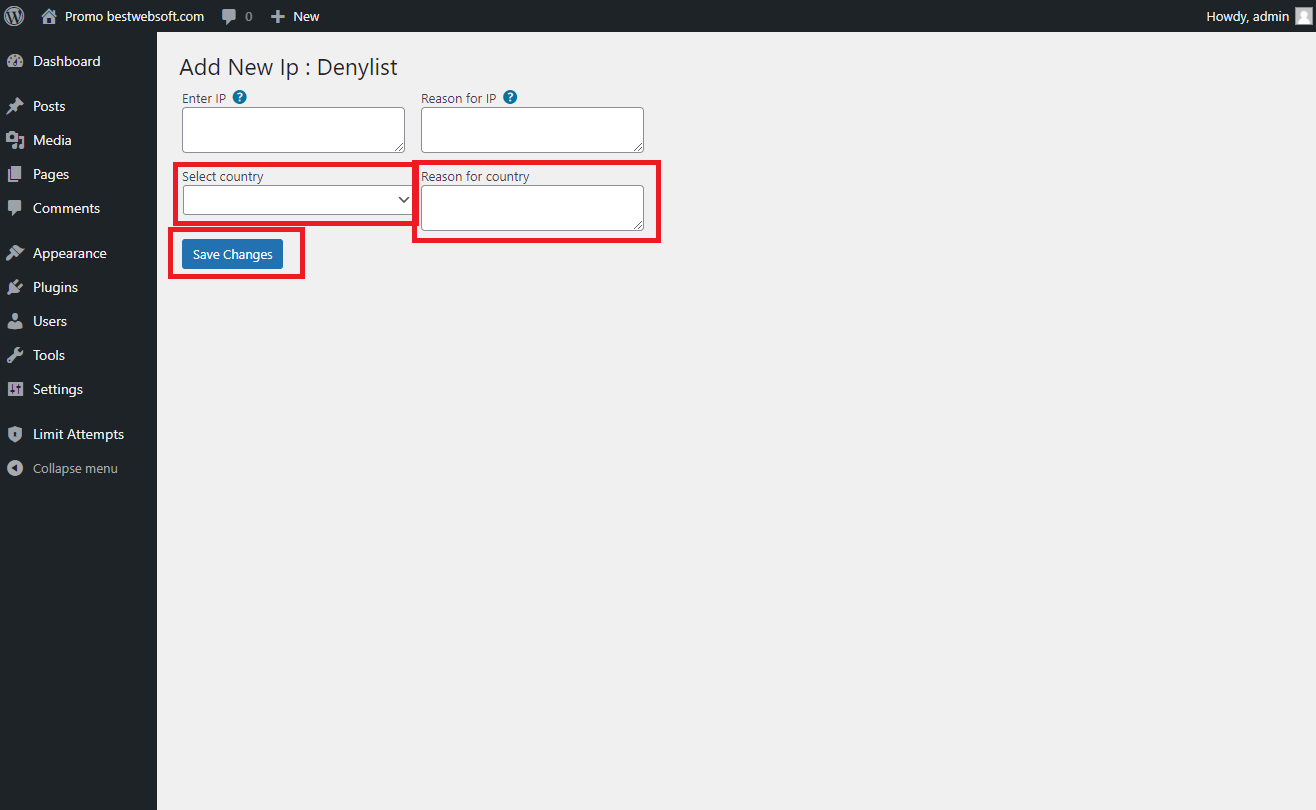
9.7. To add the country IPs to the Deny List/Allow List, select the country you want to add to Deny List/Allow List from the dropdown menu, specify the reason and click the “Save Changes” button.
Note: Upload the GeoIP library to add the country IPs to the Deny List/Allow List. |
9.8. Enable the “My IP” option of the “Allowlist” tab to add your current IP or email address to the allow list.
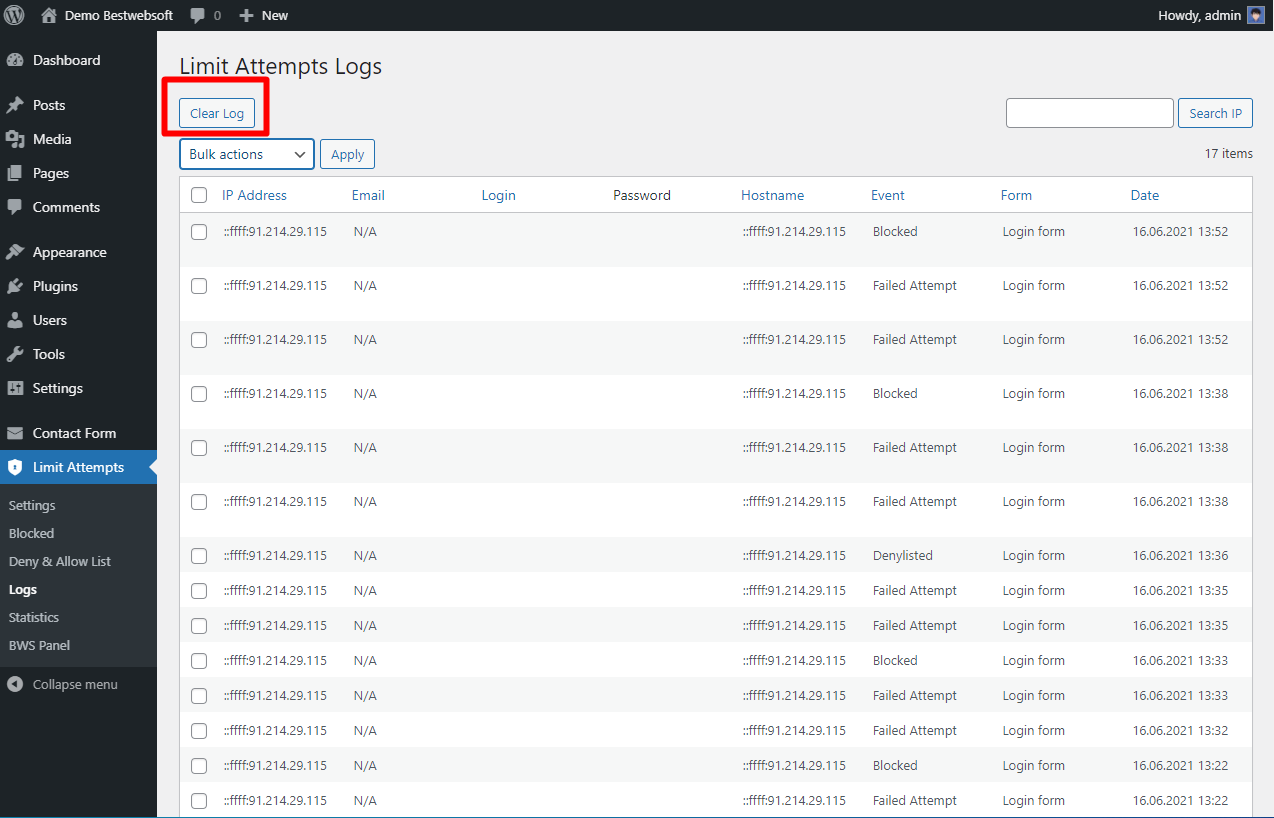
10. Logs
Use the “Logs” page to view and manage the list of log entries.

10.1. Choose the particular IP addresses, select “Delete log entry” in the “Bulk Actions” dropdown and click the “Apply” button to delete the entries.
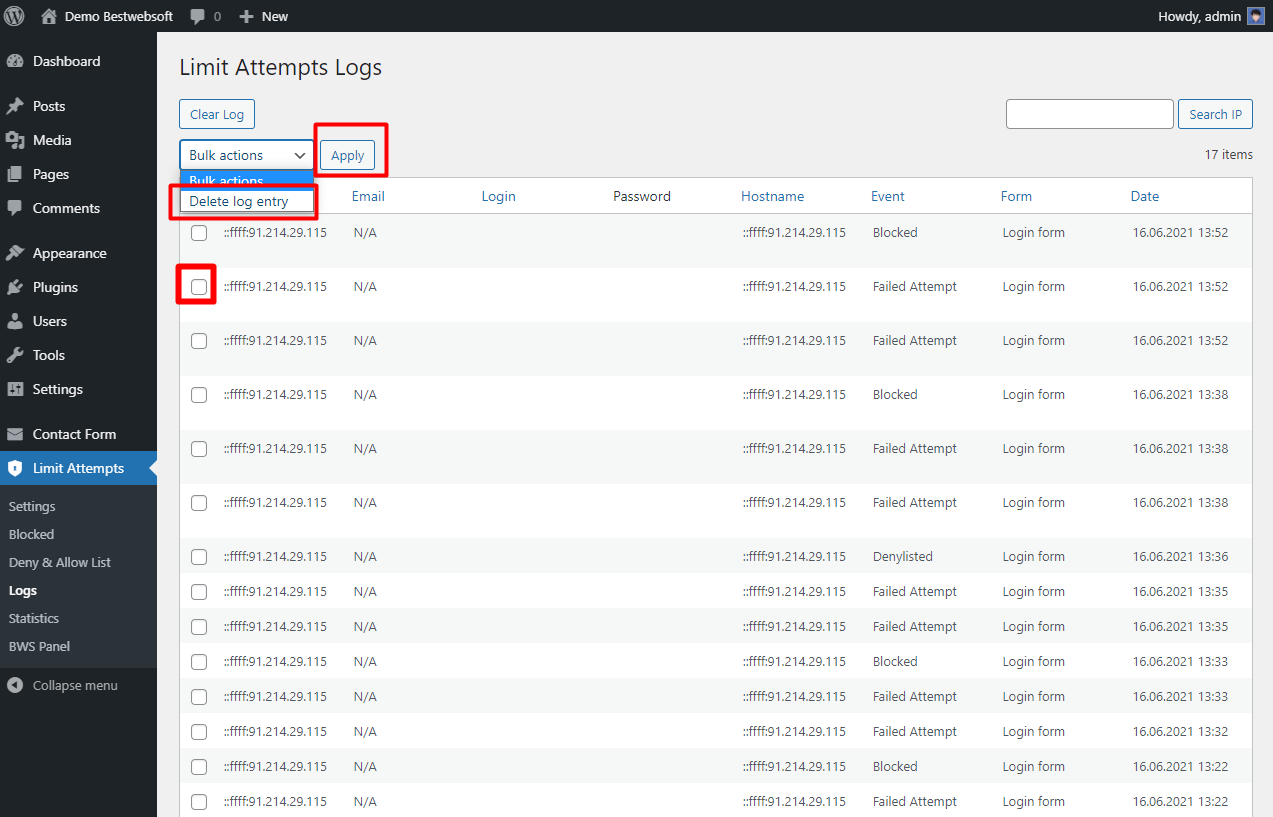
10.2. Click the “Clear Log” button to delete all the log entries from the list.
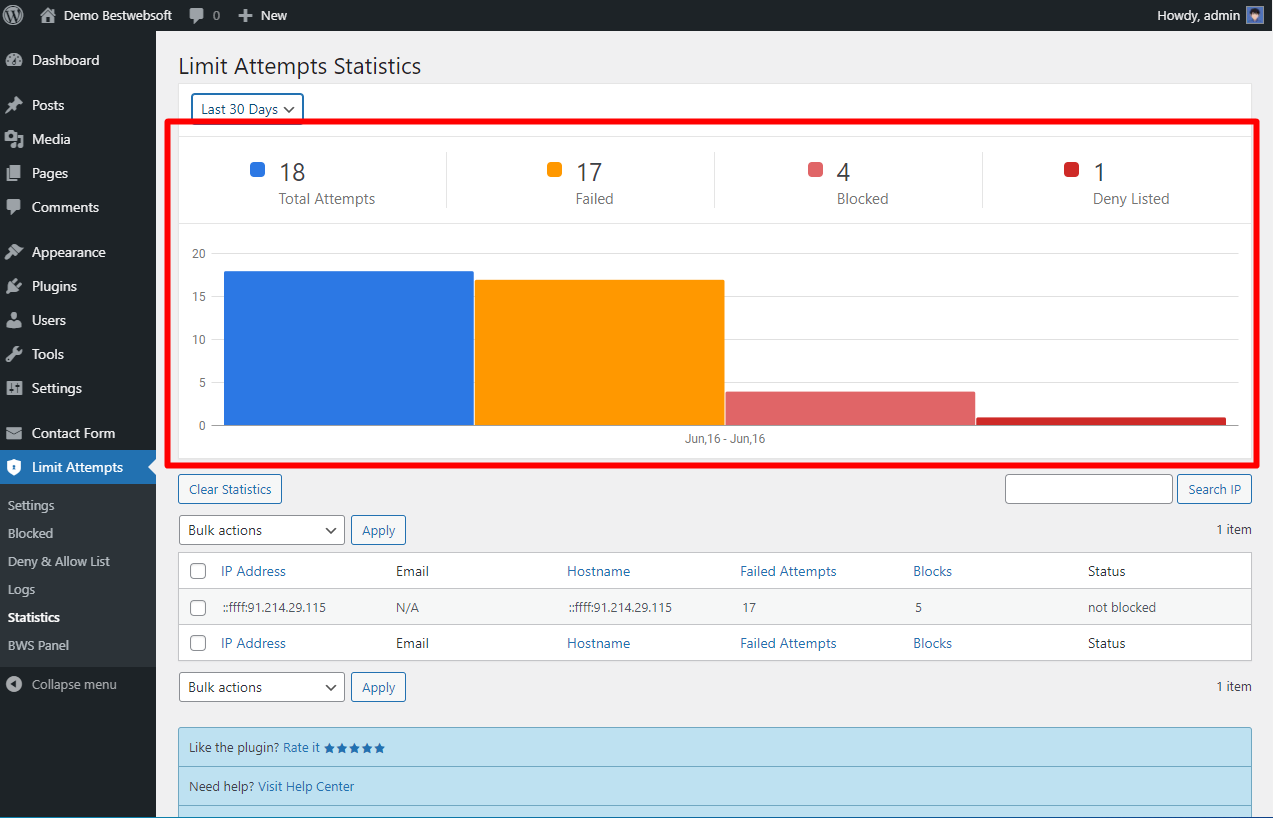
11. Statistics
Use the “Statistics” page to change the statistics display period, clear statistics, or delete particular statistics entries.
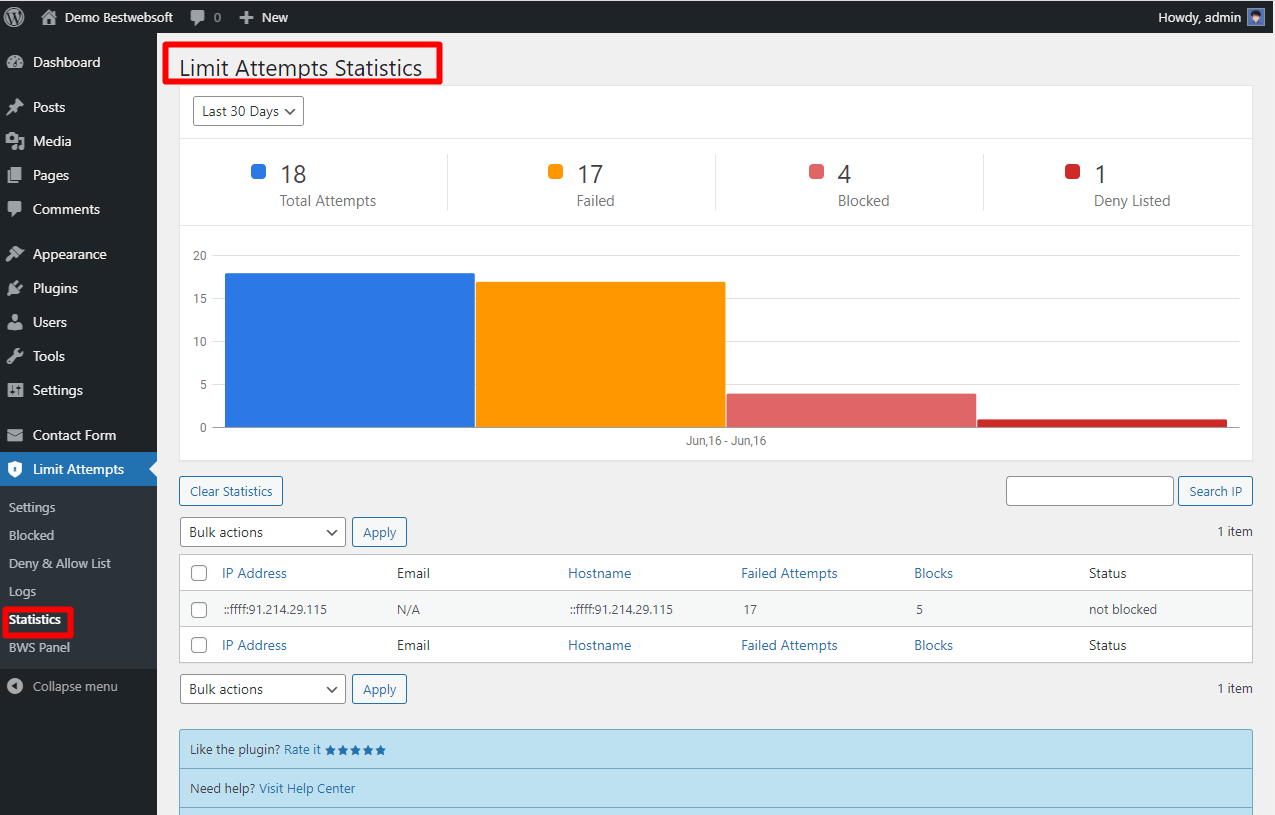
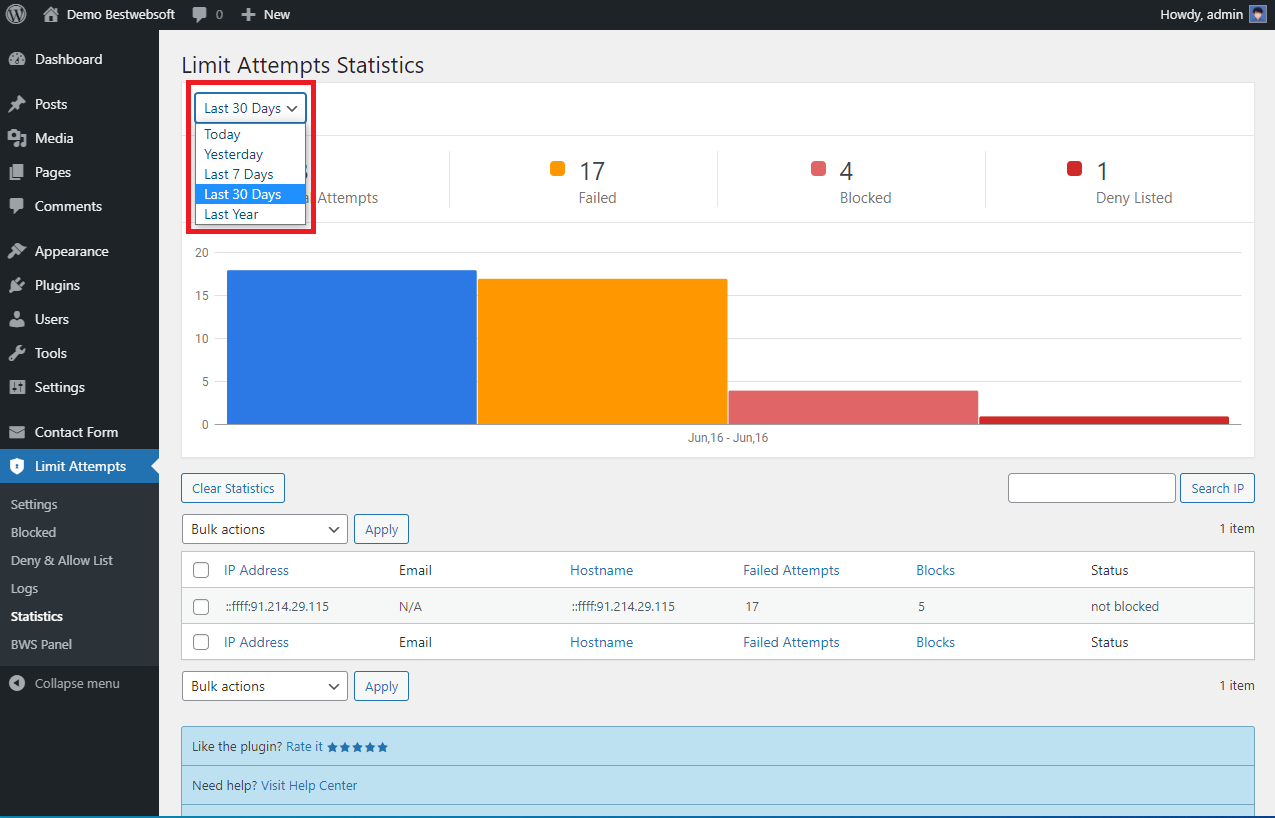
11.1. Choose the period of displayed statistics in the dropdown found in the upper left corner of the page.
11.2. Use the “Limit Attempts Statistics” widget found on your Dashboard by necessity.
Thank you!
Help & Support
Visit our Help Center if you have any questions — https://support.bestwebsoft.com/
Services
We provide additional services such as WordPress themes & plugins development,
graphic design, custom programming.
Contact us now to get a free quote — https://bestwebsoft.com/contacts/

