


Testimonials
User Guide
Testimonials | 1.0.8 * |
WordPress | 5.8 * |
reCaptcha | 1.64 * |
Rating Sender | 1.3 * 1.3.4 * |
*When using other versions some differences are possible to occur
** Screenshots were taken from a PC
Table of Contents
3.1.4. Arrange Testimonials by
3.1.5. Allow Testimonials from
3.1.6. Auto Approve Testimonials
3.1.9. Sender
5.2. Testimonials Form Shortcode
5.3. Testimonials Slider Shortcode
You can download Testimonials Plugin here:
https://bestwebsoft.com/products/wordpress/plugins/testimonials
1. Introduction
Note: Сlick the “Save Changes” button in order to apply any changes. |
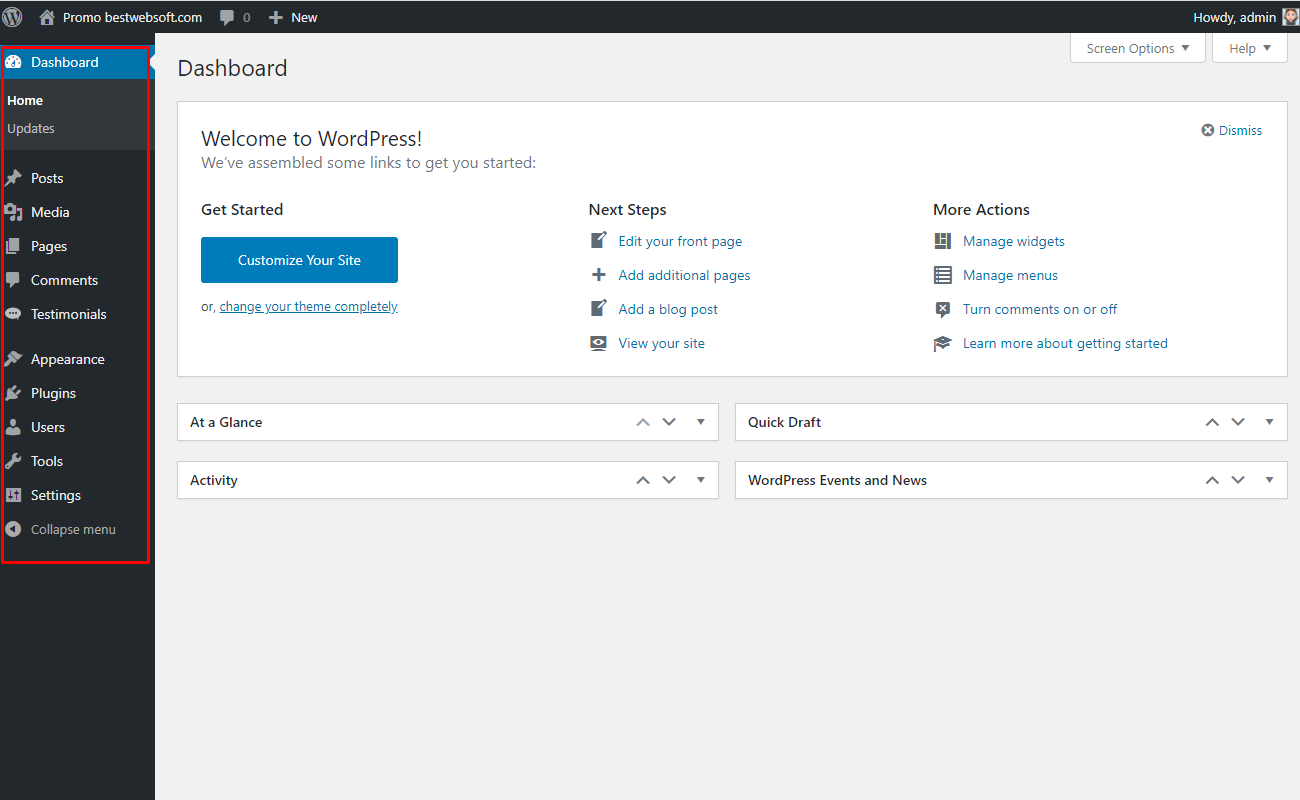
1.1. Open your WordPress Admin Dashboard and find the menu on the left.
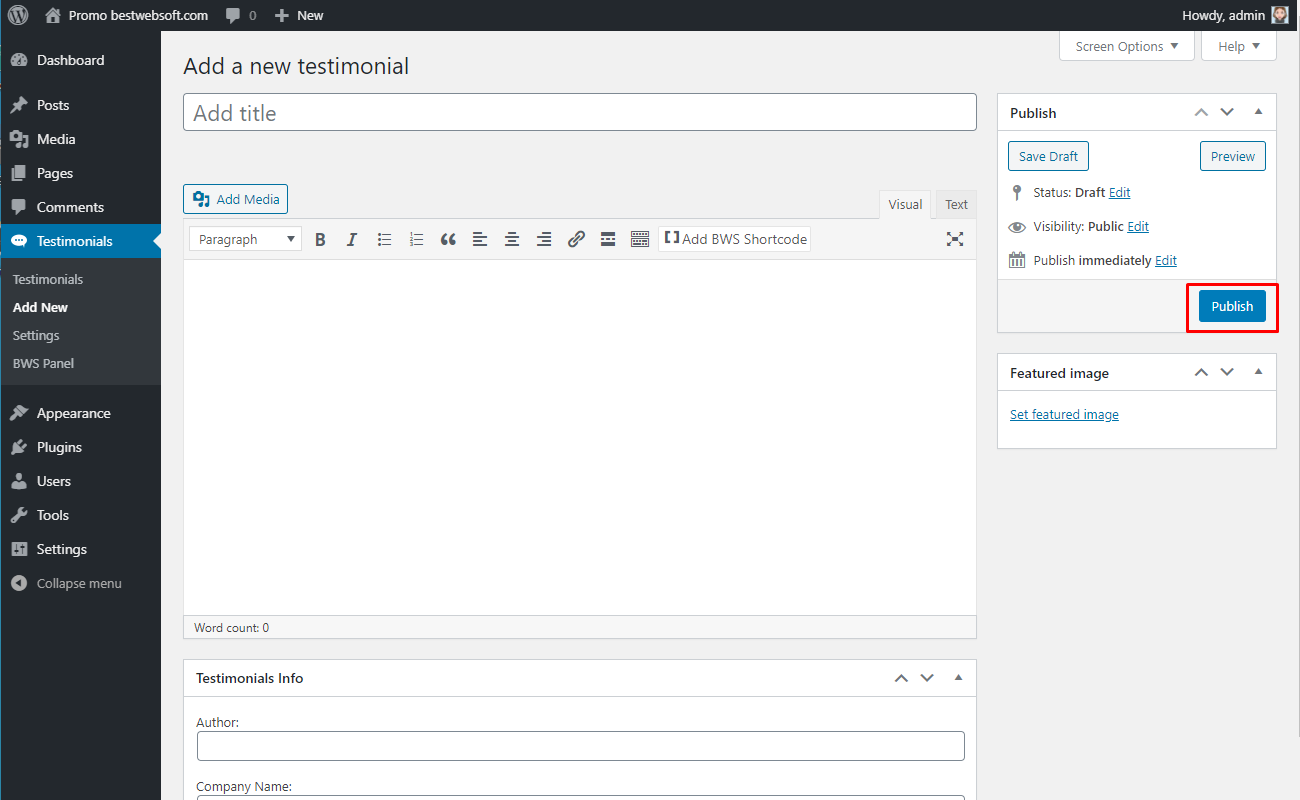
1.2. Go to the “Testimonials” > “Add New” on your dashboard.

1.3. The “Add New Testimonial” page will open.

2. Add New Testimonial
Use the “Add New Testimonial” page to add information and configure a testimonial content.
2.1. Add Title
Enter the title of a new testimonial to an appropriate field.

2.2. Add Content
Enter the content of a new testimonial to an appropriate text area.

2.3. Add Media
Click the “Add Media” button to open the Media Library window.

2.3.1. Click the “Select Files” button or drag and drop files into the window to upload new images from your computer.

2.3.2. Open the “Media Library” tab to choose images that are already uploaded into the Media Library. Select images and click the “Insert” button.

2.4. Testimonials Info
Use the “Testimonials Info” section to set the information about the person, who had left the testimonial.

2.4.1. Add Author
Use the “Author” field to enter the author’s name for a testimonial.

2.4.2. Add Company Name
Use the “Company Name” field to enter the company name for a testimonial.

2.5. Publish
Click the “Publish” button to save the changes.
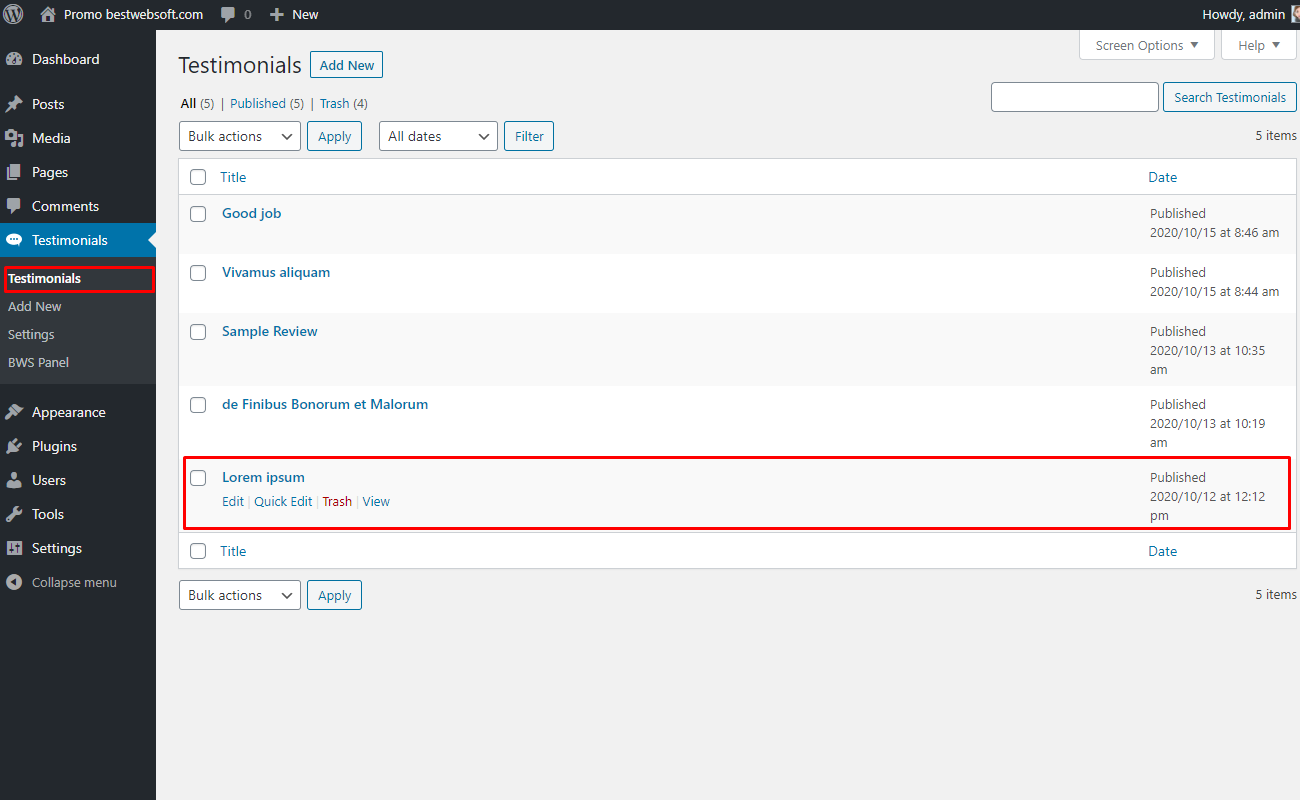
2.5.1. Published testimonials will appear on the “Testimonials” page.
3. Settings
Use the options of the “Settings” page to make the settings applicable to all the testimonials of the website.

3.1. Testimonials Settings
Use the options of the “Testimonials Settings” tab to make the most important settings for Testimonials.
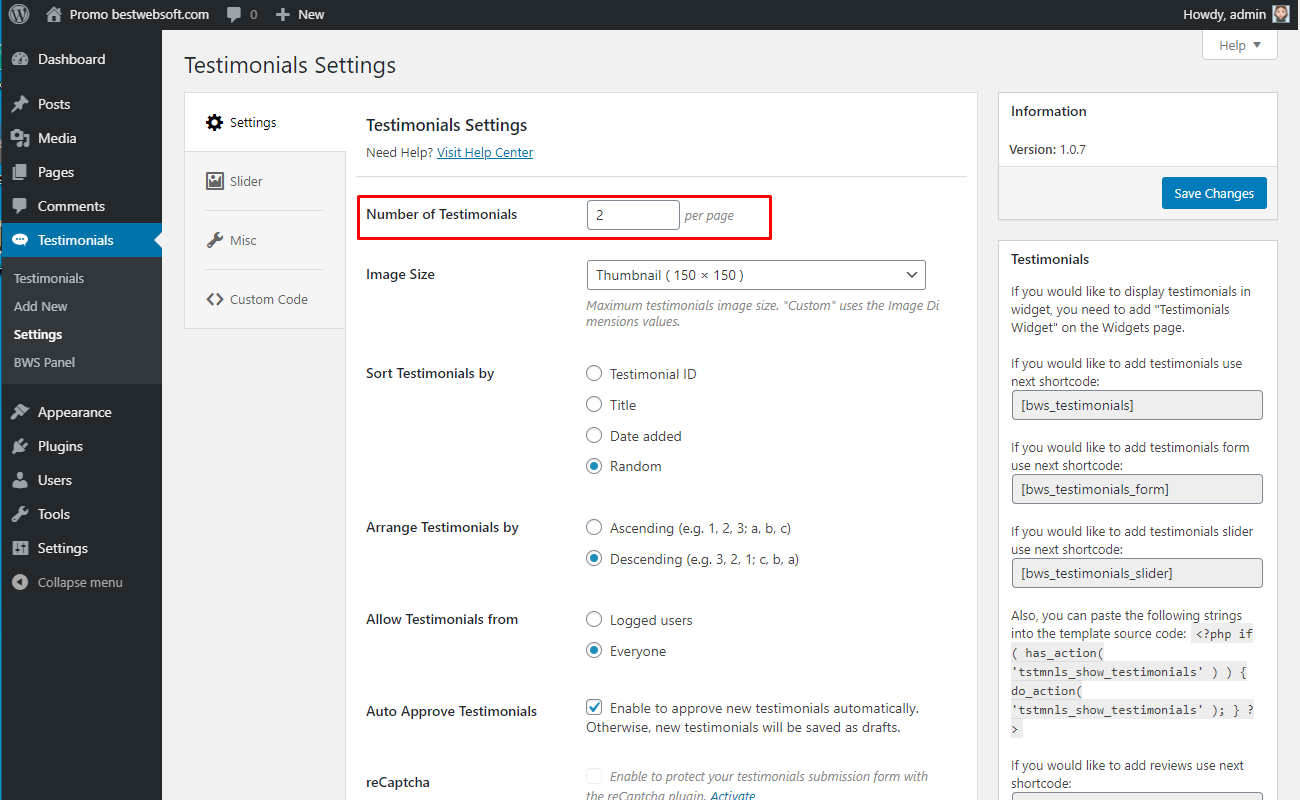
3.1.1. Number of Testimonials
Use the “Number of Testimonials” option to set the number of displayed testimonials on one page. Enter the necessary value into the appropriate box.
3.1.1.1. The result may look on a page as follows.
3.1.2. Image Size
Use the “Image Size” option to select the maximum testimonials image size. Select the necessary size from the dropdown menu.
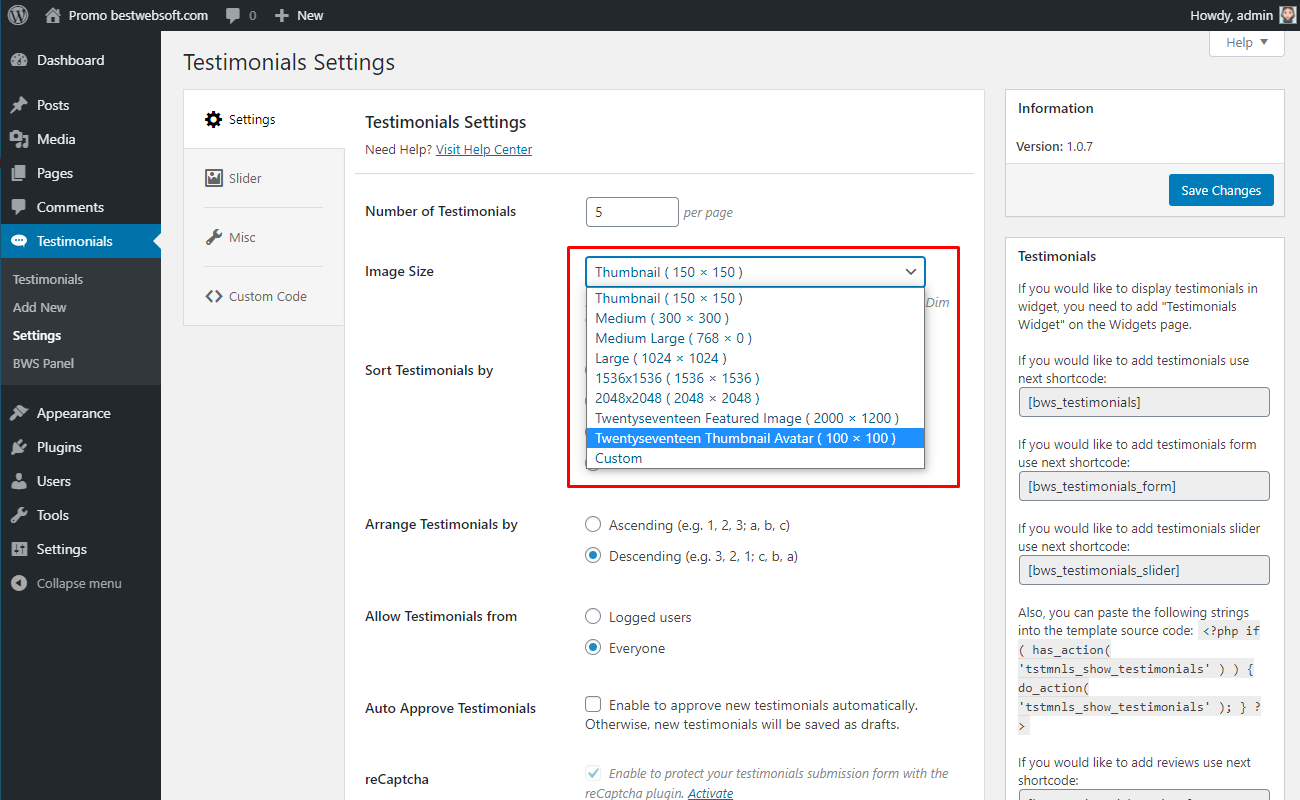
3.1.2.1. The result may look on a page as follows.

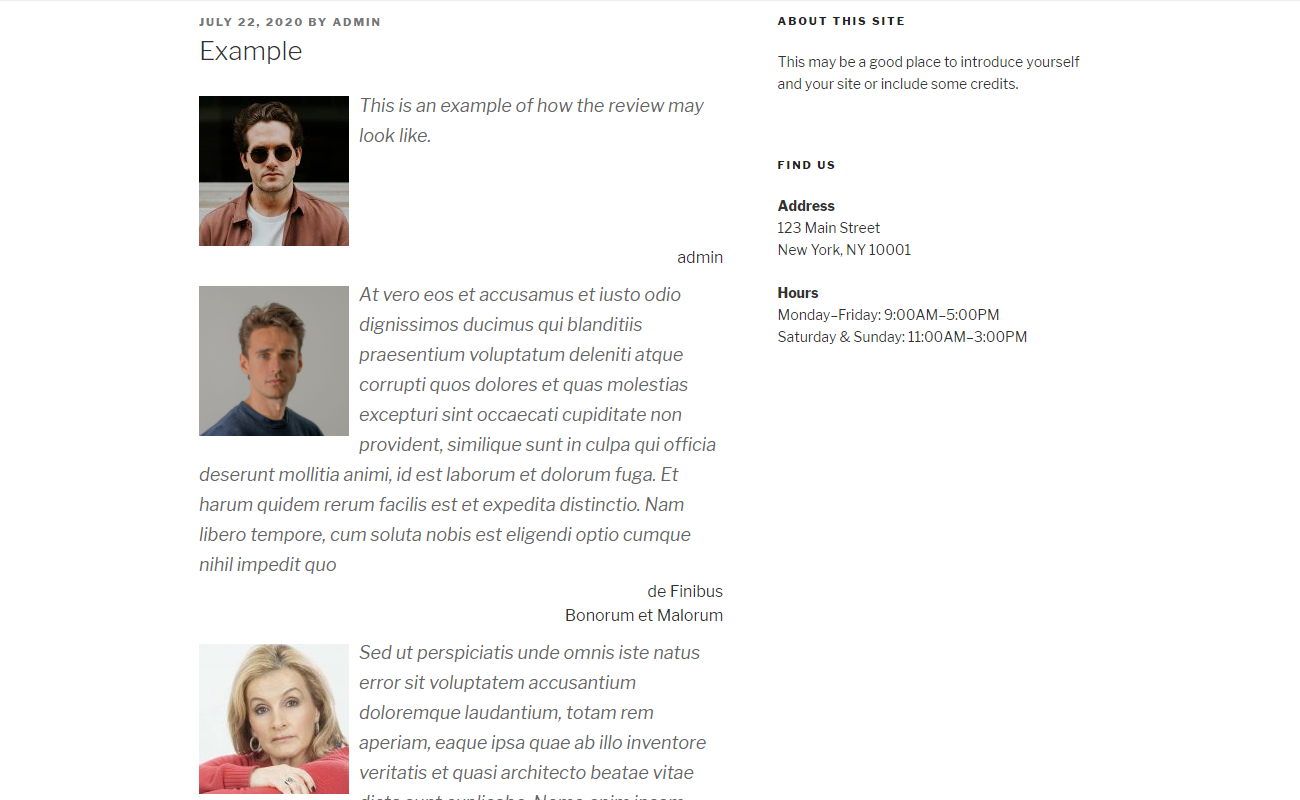
3.1.3. Sort Testimonials by
Use the “Sort Testimonials by” option to choose the testimonials order of display.

3.1.3.1. Choose “Testimonials ID” to set the sorting by the ID of testimonial.

3.1.3.2. The “Testimonials ID” sorting result may look on a page as follows.

3.1.3.3. Choose “Title” to set the sorting by the title of the testimonial.

3.1.3.4. The “Title” sorting result may look on a page as follows.
3.1.3.5. Choose “Date added” to set the sorting by testimonial date of creation.

3.1.3.6. The “Date added” sorting result may look on a page as follows.

3.1.3.7. Choose “Random” to set random sorting.

3.1.3.8. The “Random” sorting result may look on a page as follows.
3.1.4. Arrange Testimonials by
Use the “Arrange Testimonials by” option to choose the testimonials arrangement.
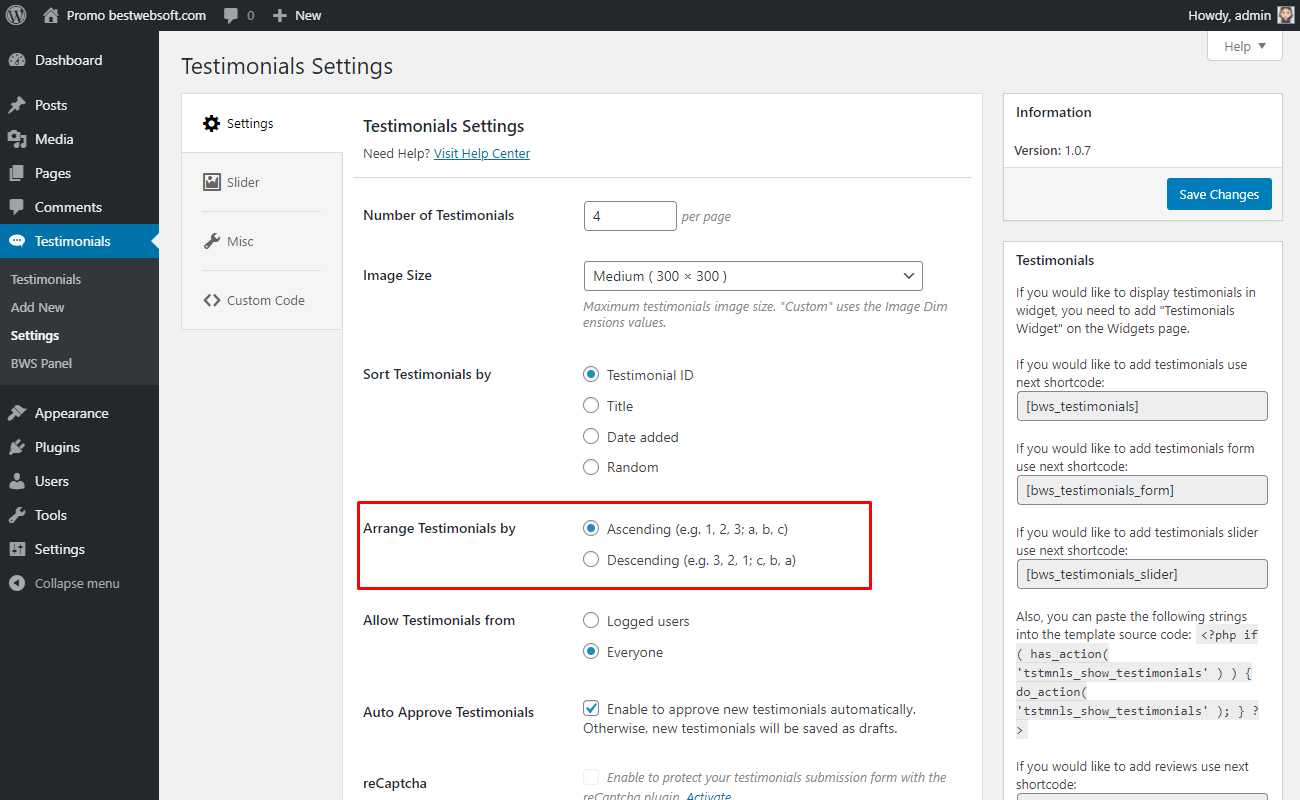
3.1.4.1. Choose “Ascending” to set the ascending arrangement.
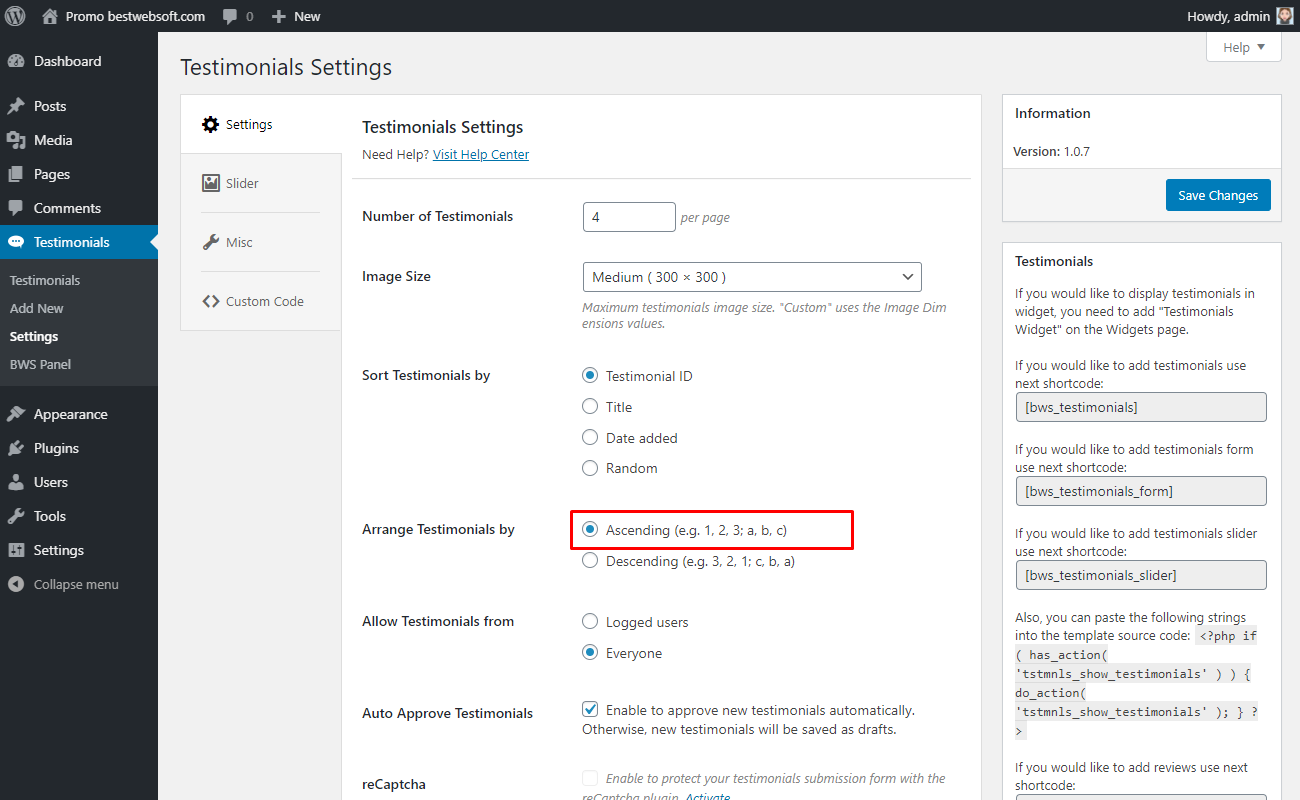
3.1.4.2. The result of the ascending arrangement for “Date added” sorting may look on a page as follows.
3.1.4.3. Choose “Descending” to set the descending arrangement.

3.1.4.4. The result of the ascending arrangement for “Date added” sorting may look on a page as follows.
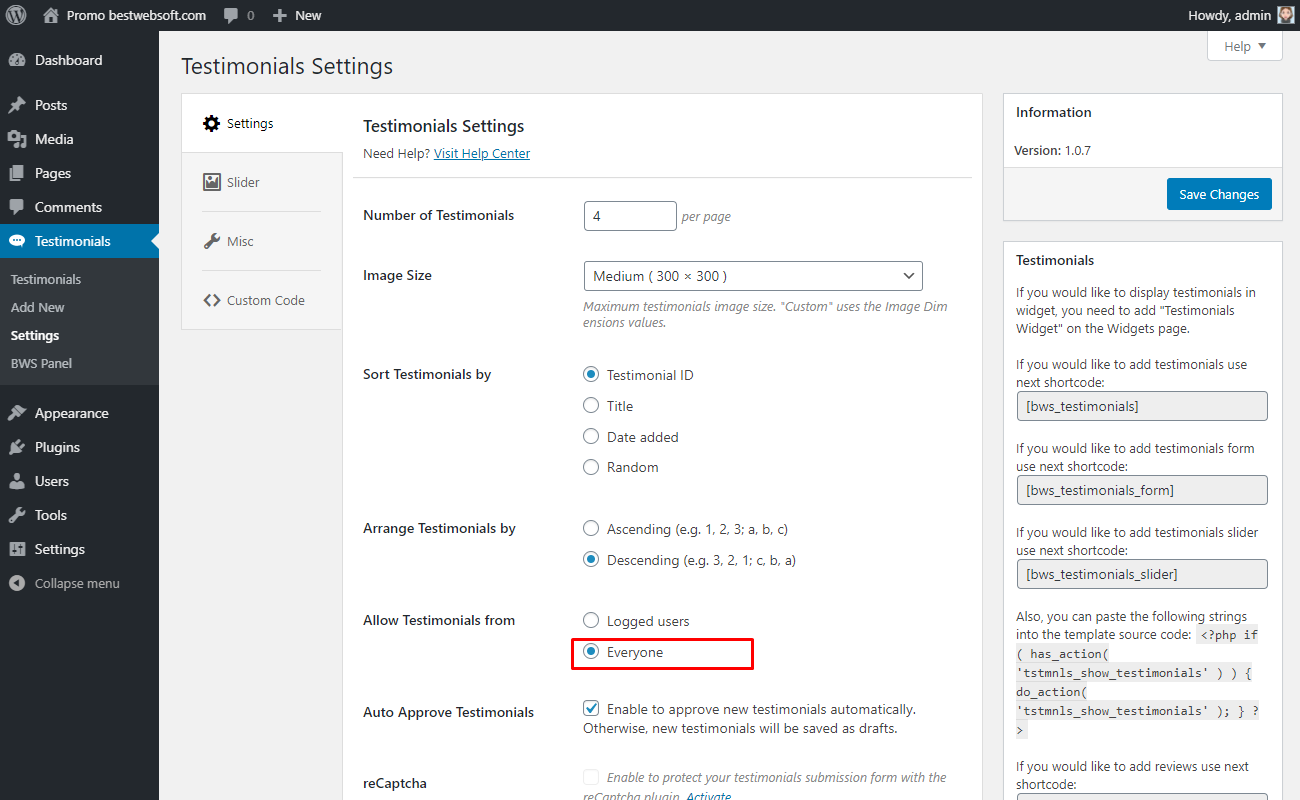
3.1.5. Allow Testimonials from
Use the “Allow Testimonials from” option to choose the rights of leaving the testimonial.
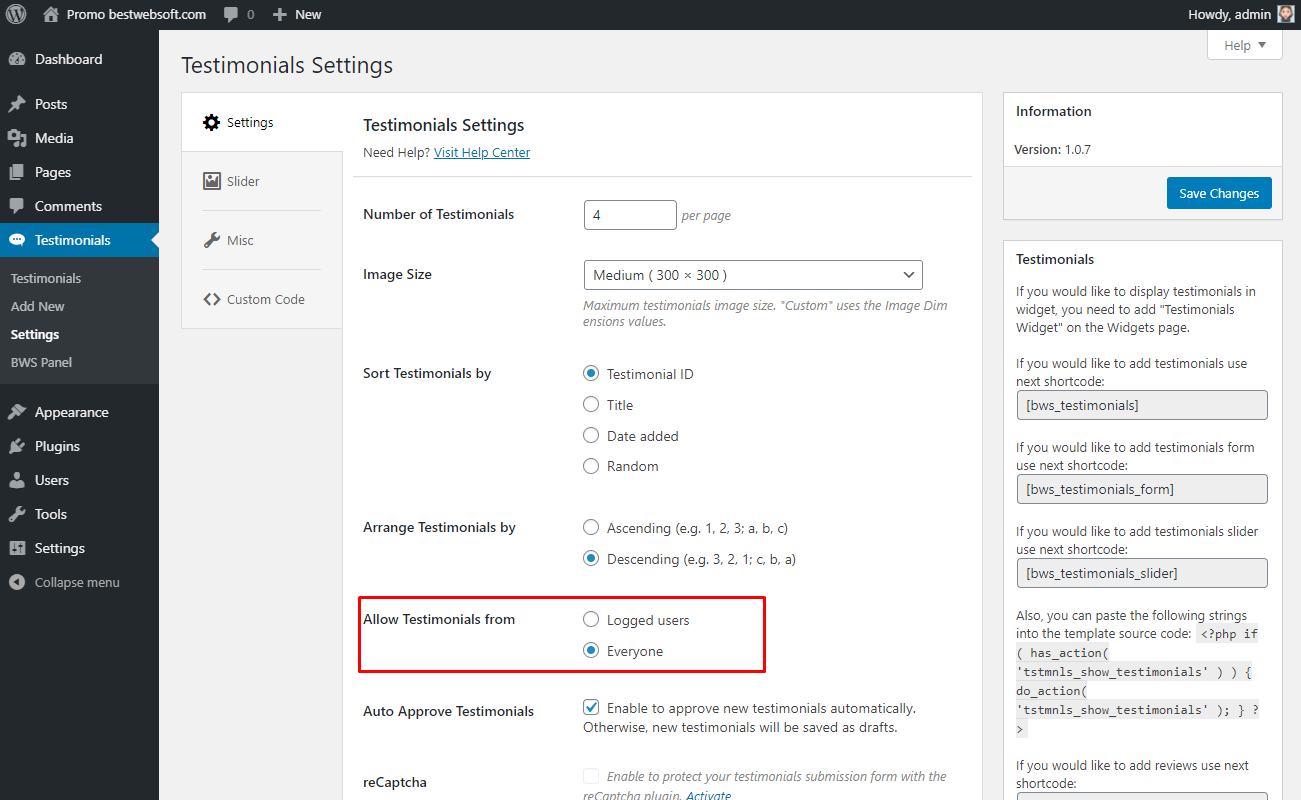
3.1.5.1. Choose “Logged users” to allow only logged users to leave testimonials.

3.1.5.2. Choose “Everyone” to allow all site visitors to leave testimonials.
3.1.6. Auto Approve Testimonials
Enable the “Auto Approve Testimonials” option to approve new testimonials automatically. Otherwise, new testimonials will be saved as drafts.

3.1.7 reCaptcha
Testimonials by BestWebSoft is compatible with “reCaptcha by BestWebSoft” plugin. Download the plugin by clicking the “Install Now” link.
You can download the reCaptcha plugin here
https://bestwebsoft.com/products/wordpress/plugins/google-captcha/

3.1.7.1. After a successful download, activation, and configuration of the “reCaptcha” plugin enable reCaptcha for “Testimonials”.

3.1.7.2. After saving changes the “Testimonials” form with reCaptcha will look as follows.

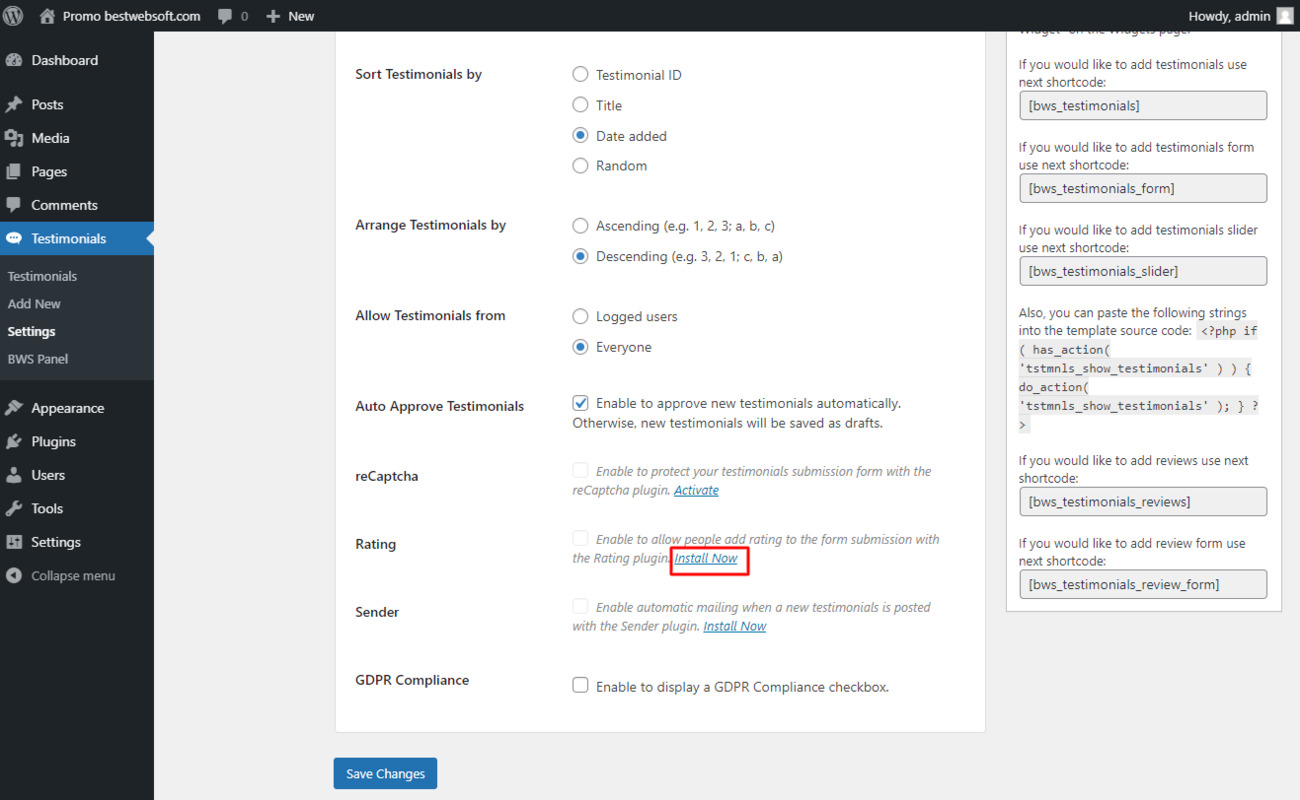
3.1.8. Rating
Testimonials by BestWebSoft is compatible with “Rating by BestWebSoft” plugin. Download the plugin by clicking the “Install Now” link.
You can download the Rating plugin here
https://bestwebsoft.com/products/wordpress/plugins/rating/
3.1.8.1. After a successful download and activation of the “Rating” plugin enable Rating for “Testimonials”.

3.1.8.2. After saving changes the review form with rating may look as follows.

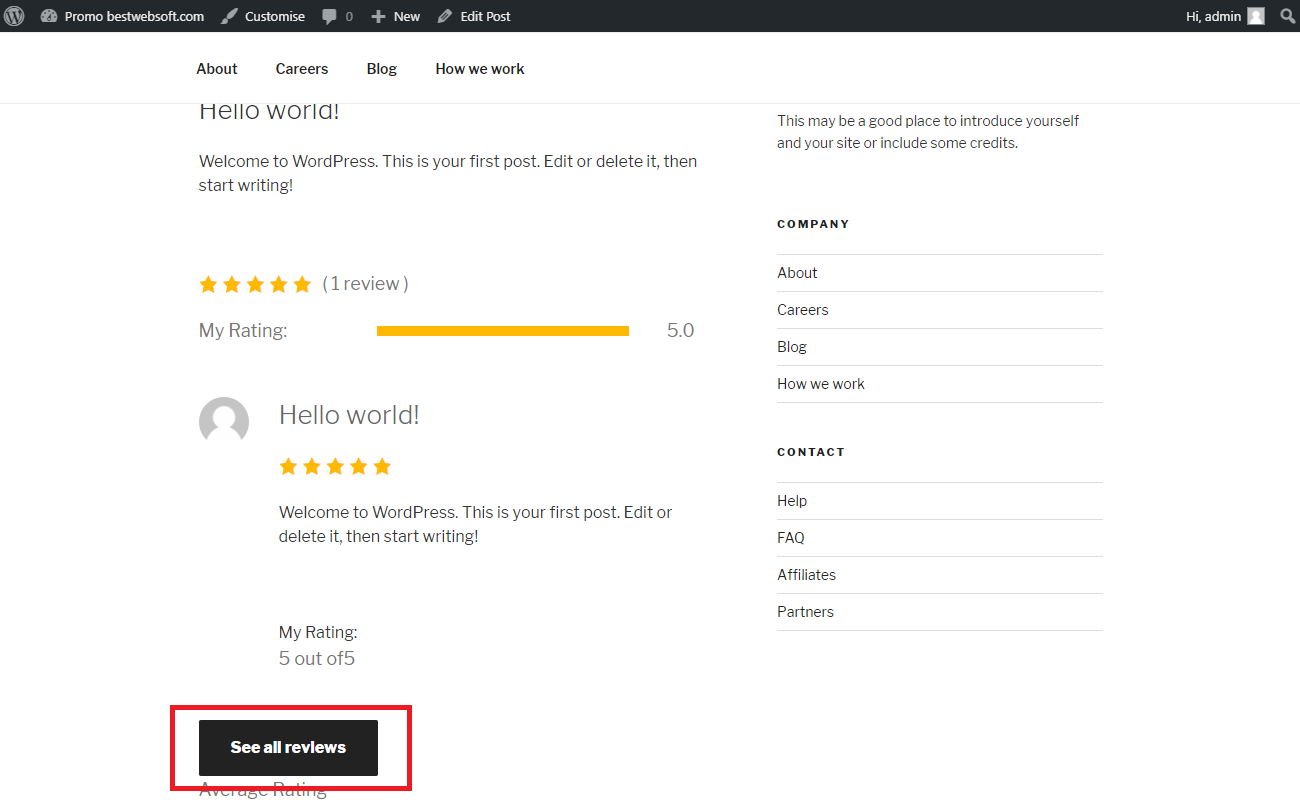
3.1.8.3. Use the “Reviews per load” option to set the number of reviews that would be displayed by pressing the “See all reviews” button.

3.1.8.4. The “See all reviews” button on a page may look as follows.
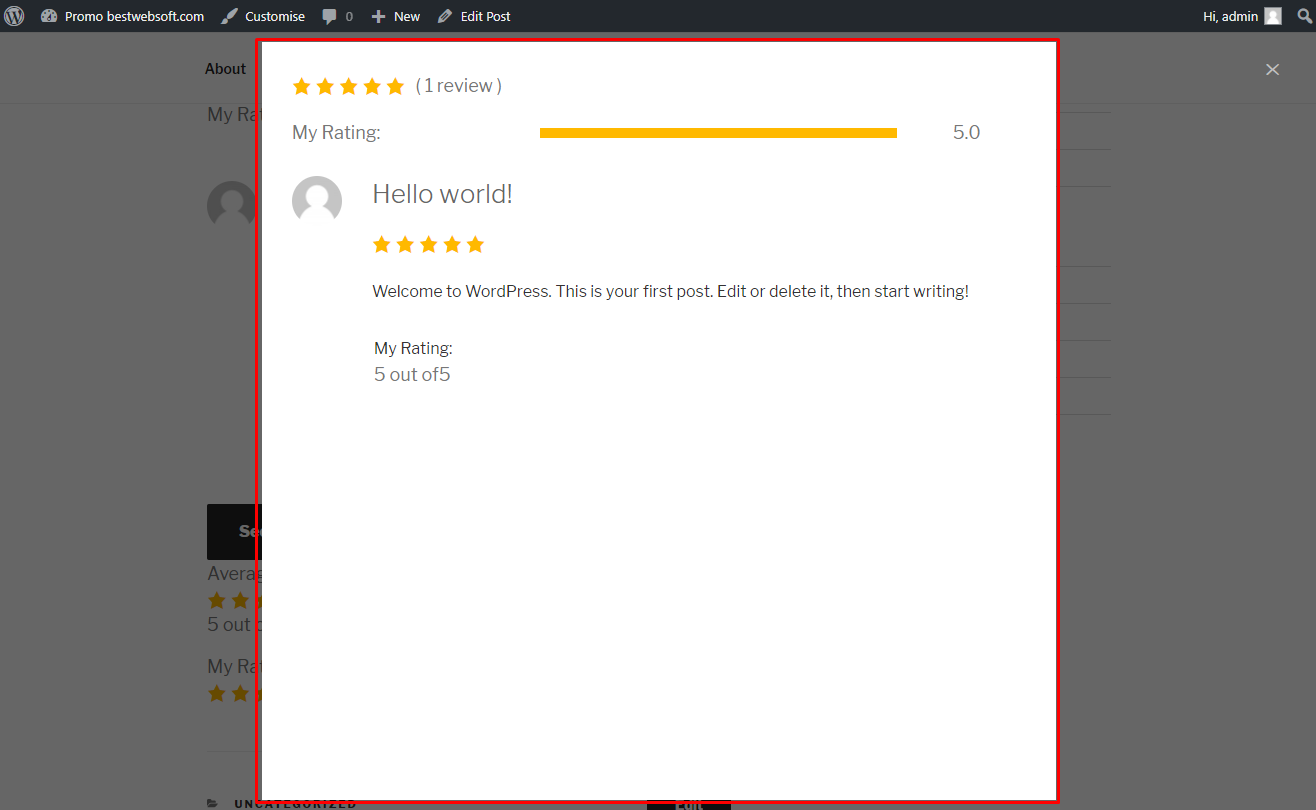
3.1.8.5. The displaying result of all reviews on a page may look as follows.
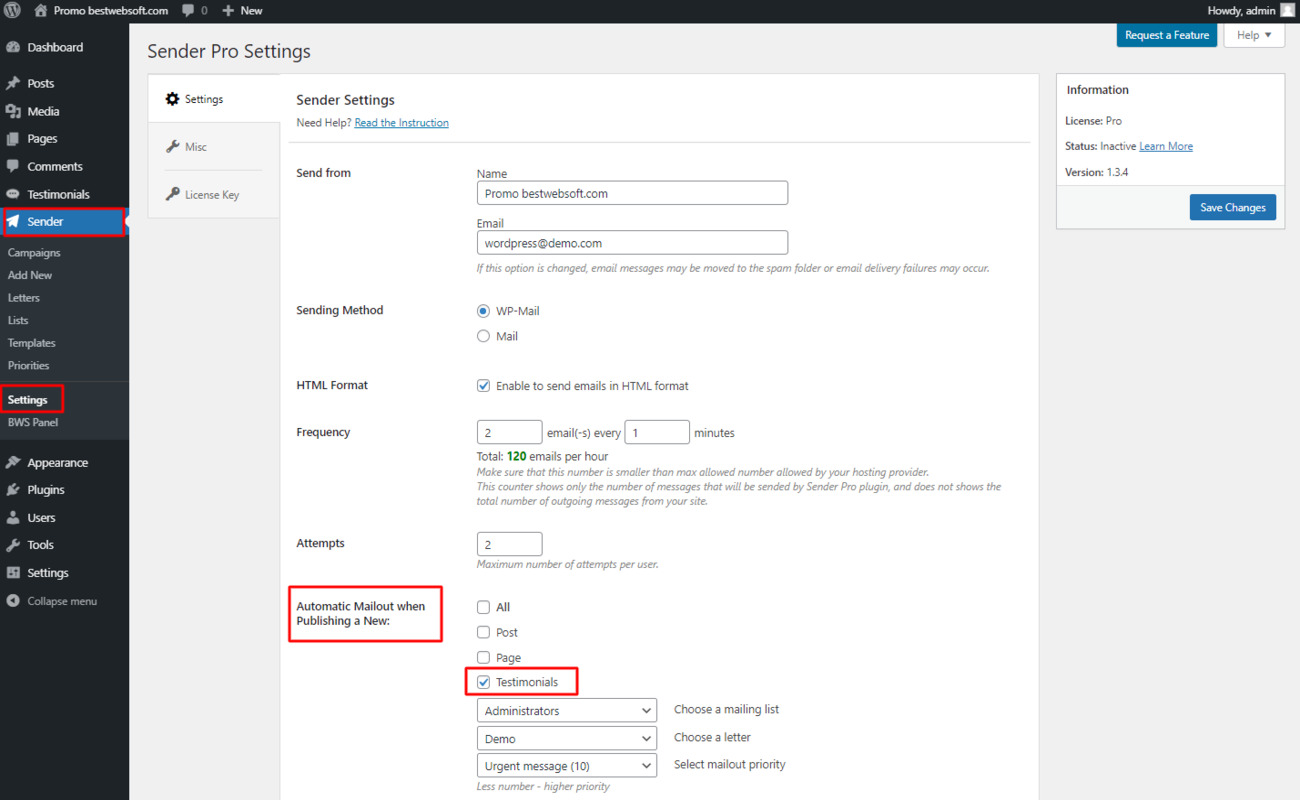
3.1.9. Sender
Testimonials by BestWebSoft is compatible with “Sender by BestWebSoft” plugin. Download the plugin by clicking the “Install Now” link.
You can download the Sender plugin here
https://bestwebsoft.com/products/wordpress/plugins/sender/

3.1.9.1. After a successful download and activation of the “Sender” plugin enable Sender for “Testimonials” for automatic mailing when a new testimonials is posted.

3.1.9.2. Open the “Sender“ > “Settings“ page, select the “Automatic Mailout when Publishing a New” option and enable “Testimonials”.
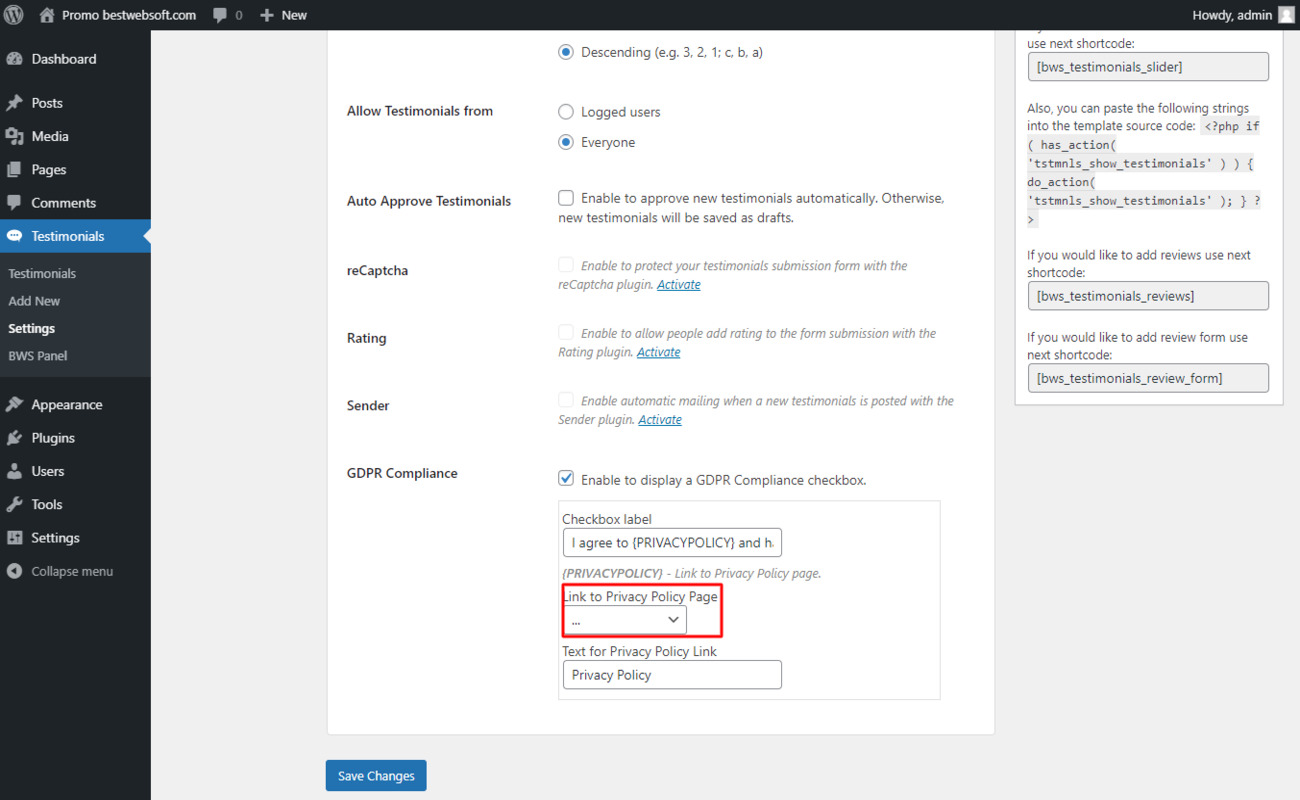
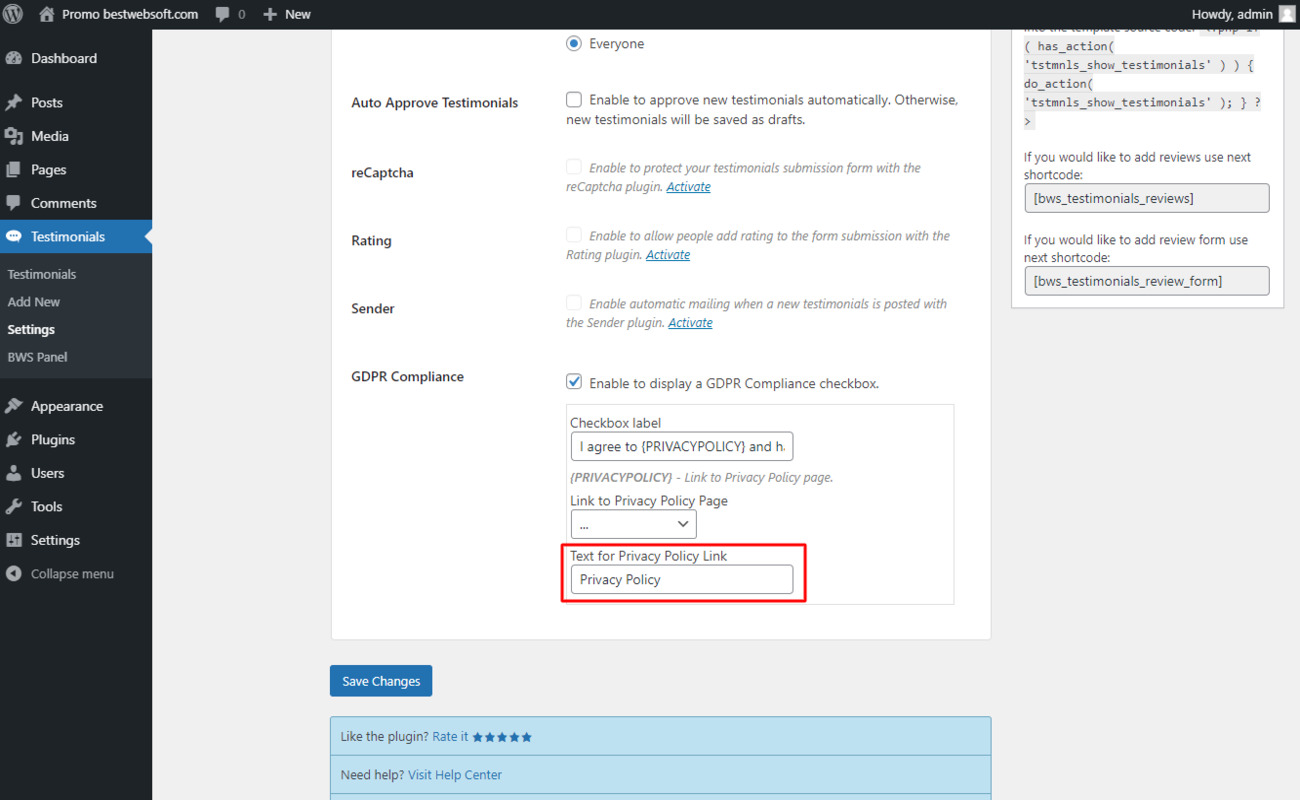
3.1.10. GDPR Compliance
Enable the “GDPR Compliance” option to display a GDPR Compliance checkbox.
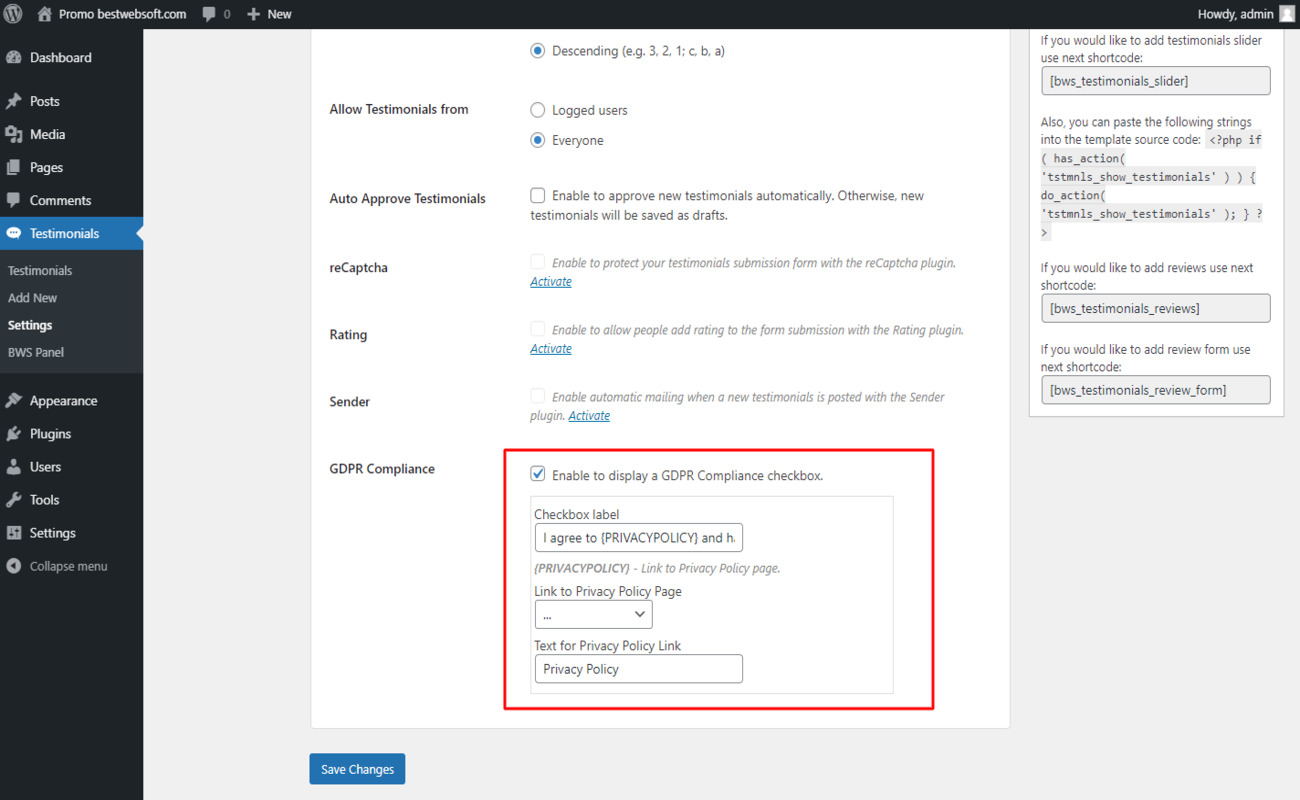
3.1.10.1. Enter the necessary text into the “Checkbox label” field.

3.1.10.2. Select the “Link to Privacy Policy Page” from the dropdown menu.
3.1.10.3. Enter the “Text for Privacy Policy” value into the appropriate field.
3.1.10.4. The result of “GDPR Compliance” customization on a page may look as follows.

3.2. Slider Settings
Use the options of the “Slider Settings” tab to customize the appearance of the testimonials slider.
3.2.1. Items in Slide
Use the “Items in Slide” option to set the number of elements in the slider.
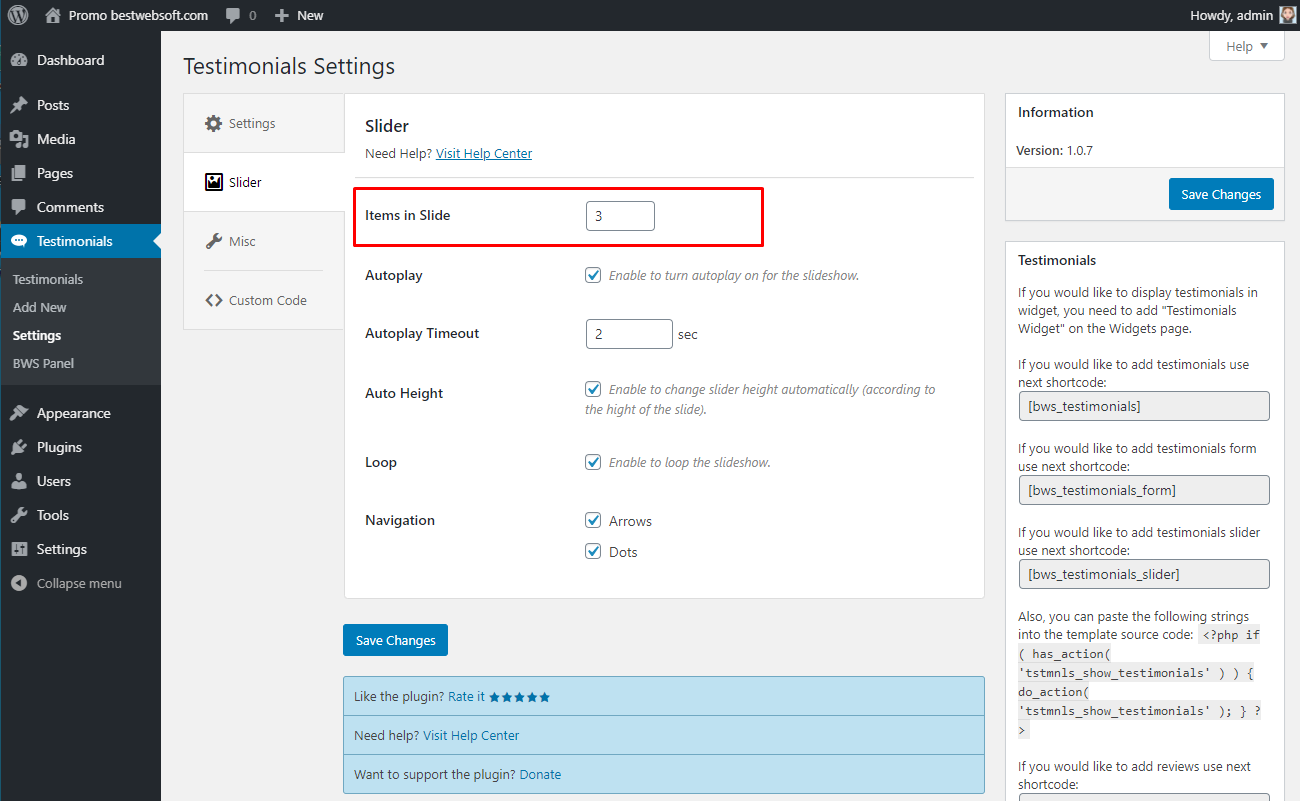
3.2.1.1. The result of the slider display may look on a page as follows.

3.2.2. Autoplay
Enable the “Autoplay” option to turn on the automatic slide change.

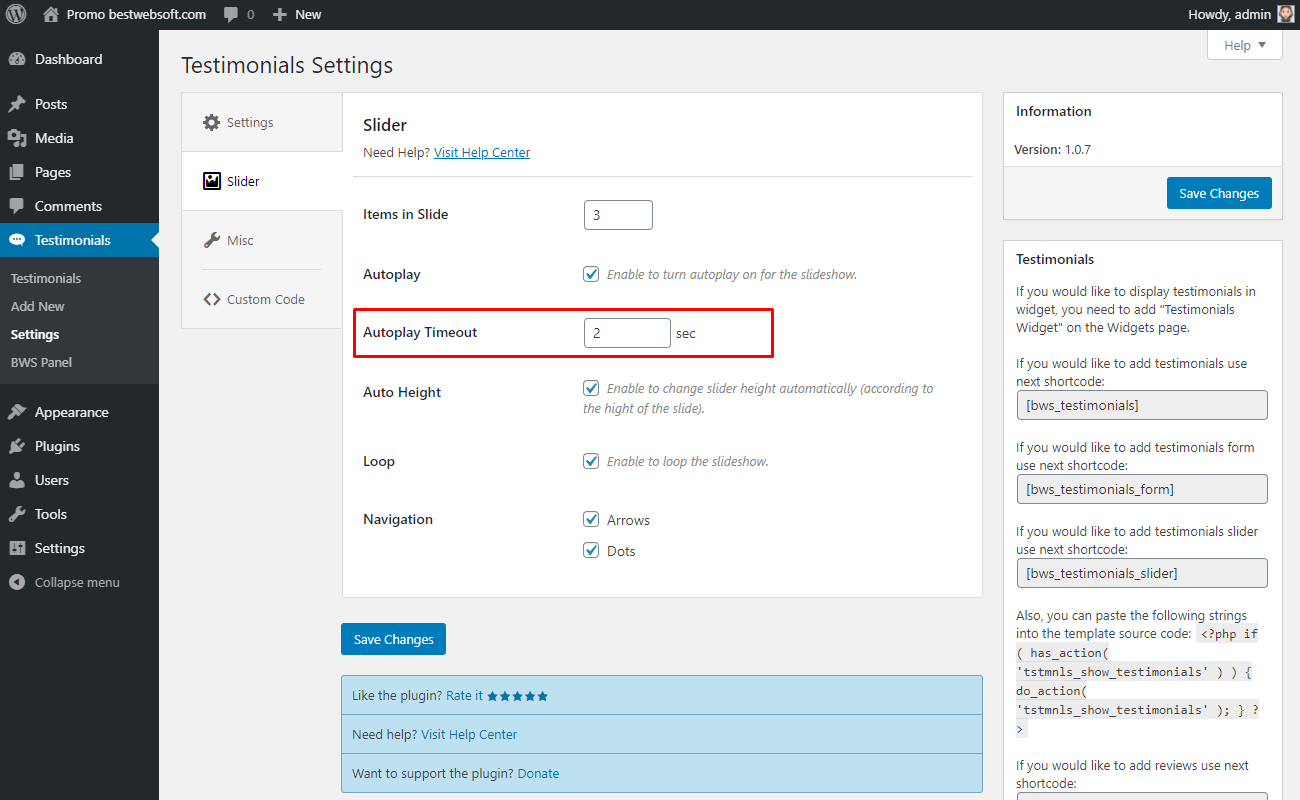
3.2.3. Autoplay Timeout
Use the “Autoplay Timeout” option to set the appropriate duration of autoplay.
3.2.4. Auto Height
Enable the “Auto Height” option to set the automatic slider height change (according to the height of the slide).

3.2.5. Loop
Enable the “Loop” option to set the cyclical slideshow.

3.2.6. Navigation
Use the “Navigation” option to enable navigation elements in the slider.

3.2.6.1. Enable the “Arrows” to set the arrows as a next/previous slider switch.
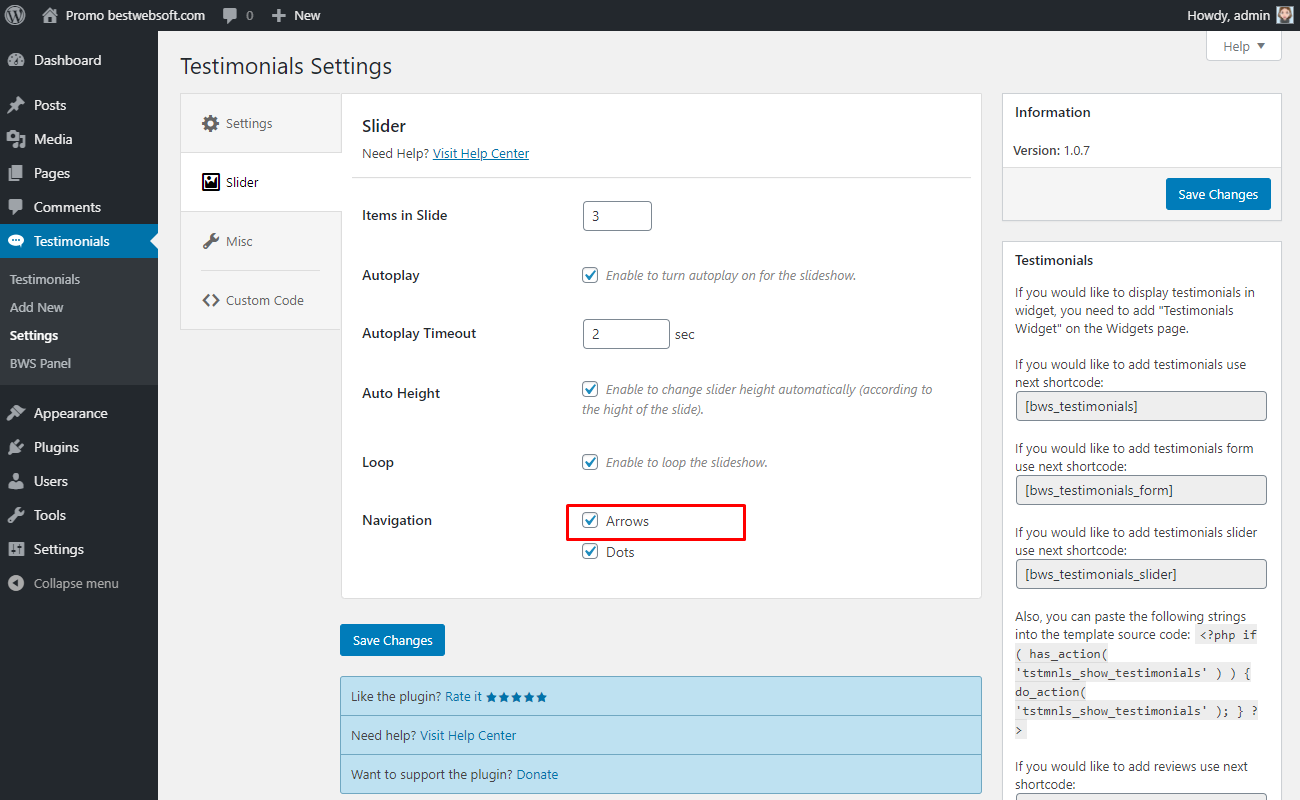
3.2.6.2. Slider with arrows navigation may look on a page as follows.

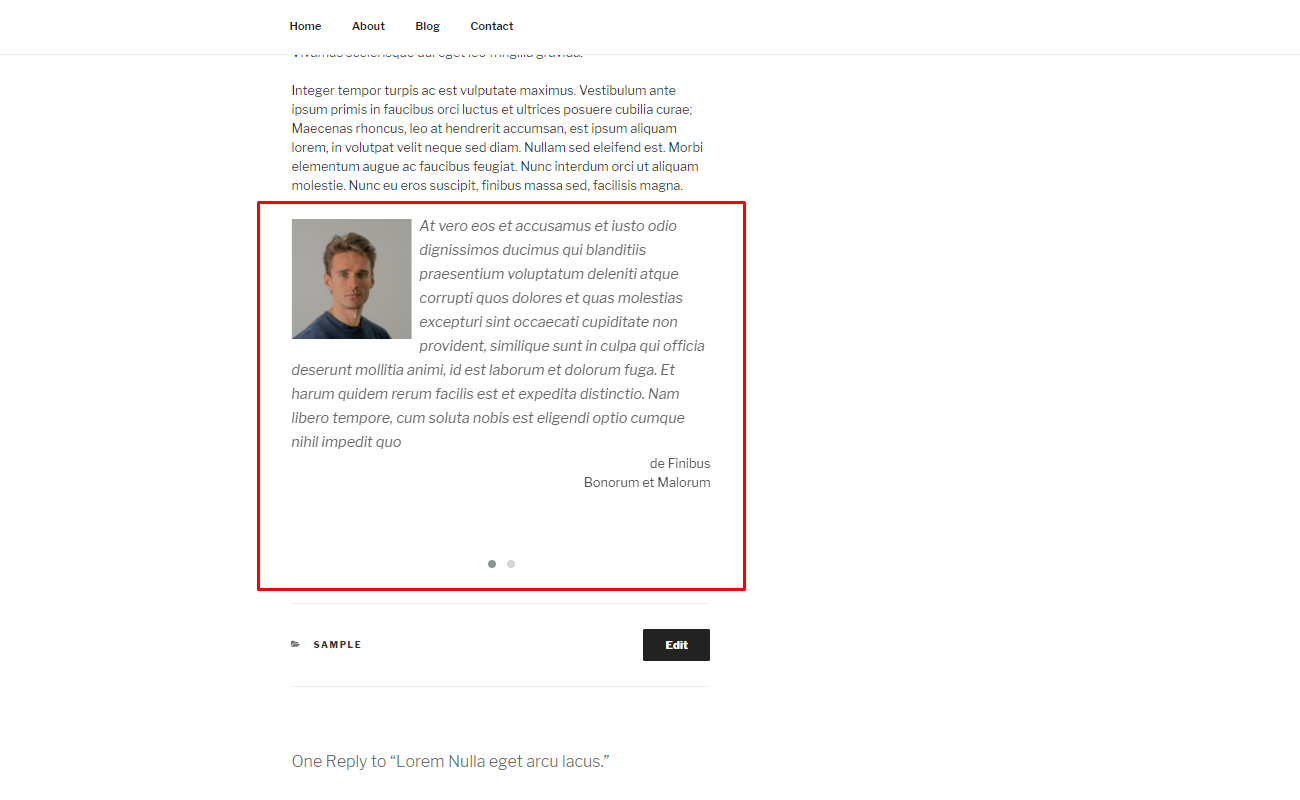
3.2.6.3. Enable the “Dots” to set the dots as a slider number index.

3.2.6.4. Slider with dots navigation may look on a page as follows.
3.3. Miscellaneous Settings
Use the options of the “Miscellaneous Settings” tab to make the settings regarding the track usage and default settings.
3.3.1. Track Usage
Enable the “Track Usage” option to allow tracking plugin usage anonymously.

3.3.2. Default Settings
Click the “Restore settings” button to reset all the settings made previously and revert them to the default ones.

3.3.2.1. Click “Yes, restore all settings” button to confirm the procedure.

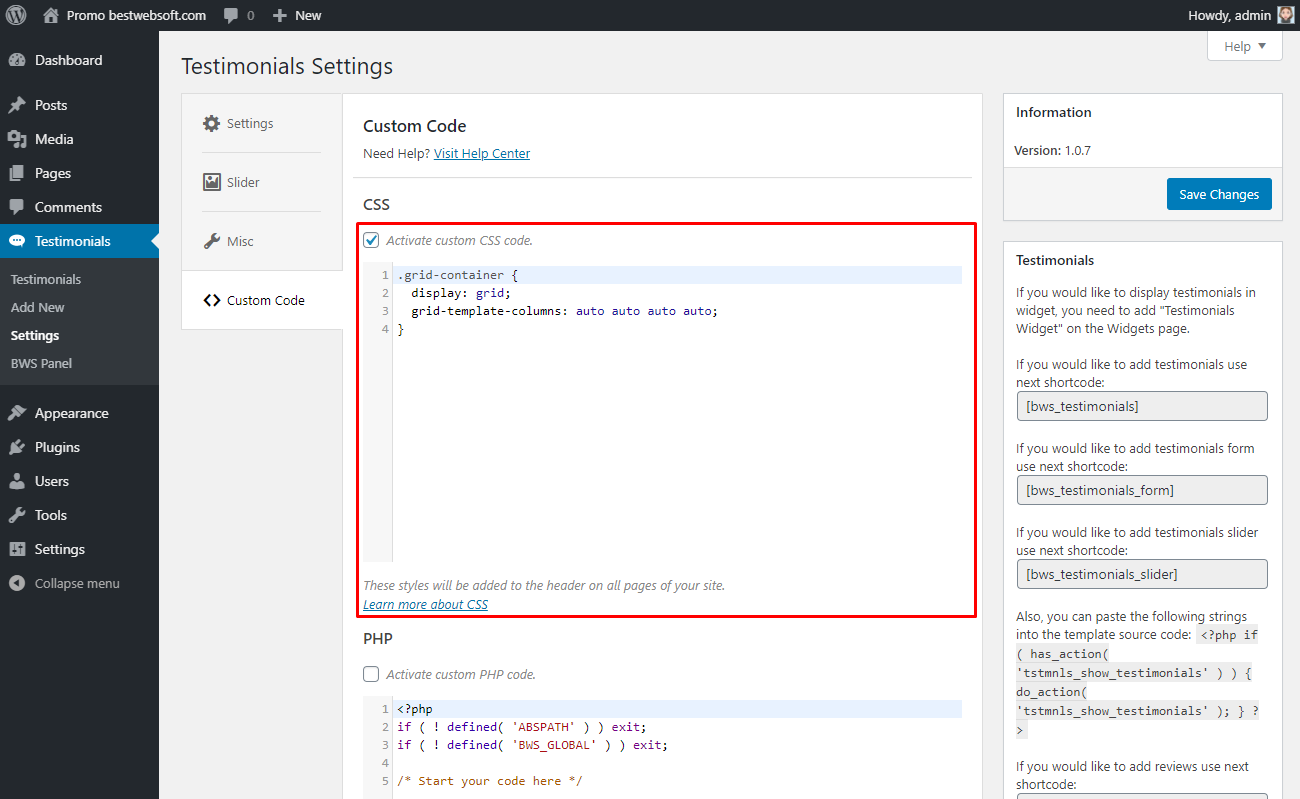
3.4. Custom Code
Use the “Custom code” tab to insert a CSS, PHP, or JavaScript code. To activate the inserted code, enable the “Activate custom … code” option, and save changes.
4. Testimonials
Use the “Testimonials” page to make changes in the testimonials, to delete the testimonial, or to do the search.
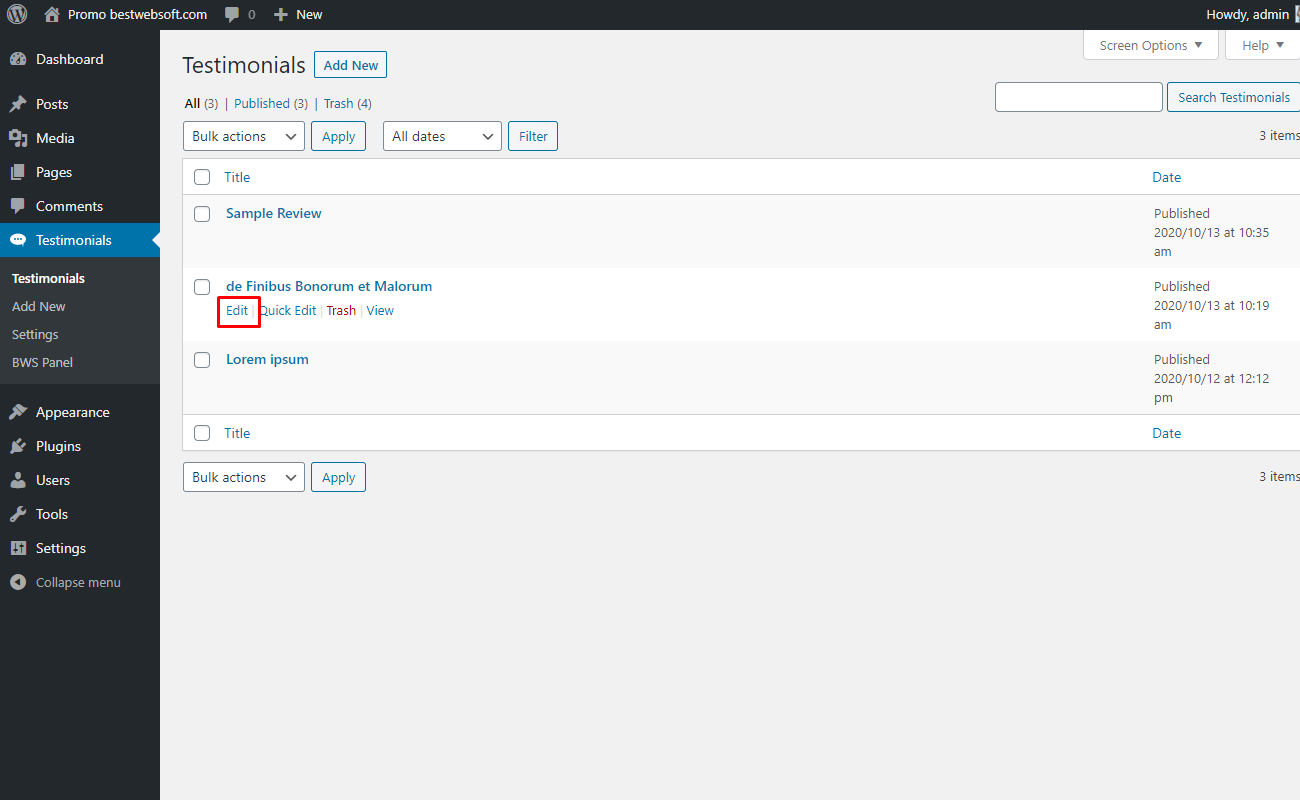
4.1. Edit Testimonial
Hover the cursor on the preferred testimonial and click the “Edit” button to do the proper editions.
4.2. Delete Testimonial
Click the “Trash” button to move the selected testimonial to the trash.

4.3. Search
Enter the title of the testimonial and click the “Search Testimonials” button to do the search.

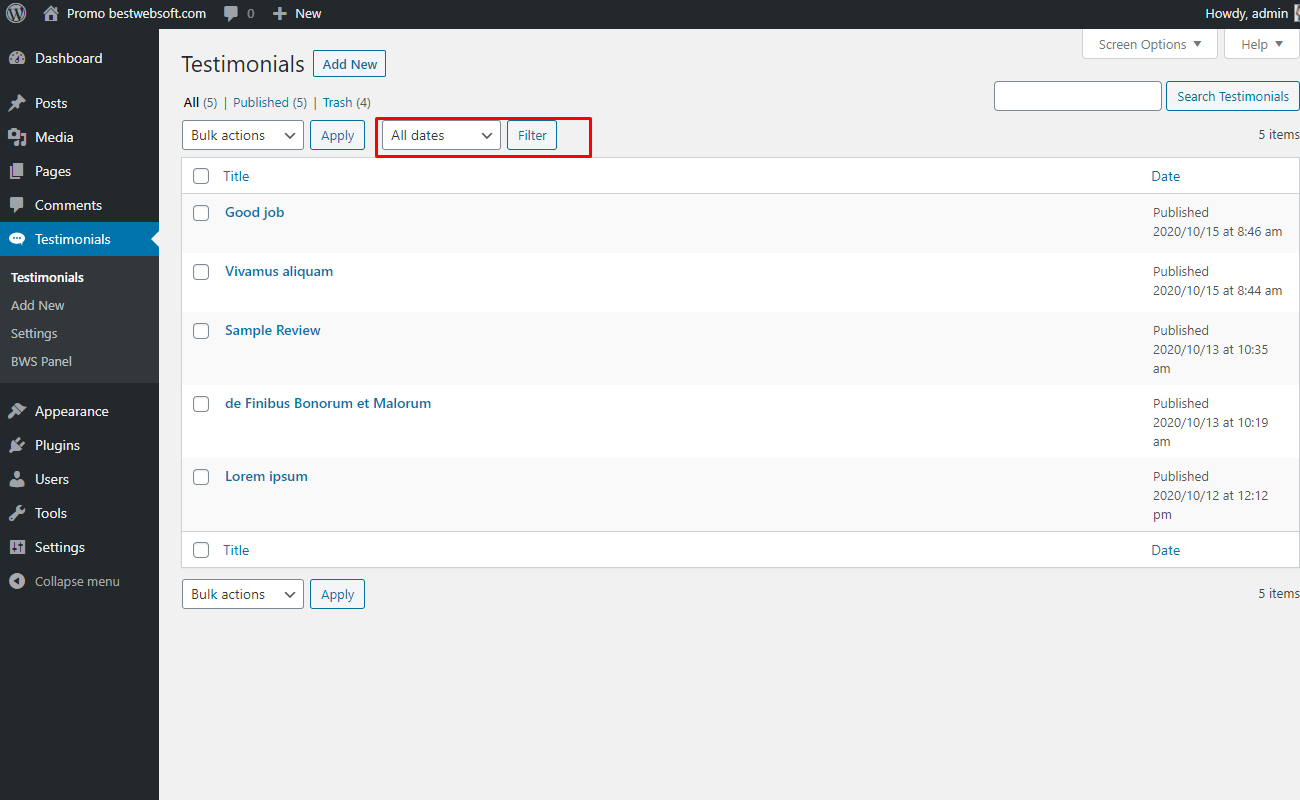
4.4. Filter
Use “Filter” to sort all the testimonials by different parameters.
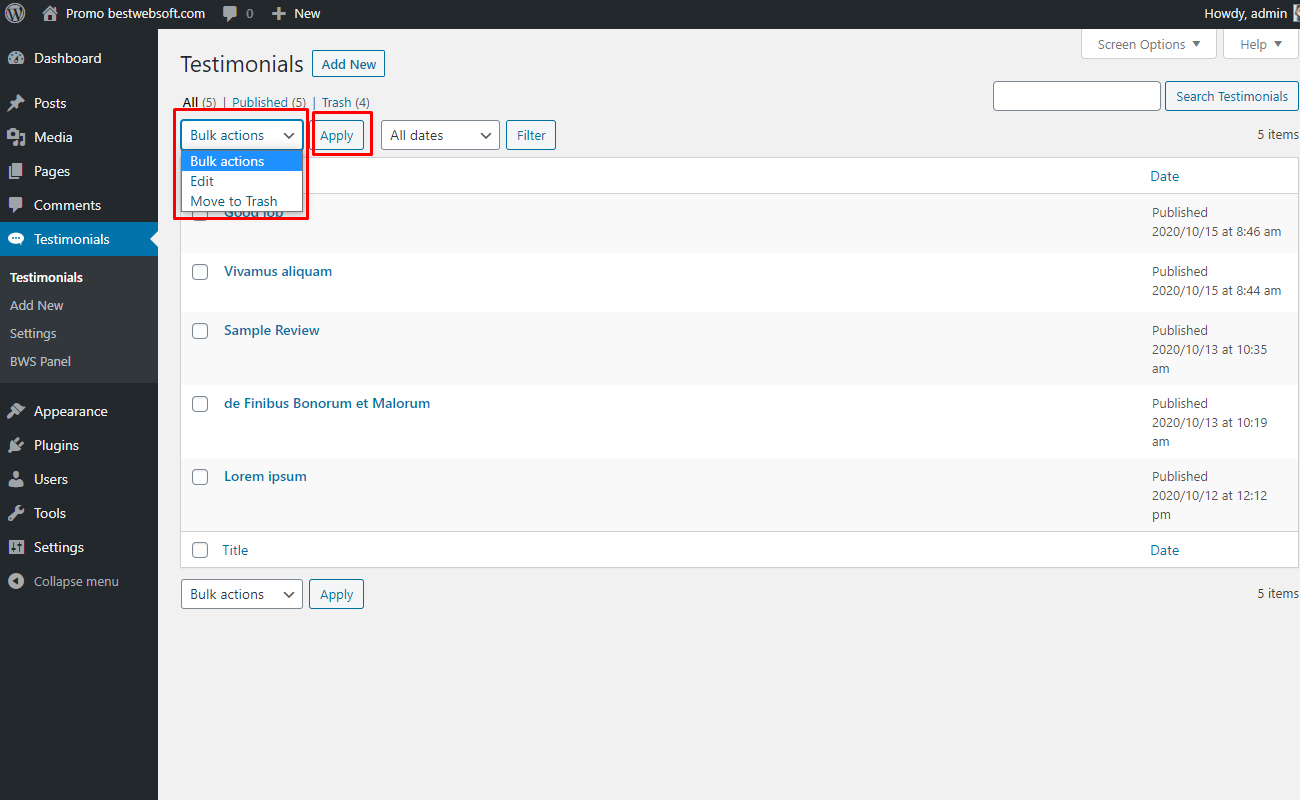
4.5. Bulk Actions
Use the “Bulk Actions” to, “Edit” or “Move to trash” to multiple testimonials.
5. Shortcode
Use the shortcodes to add Testimonials to your posts or pages. Available shortcodes are displayed on the “Testimonials” > “Settings” page.

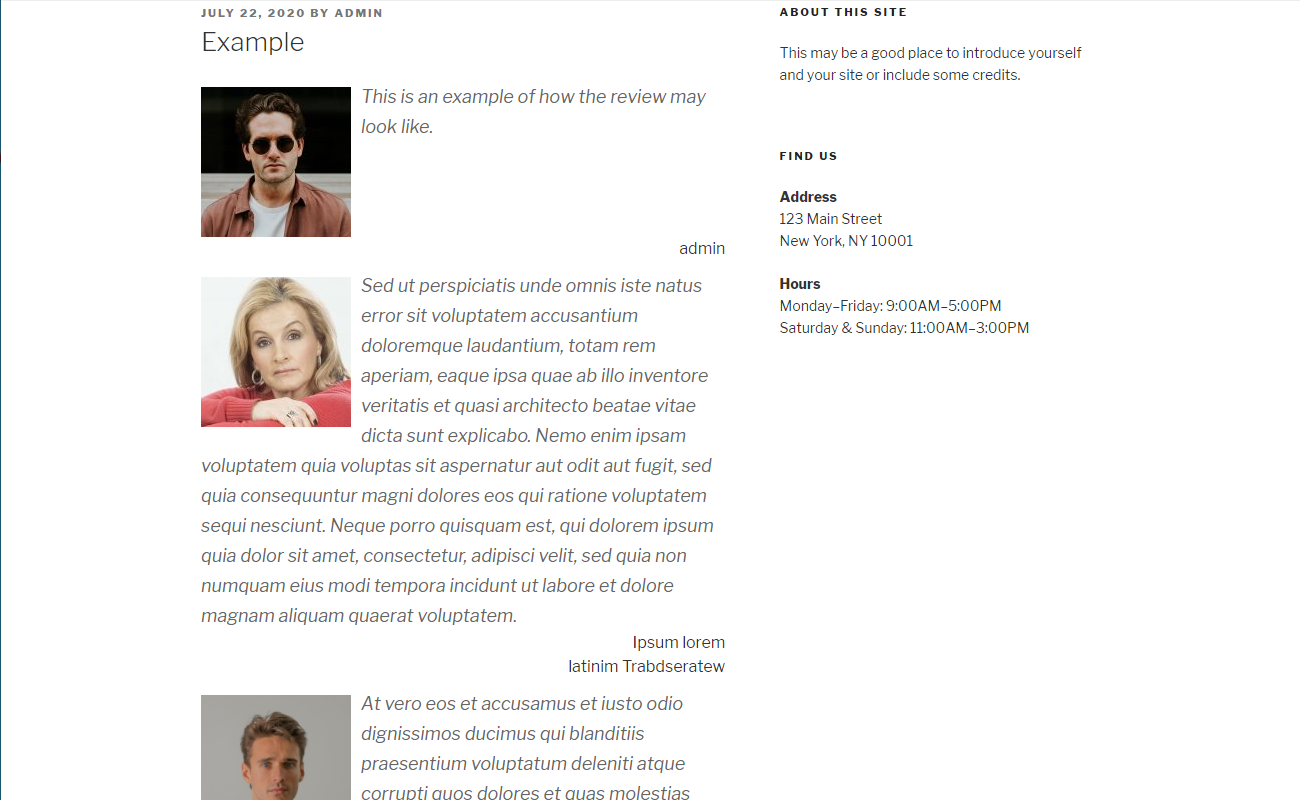
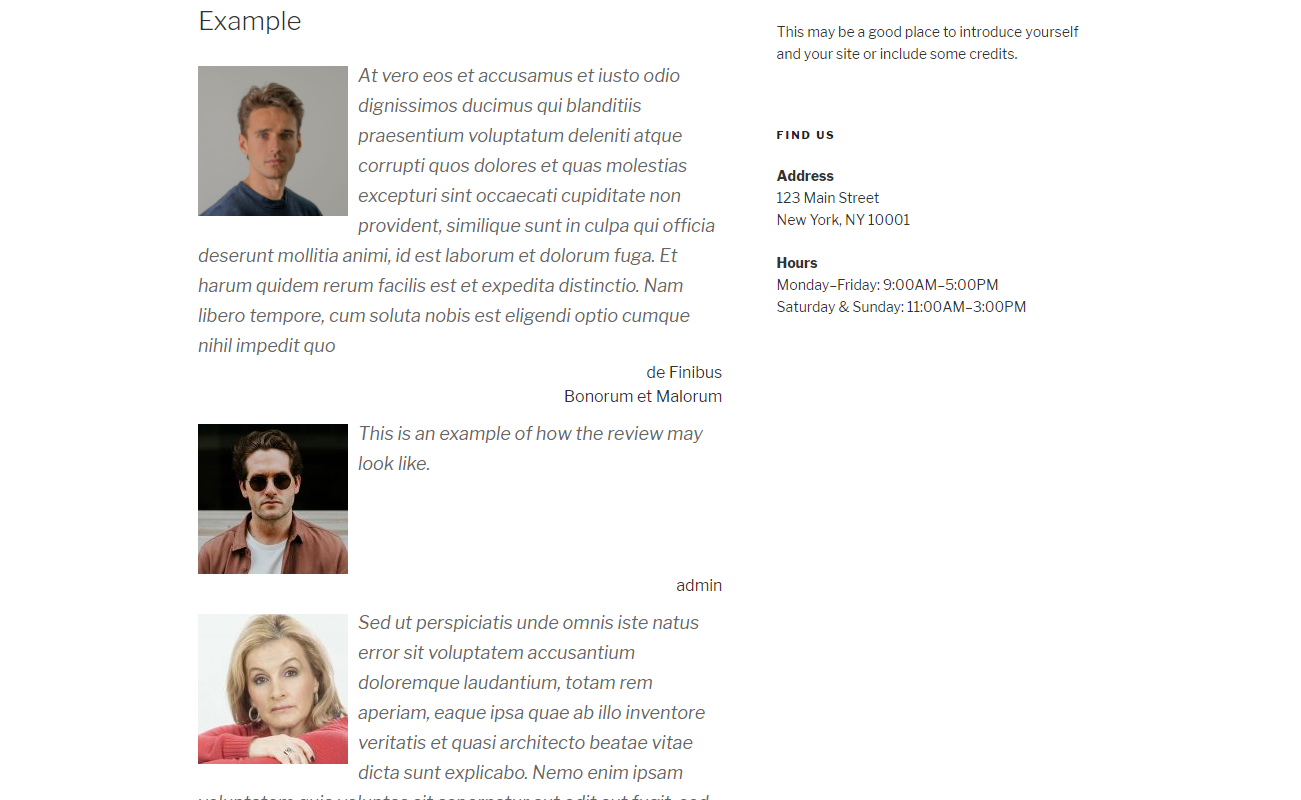
5.1. Testimonials Shortcode
To display testimonials, copy the necessary shortcode, create a new post or page or open the existing in the “Edit” mode and insert copied earlier shortcode to the necessary place.
5.1.1. The result of adding testimonials by using shortcode may look on a page as follows.

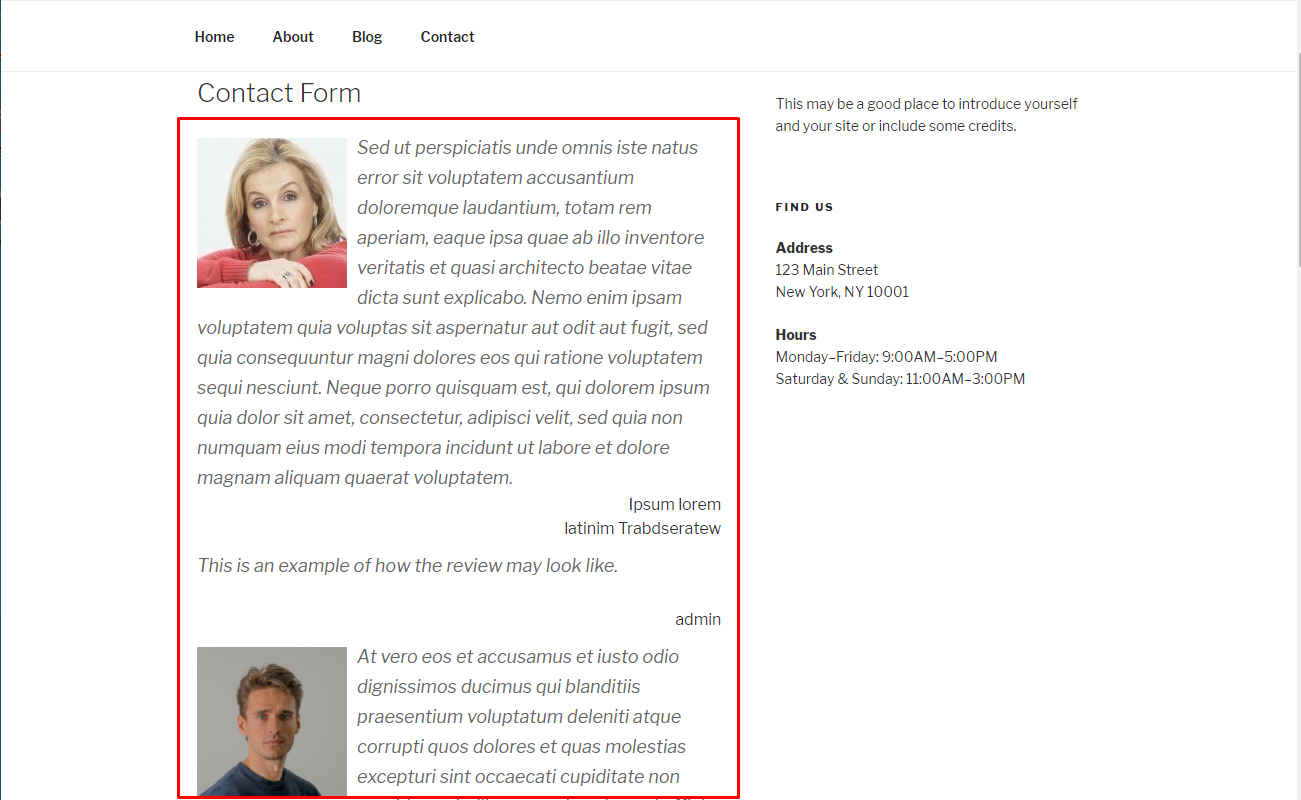
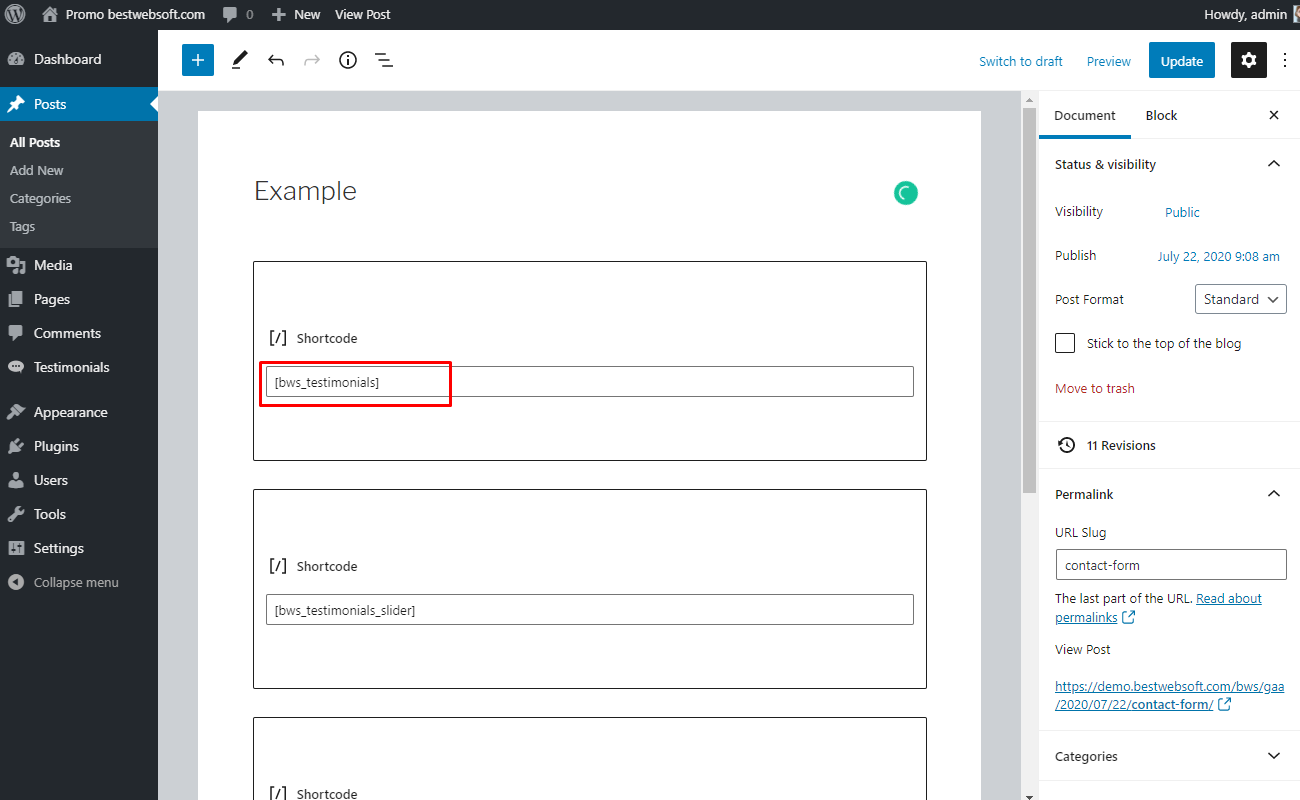
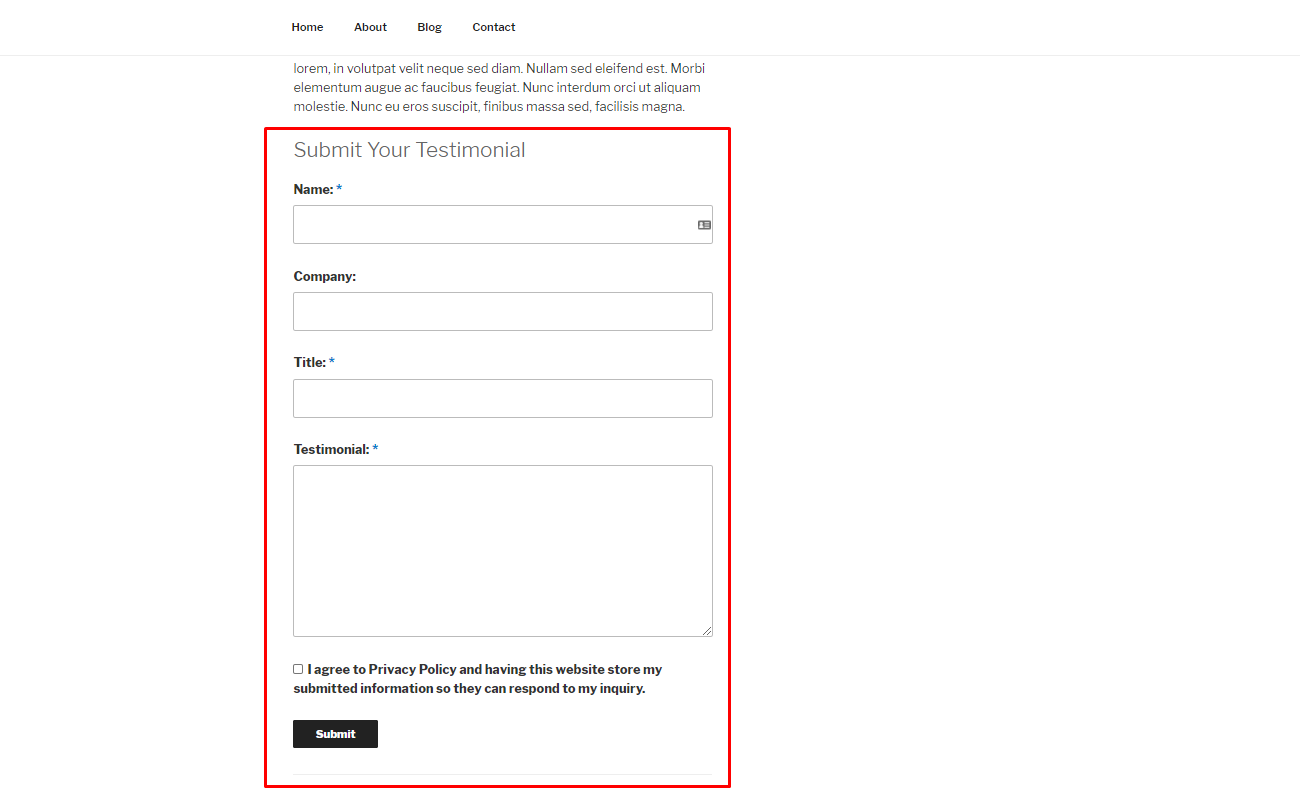
5.2. Testimonials Form Shortcode
To display Testimonials Form, copy the necessary shortcode, create a new post or page or open the existing in the “Edit” mode and insert copied earlier shortcode to the necessary place.

5.2.1. The result of adding testimonials form by using shortcode may look on a page as follows.
5.3. Testimonials Slider Shortcode
To display Testimonials Slider, copy the necessary shortcode, create a new post or page or open the existing in the “Edit” mode and insert copied earlier shortcode to the necessary place.
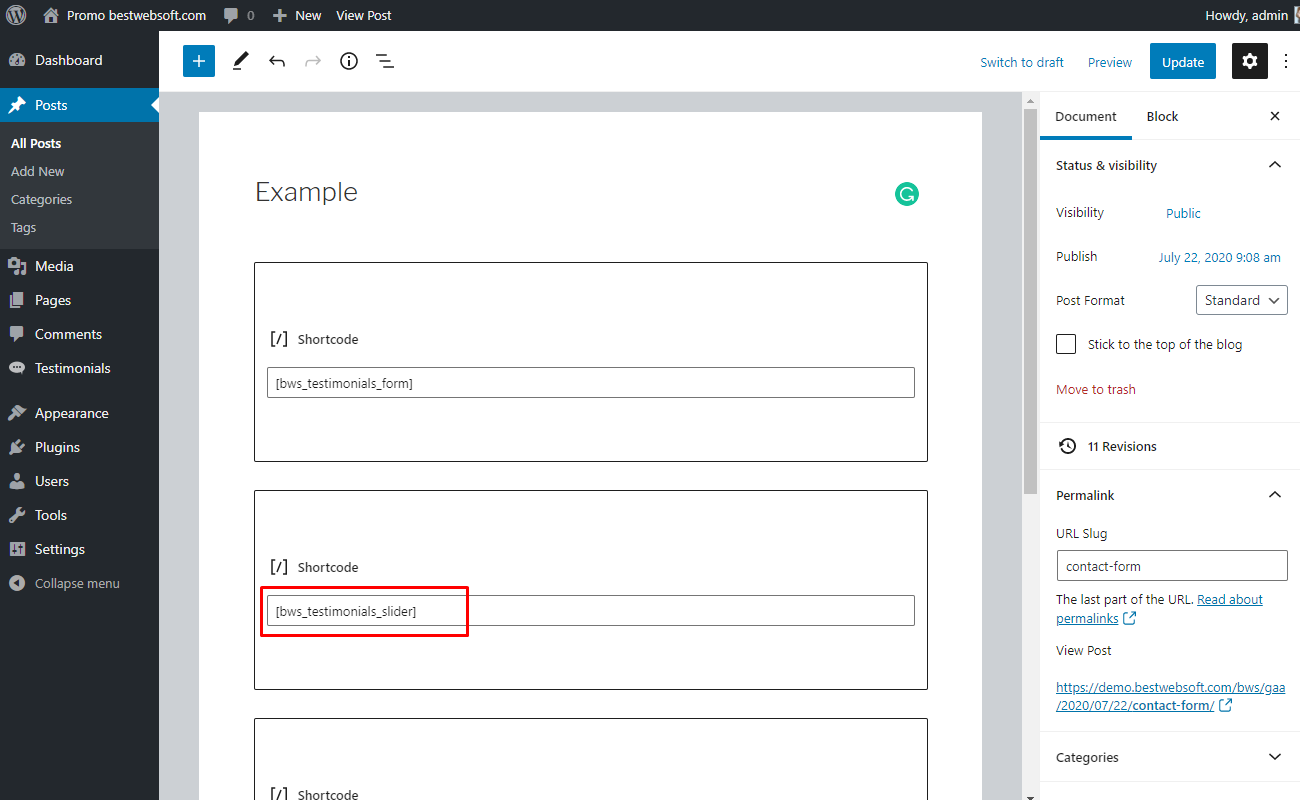
5.3.1. The result of adding testimonials slider using shortcode may look on a page as follows.

5.4. Reviews Shortcode
To display reviews, copy the necessary shortcode, create a new post or page or open the existing in the “Edit” mode and insert copied earlier shortcode to the necessary place.

5.4.1. The result of displaying the reviews using the shortcodes may look on a page as follows.

5.5. Review Form Shortcode
To display Review Form, copy the necessary shortcode, create a new post or page or open the existing in the “Edit” mode and insert copied earlier shortcode to the necessary place.

5.5.1. The result of displaying the review form by shortcode may look on a page as follows.

Thank you!
Help & Support
Visit our Help Center if you have any questions — https://support.bestwebsoft.com/
Services
We provide additional services such as WordPress themes & plugins development,
graphic design, custom programming.
Contact us now to get a free quote — https://bestwebsoft.com/contacts/

