Renty is a Car Rental & Booking WordPress Theme created for people who’d like to have (or improve) their rental sites. The thing is, it is just a well-looking thematic appearance which has no functionality. If you want to create a full-fledged car rental website, it is necessary to install Car Rental plugin additionally. It integrates with Renty theme for WordPress and adds all the necessary functionality for renting cars.
So how to create the look similar to the Demo of the theme and make it work?
Step 1: Install the theme and the plugin.
Step 2: Configure the slider.
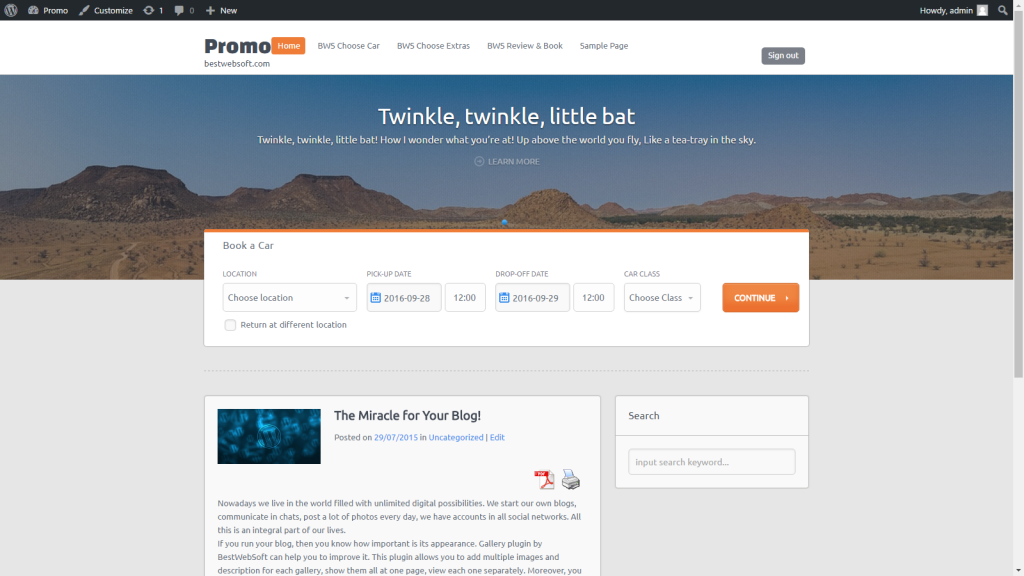
Firstly, enable the slider in theme settings. After that, go to the plugin settings page and add the slides you’d like to be showed up. Add title and description if necessary. Don’t forget to save changes. Here is a result:

Step 3: Create pages.
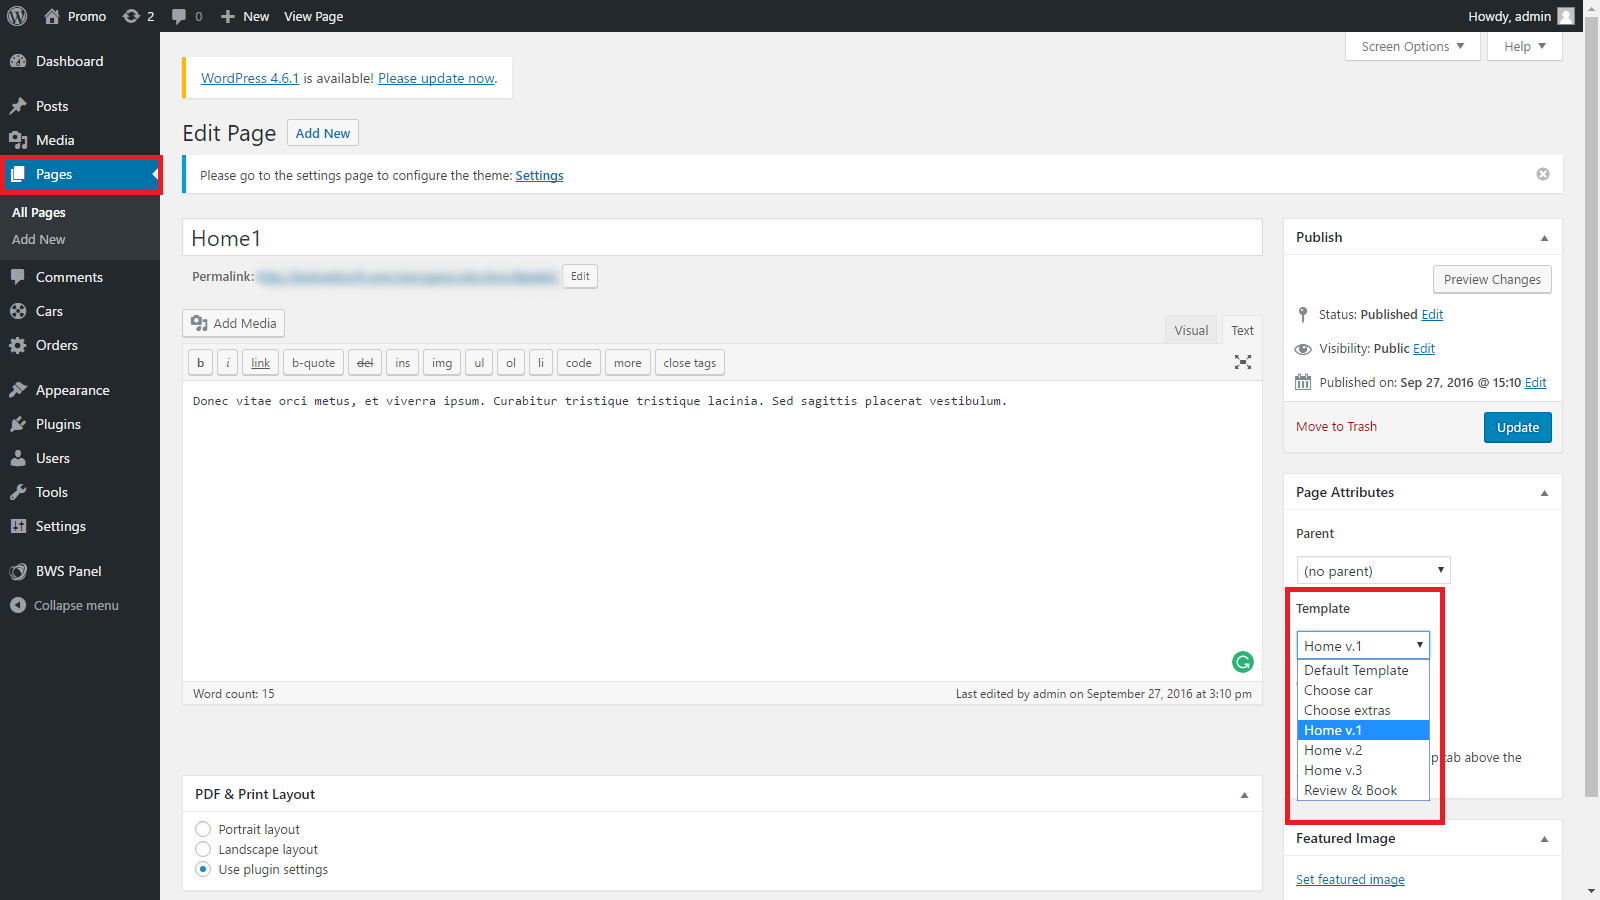
Use page templates provided by the theme:

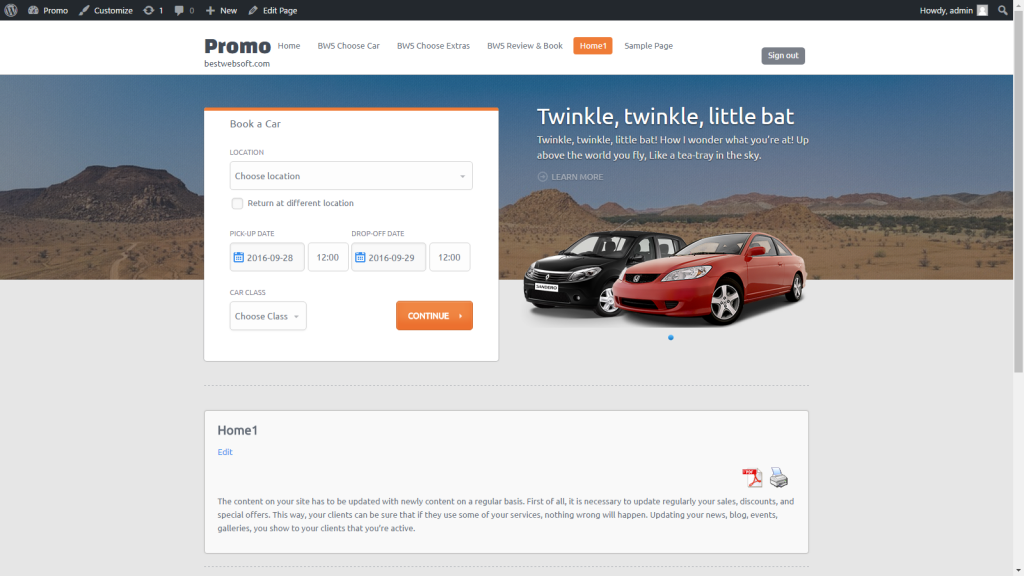
As you can see, “Home v.1” template is taken as an example. Here how it looks:

Create as many pages as you need.
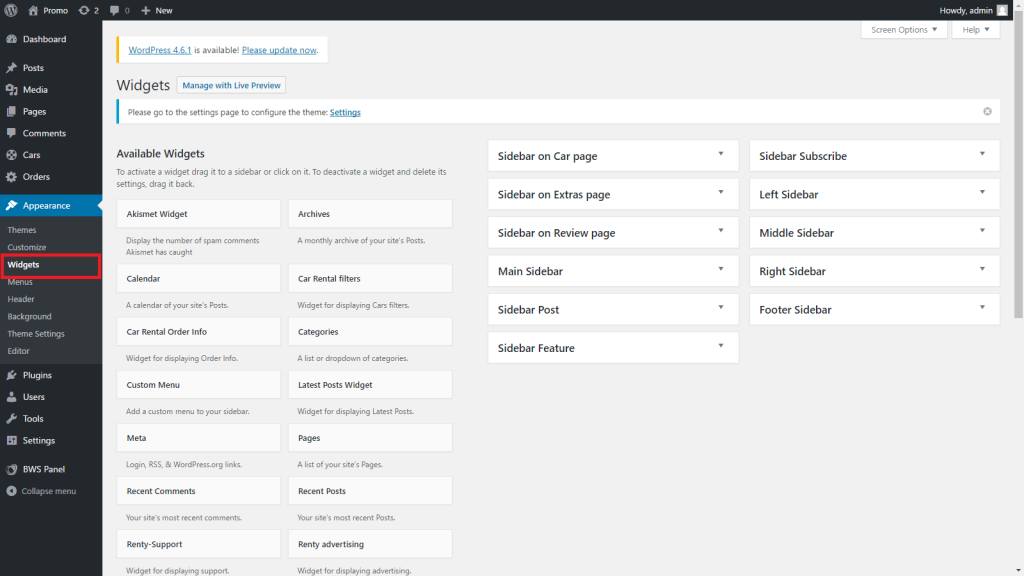
Step 4: Configure Widgets.
Renty theme provides 8 widget areas for displaying them in different parts of your website. Configure them in accordance with your requirements.

Step 5: Add Cars.
Go to Dashboard > Cars, and add as many as you need.

You can include the following info in addition to the main one like Title, Content, and Featured Image:
- Manufacturers
- Car Classes
- Vehicle type
- Extras
- Location
- Number of passengers
- Luggage quantity
- Transmission
- Air conditioning
- Average consumption
- Price per hour
That’s all, 5 steps for creating a full-fledged car rental website which is ready-to-use. Complete them now and your customers won’t be long in coming!


