
Firebase Dynamic Links API Tutorial

Shortlink
Firebase Dynamic Links API
WordPress | 5.7 * |
Shortlink | 1.5.9 * |
* When using other versions some differences are possible to occur
** Screenshots were taken from a PC
Get an API key for the Firebase API
To start your work with the “Google Firebase” service gets the API key for the Firebase API first.
1.1. Go to https://code.google.com/apis/console page and click the “Create Project ” button.

1.2. Go to the “API Library” and click the “Firebase Dynamic Links API” section.

1.3. Click the “Enable” button to activate the API library.

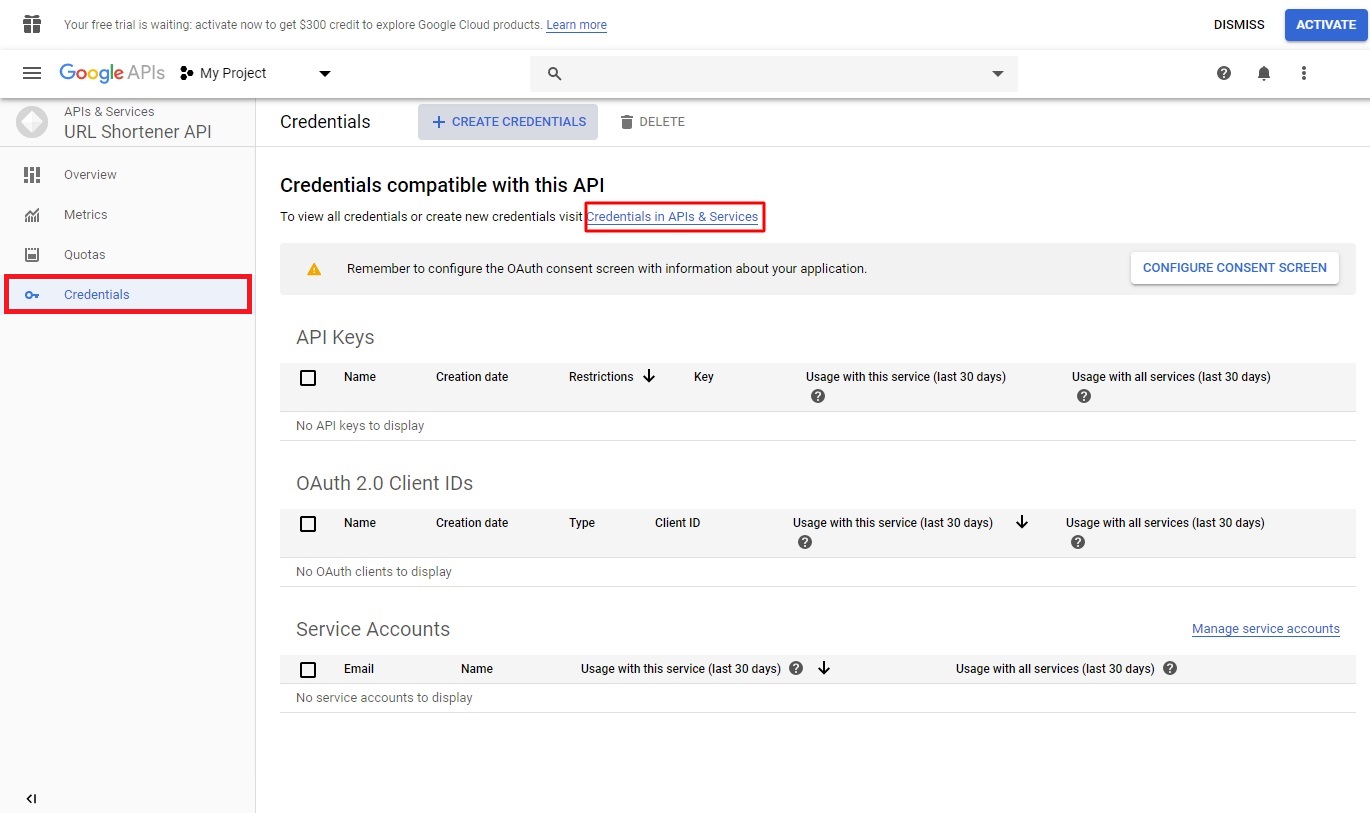
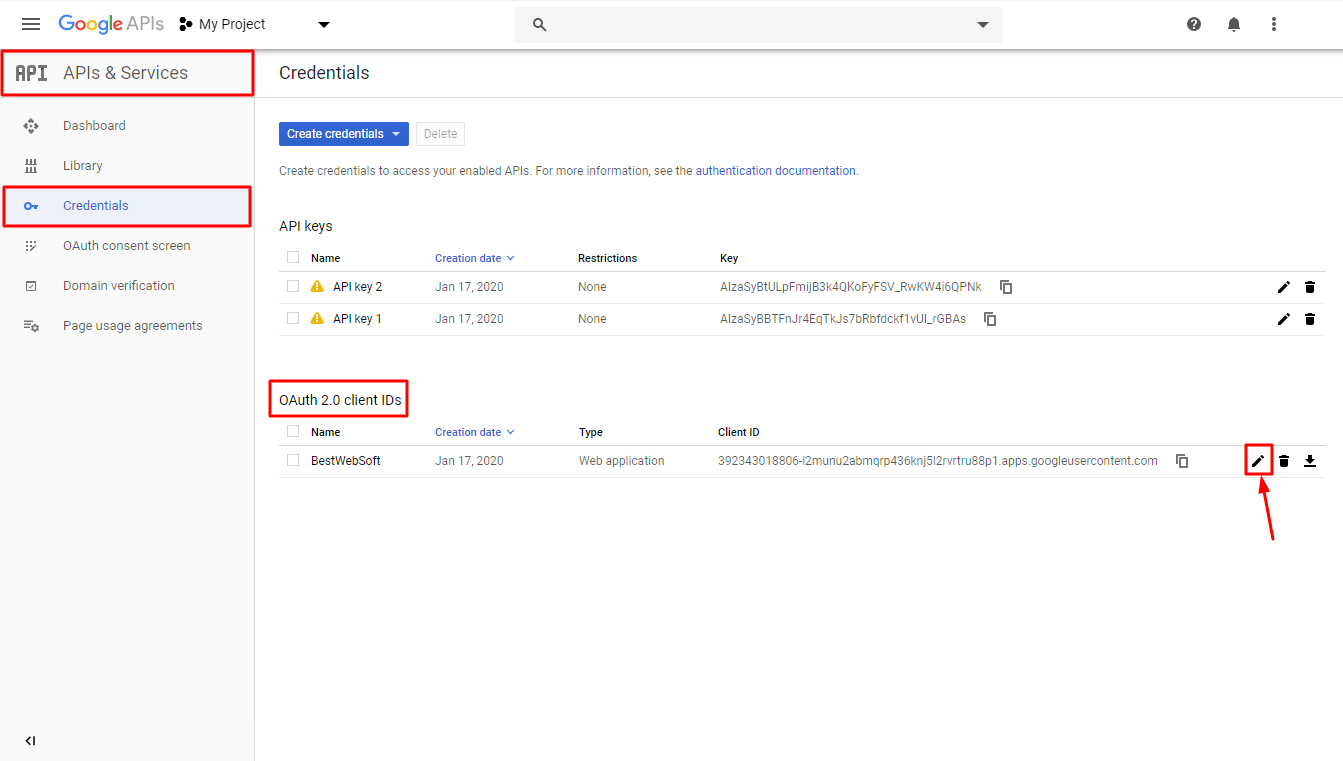
1.4. Open the “Credentials” tab and click the “Credentials in APIs&Services” link.
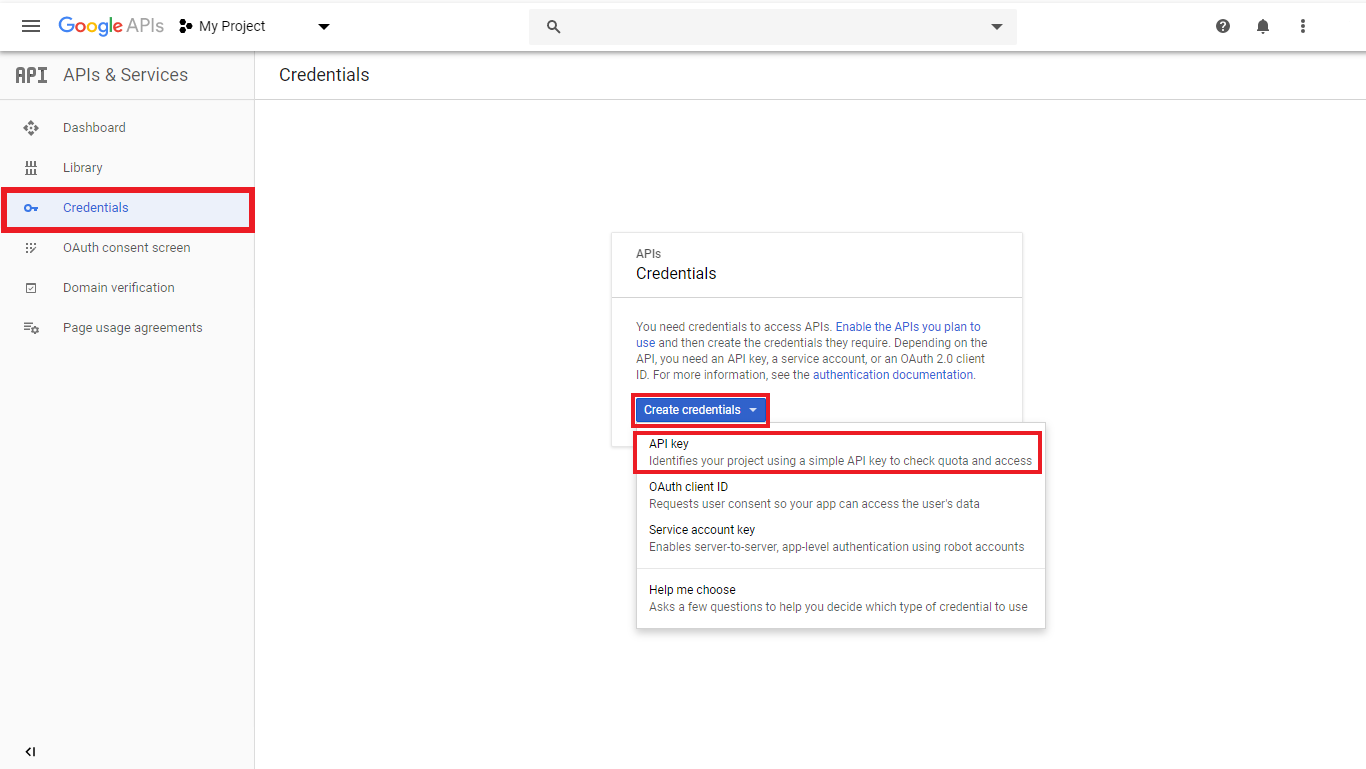
1.5. Select the “API key” item from the “Create credentials” drop-down list.
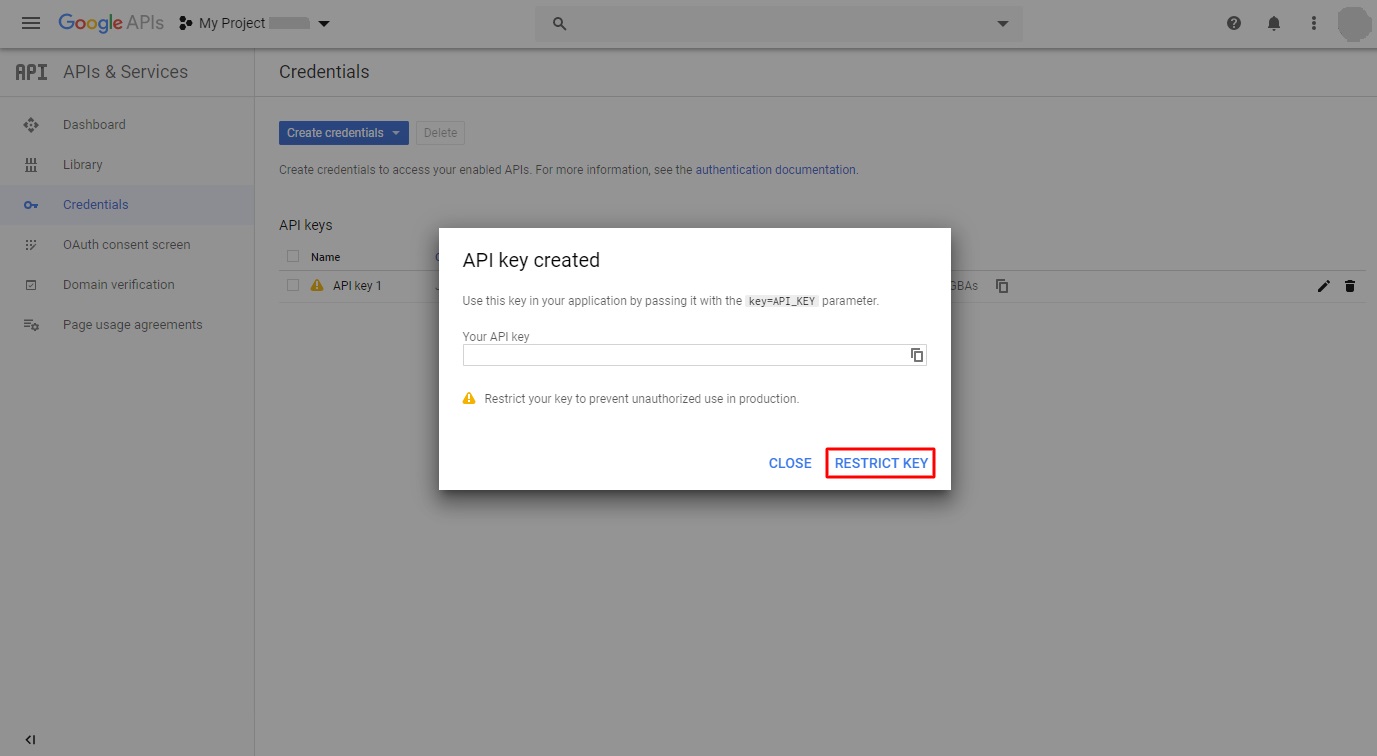
1.6. The API key for browser application will be created.

1.7. Click the “Restrict key” button to prevent unauthorized use of the key in production.
2. Create Google Client ID and Client Secret
2.1. Open the “OAuth consent screen” tab and choose the “External” user type. Click the “Create” button.

2.2. The “oAuth Consent Screen” settings page will open. Select the email address from the dropdown list, enter your product name (i.e. name of your website) and save changes.

2.3. Switch back to the “Credentials” tab. Click the “Create credentials” and select the “OAuth client ID” from the dropdown menu.

2.4. Select the “Web application” value for the application type option and click the “Create” button.

2.5. You will see your Client ID and Client Secret values in the “OAuth client” window.

2.6. Copy the obtained keys, paste them into the “Client ID” and “Client Secret” fields found on the plugin’s “Shortlink Settings” page and save changes.

3. Redirect URI
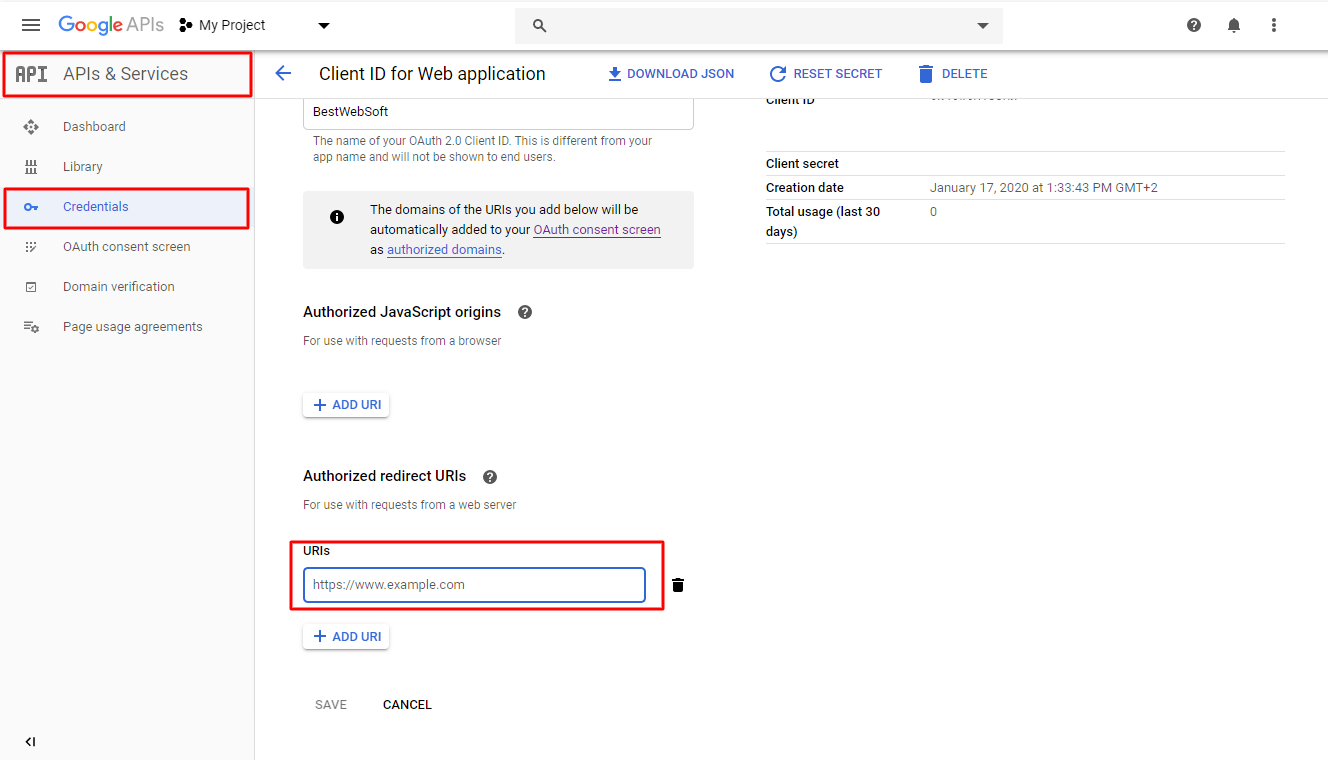
3.1. Copy the “Redirect URI” link.

3.2. Click the “Edit” icon to change the OAuth 2.0 client IDs.
3.3. Click the “Add URI” button and paste the copied “Redirect URI” into its field.
4. Get Domain Link for Your Google Project
To get Domain Link for your website, register your project by the Firebase service first.
4.1. Follow the https://console.firebase.google.com link and click the “Create a Project” button.

4.2. Fulfil the four steps of project registration and click the “Add Firebase” button.

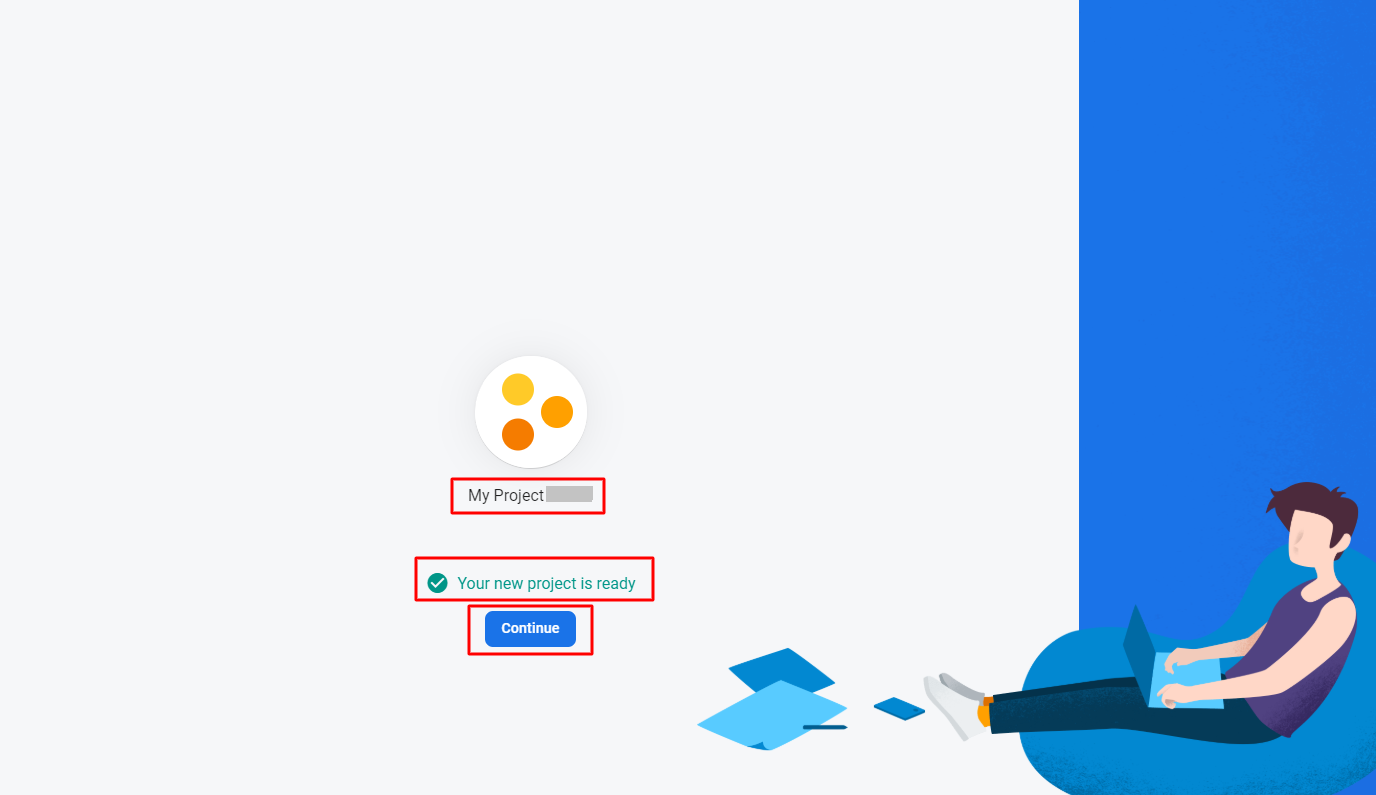
4.3. If the project is successfully created you will see the “Your new project is ready” notification.
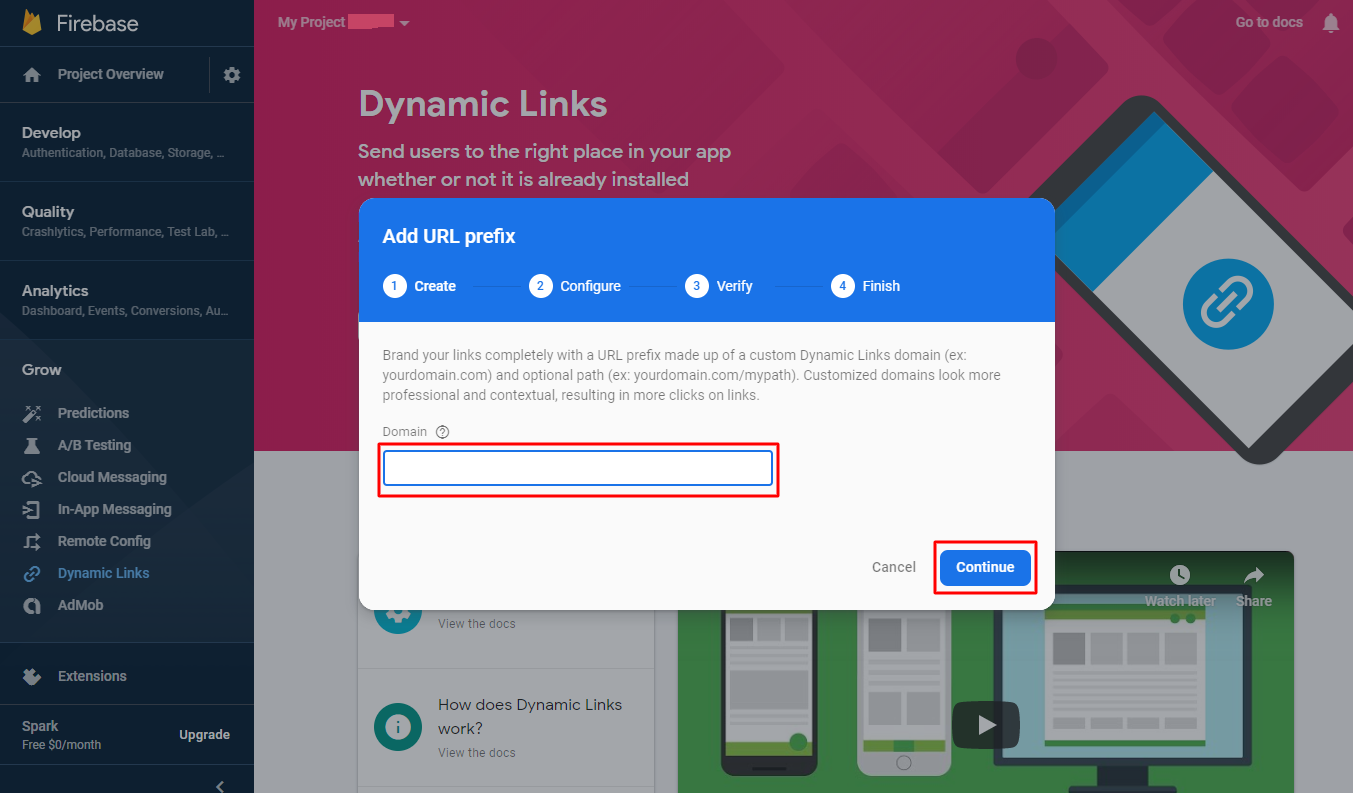
4.4. Open the “Grow” > “Dynamic Links” page and click the “Get started” button.

4.5. Enter the domain for your short links (i.e. name of your website) and click the “Continue” button.
4.6. You will see the notification, informing that your domain name “has been verified and approved for use”. Click the “Finish” button.

4.7. Copy the registered domain link, open the “Shortlink Settings” page of the plugin and paste the link into the field of the “Domain Link for your google project” option. Save changes.

Thank you!
Help & Support
Visit our Help Center if you have any questions — https://support.bestwebsoft.com/
Services
We provide additional services such as Wordpress themes & plugins development,
graphic design, custom programming.
Contact us now to get a free quote — https://bestwebsoft.com/contacts/

