If we talk about an eCommerce store powered by WordPress, the very first plugin that comes to mind is, of course, WooCommerce. It allows creating an online store your customers will love visiting and buying from. But before they purchase, why not make users register on your site? This approach certainly has its own benefits.
Enable WooCommerce Registration Form
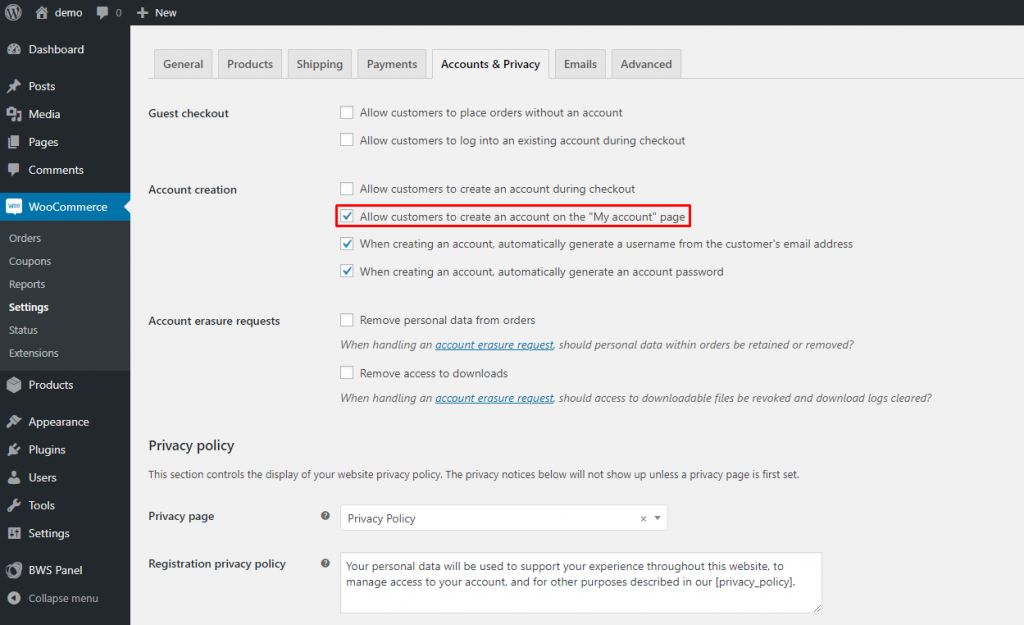
WooCommerce has its own built-in registration form. To enable it, all you need to do is go to “WooCommerce” -> “Settings” from your dashboard. Then, choose the “Accounts and Privacy” tab and mark the “Allow customers to create an account on the “My account” page” checkbox.
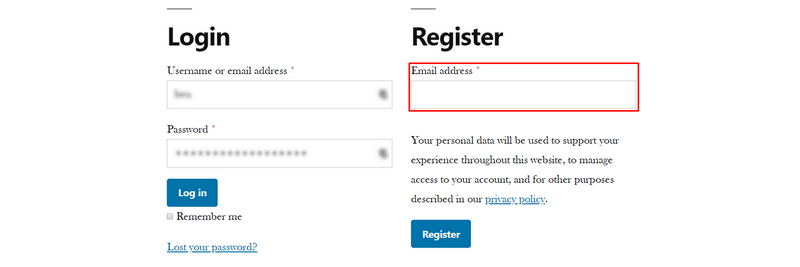
The registration form will be added. By default, WooCommerce has only one field – Email.
If this sounds like too little, consider adding Profile Extra Fields to your WooCommerce registration form.
Adding Profile Extra Fields to WooCommerce Registration and Checkout Forms
Profile Extra Fields is a simple but powerful plugin that helps to add additional fields to the WooCommerce and WordPress website user profile page. It has checkboxes, radio buttons, text, date, time, and phone number fields for you to choose from.
In order to add extra fields to the WooCommerce registration or checkout form, you need to simply follow these steps:
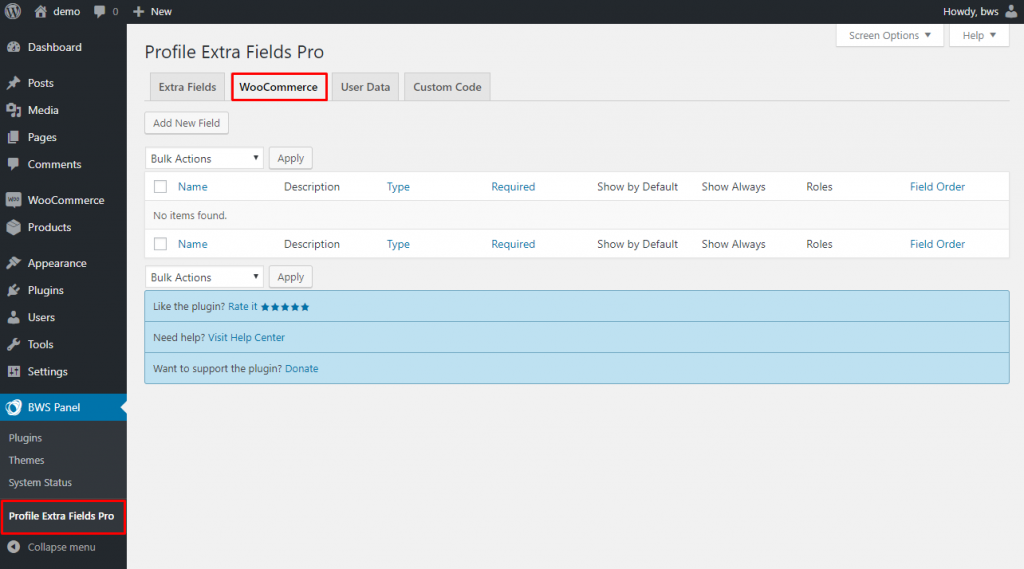
1. After you have purchased, installed, and activated Profile Extra Fields Pro, go to “BWS Panel” -> “Profile Extra Fields Pro” from your dashboard and switch to the “WooCommerce” tab. On this page, you will see all the WooCommerce extra fields you have created.
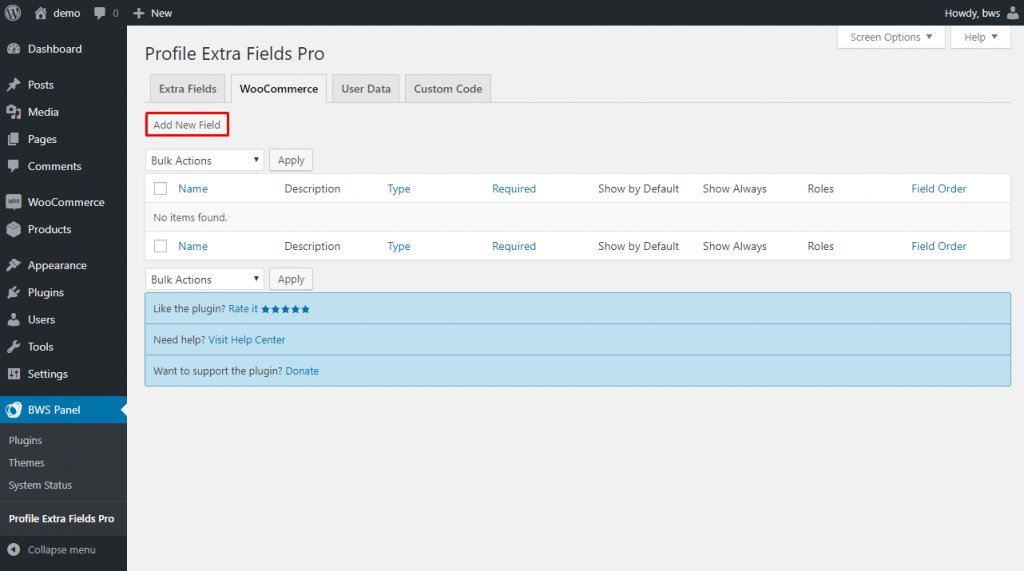
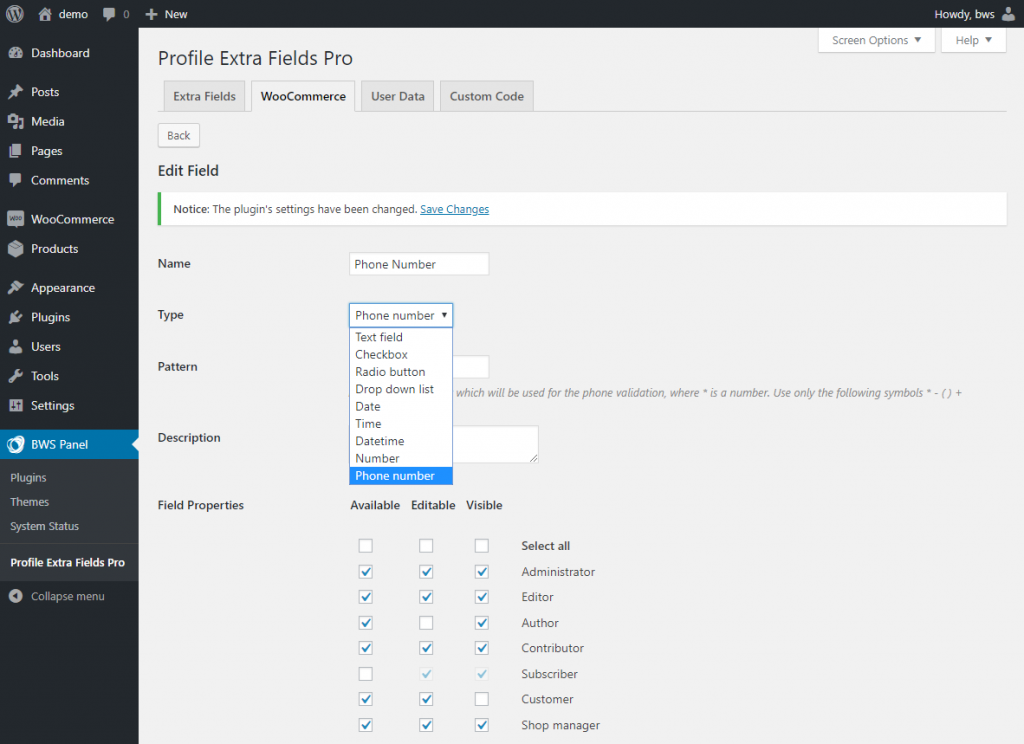
2. But for now, we need to create our first new extra field. To do so, click the “Add New Field” button.
3. Here you can name the field, choose its type and customize it, add a description, and choose field properties.
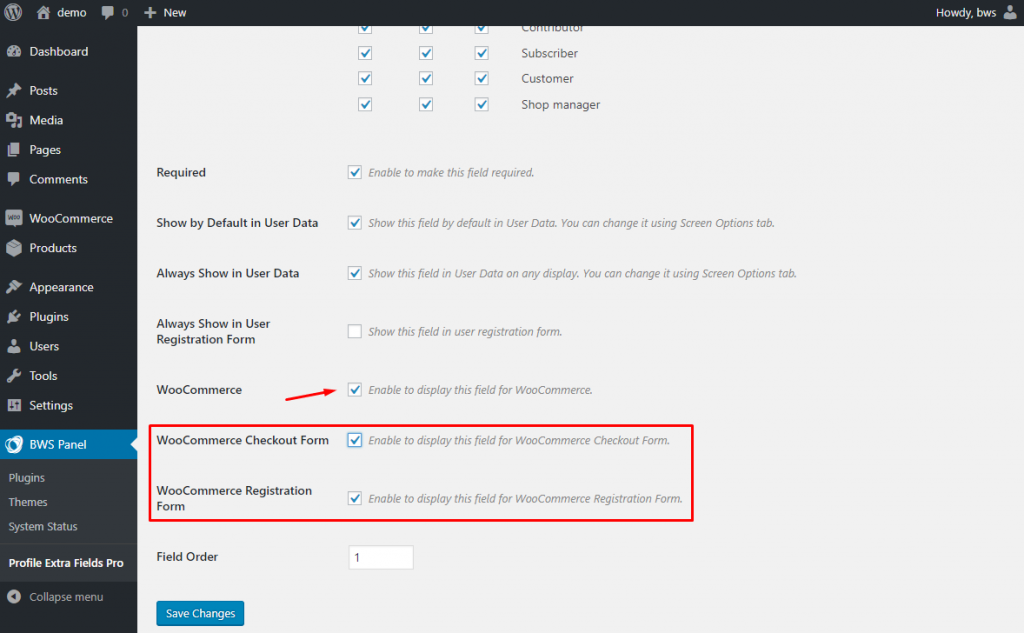
4. Scroll down to find more options. Here you can mark the field as required, show by default/always show in user data, and/or always show in the WordPress Registration form. But the option that interests us most is the “WooCommerce” checkbox. Once marked, you get two more checkboxes available: “WooСommerce Сheckout Form” and “WooСommerce Registration Form”. Mark one or both of the checkboxes and save the changes.
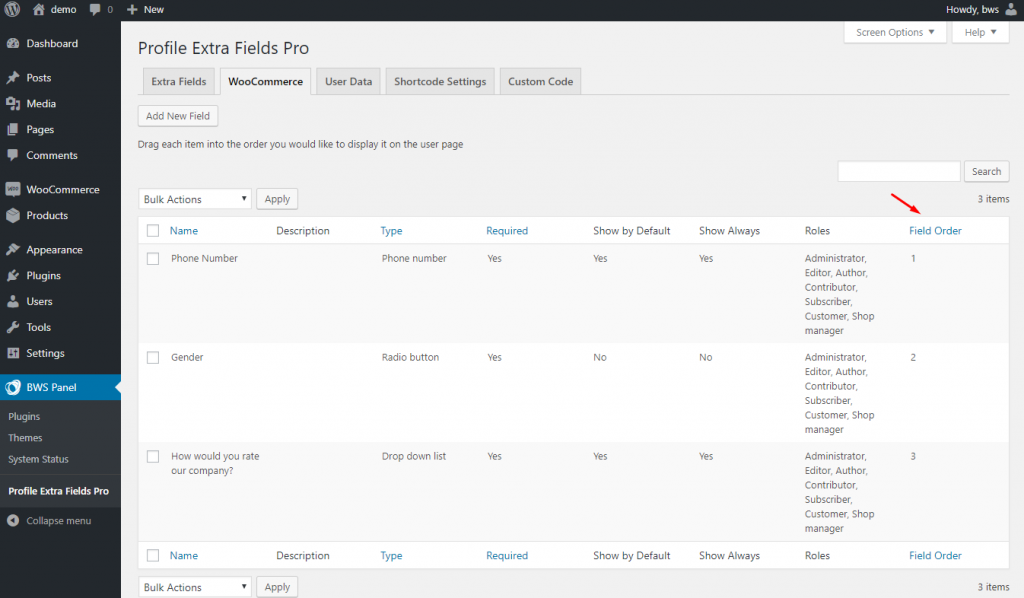
5. Then you can click the “Back” button in the upper left corner and add as many extra fields as you need. Mind the “Field Order” section when you edit each of the fields. If several extra fields are applied simultaneously, the “Field Order” determines the order of the fields’ display.
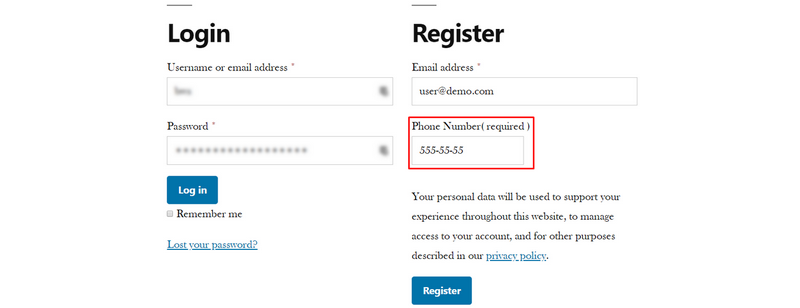
6. In the front-end WooCommerce Registration form with an extra field will look the following way:
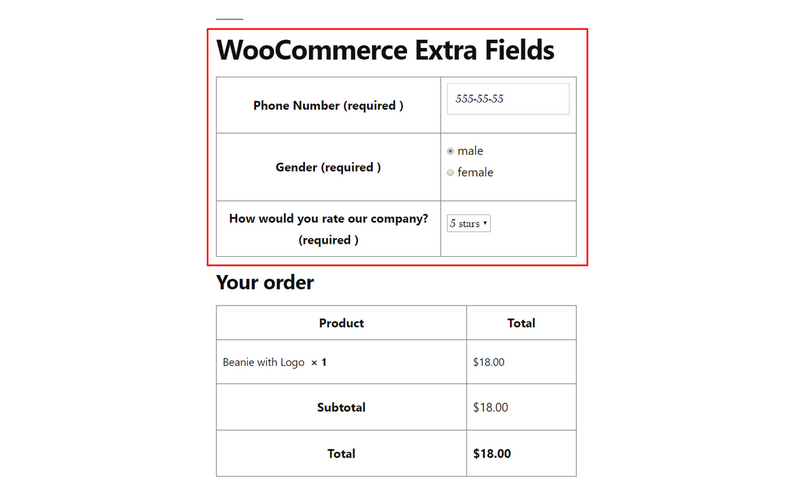
7. Your WooCommerce Checkout Form will look the following way:
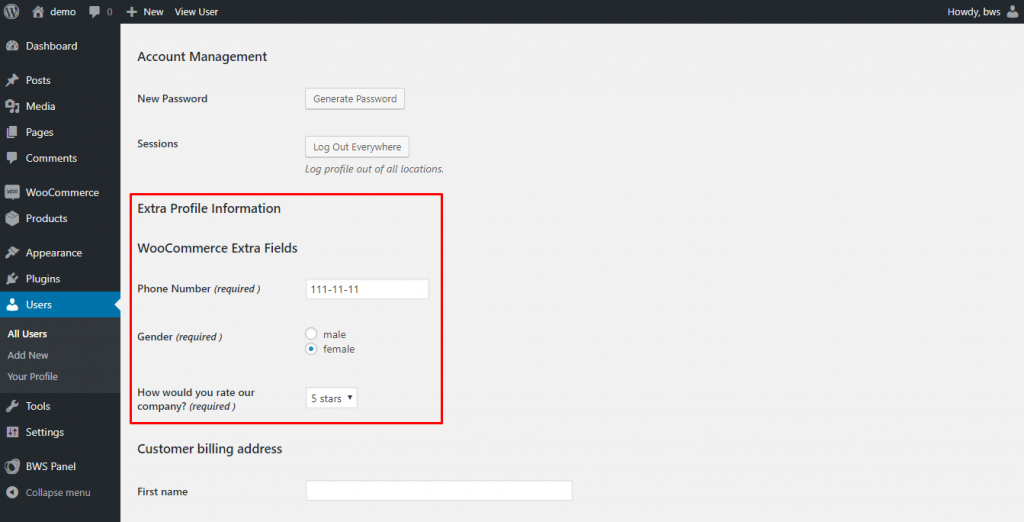
8. You can also see the users’ Extra Profile Information on the “Users” page.
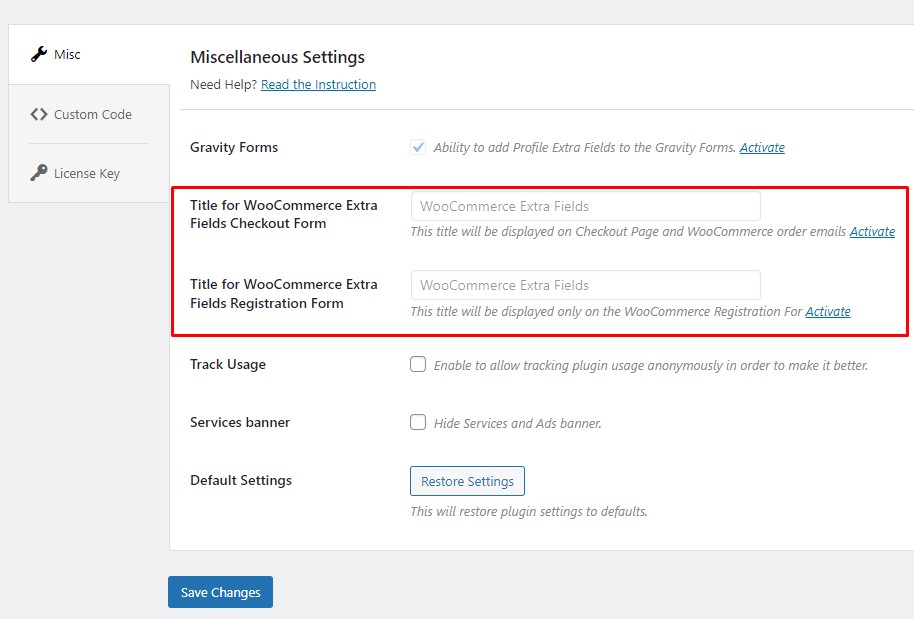
9. And change titles for WooCommerce Extra Fields Checkout Form and WooCommerce Extra Fields Registration Form on the “Settings” page.
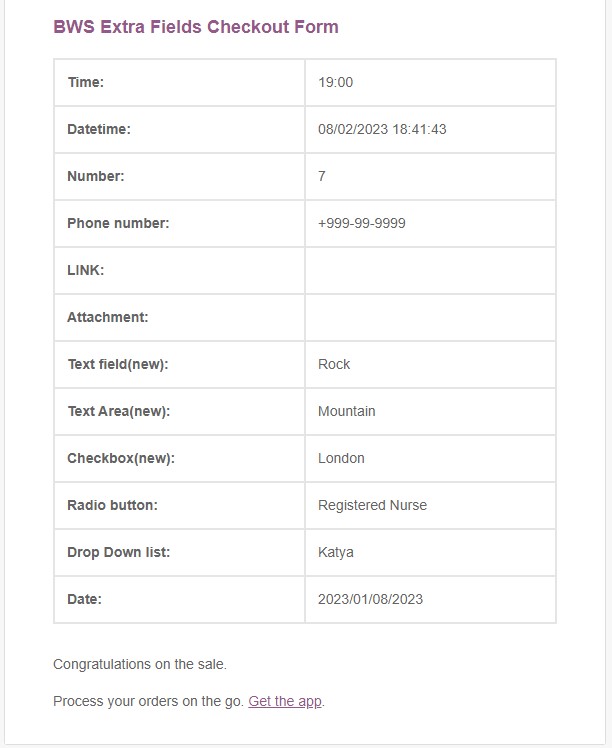
10. The information that the user has entered in the Extra Fields on the checkout page will be visible in a successful order letter from WooCommerce.
As you can see, creating an extended WooCommerce Registration and Checkout forms is a fairly simple task that requires no coding skills at all. And our simple but really powerful Profile Extra Fields plugin allows you – a site owner – to collect additional information about WooCommerce customers on the registration and checkout forms without much effort.