
Whether you run a small blog or a corporate website, every website needs a contact form. The contact form can serve as a bridge between you and the audience. Most modern websites need more than just a contact form. They also need other forms, such as a request for quotation form, survey, reservation, content submission, etc.
Gravity Forms is one of the most popular form builder plugins for WordPress. Using it, you can create any type of web form you can think of, from simple contact forms to complex long forms – Gravity Forms makes the process easy and simple.
Combined with Profile Extra Fields it will help you get information about users. You can add checkboxes, radio buttons, text, date, time, phone number fields, and even URL field types to the configuration file or registration page. Add custom fields to the registration page or even the user’s profile.
Don’t miss the opportunity to get to know your audience better.
What are the Benefits of Gathering Users’ Information?
If you are in serious business, the marketing team has data to develop a stronger strategy. They can see what content their main potential customers are participating in, and understand which traffic sources bring more ideal customers to the site, while also generating more potential customers from current traffic and proposing stronger actions.
Provide the sales team with the company name of the viewers so that they can find potential customers who are already looking for the products or services you provide. This reduces the need for aggressive sales strategies and reduces the time they spend looking for their potential customers.
Instead, they are more time-efficient and can focus on potential customers who can increase revenue.
Interestingly, the same works not only for major business players but for almost everyone who can apply targeting to promoting and improving their website. Understanding the people you are interacting with is a key to providing better content, products and service.
Actual Steps and Instruction
With that out of the way, what are the actual steps for integrating these two plugins? The process of integration requires you to have both plugins installed. And then…
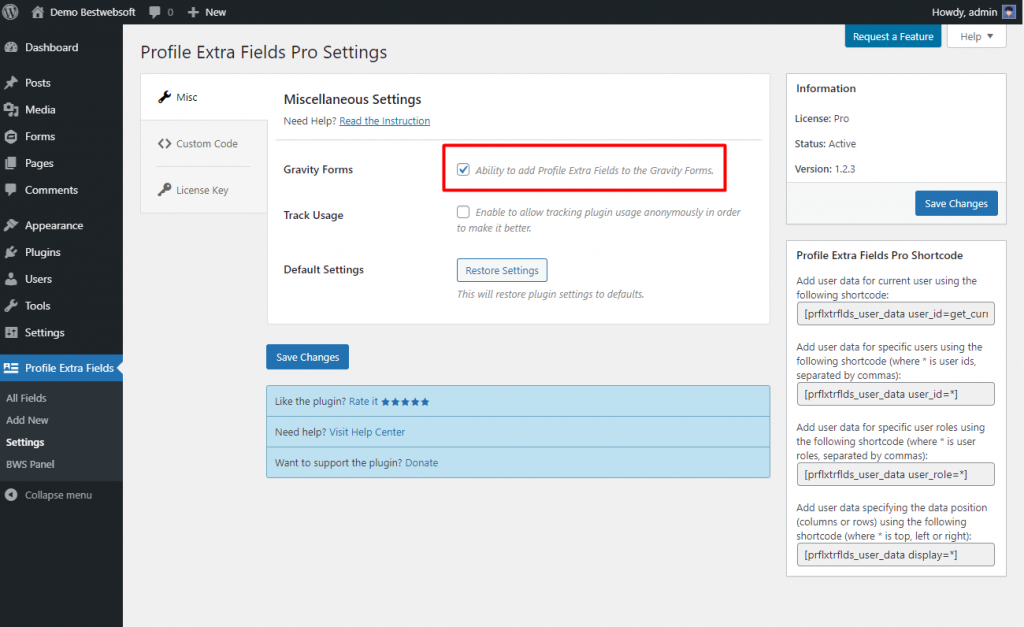
- First things first. You need to check the Gravity Forms box in the Settings tab of the Profile Extra Fields plugin. It will allow adding the plugin’s fields to the Gravity Forms.
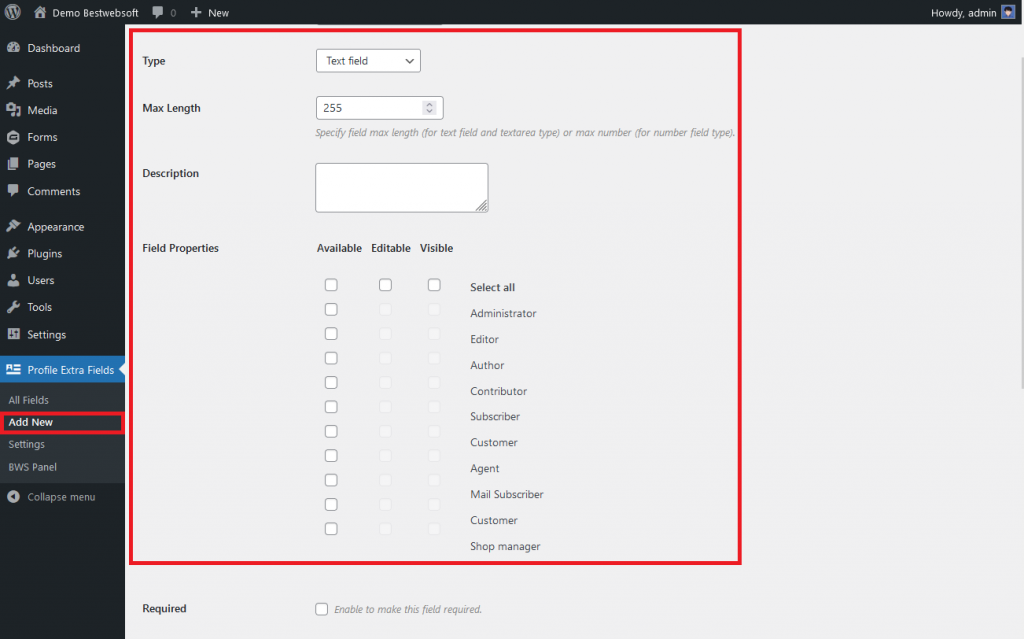
2. The second step would be creating a new Extra Fields Form. Select the Add New tab of the Profile Extra Fields menu, and pick the settings.
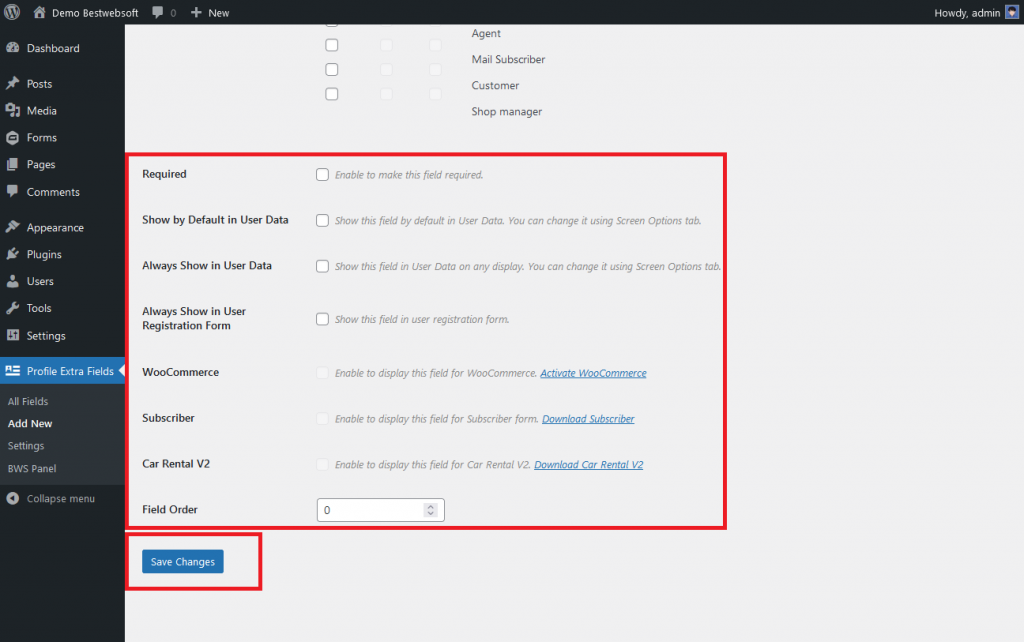
3. Don’t forget to enable additional options if neccesary and click Save Changes.
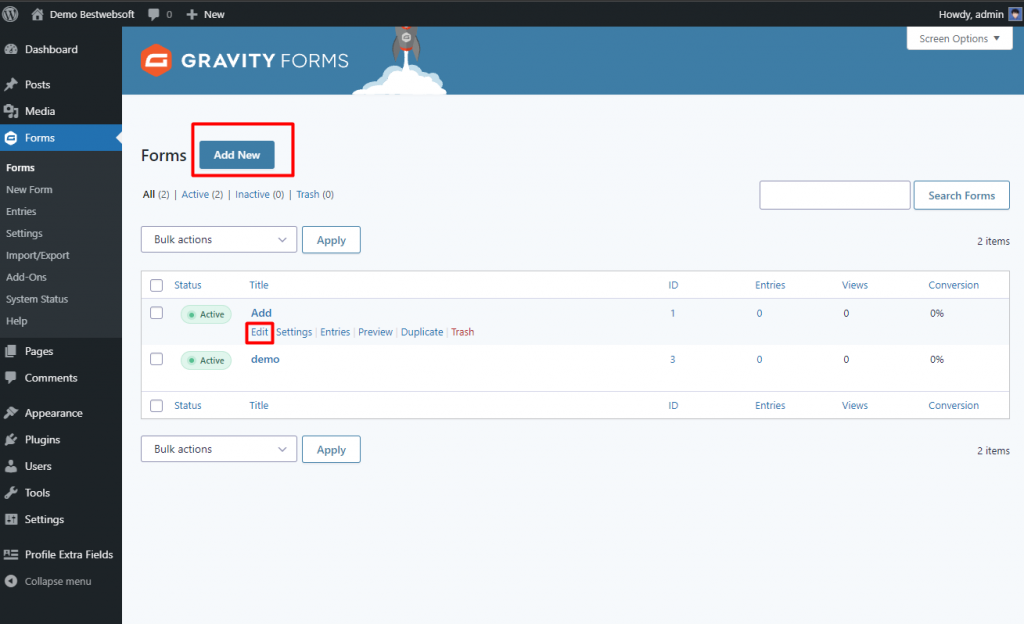
4. Select the Forms tab of the Gravity Forms plugin. Add the new one or edit a preexisting field.
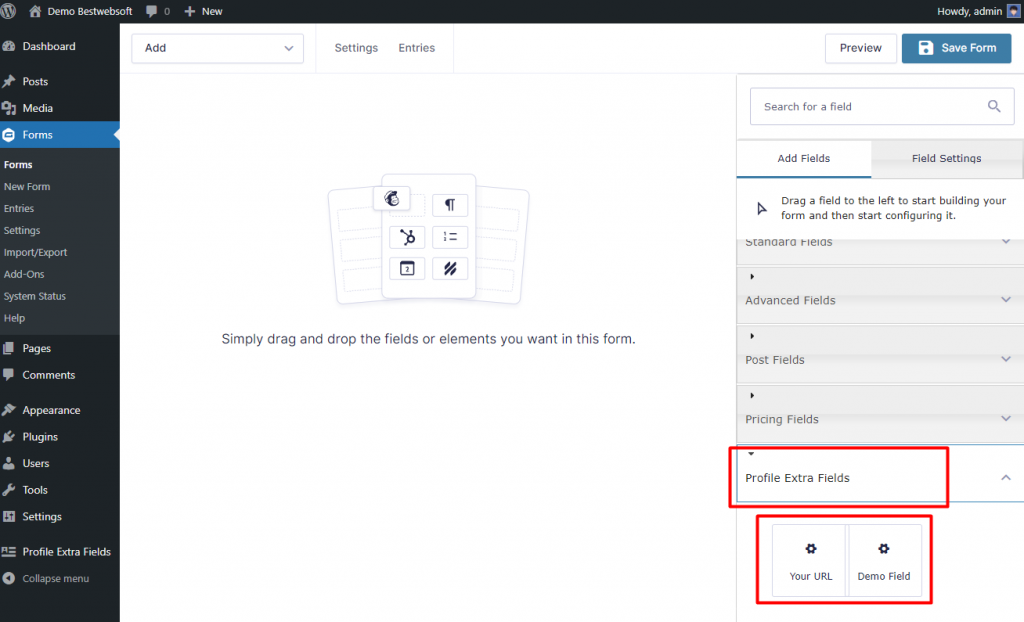
5. Find Profile Extra Fields drop menu on the right. Select the necessary field, and drag-n-drop it into the form. You can mix elements along with other ones however you like.
6. The result may look as follows.
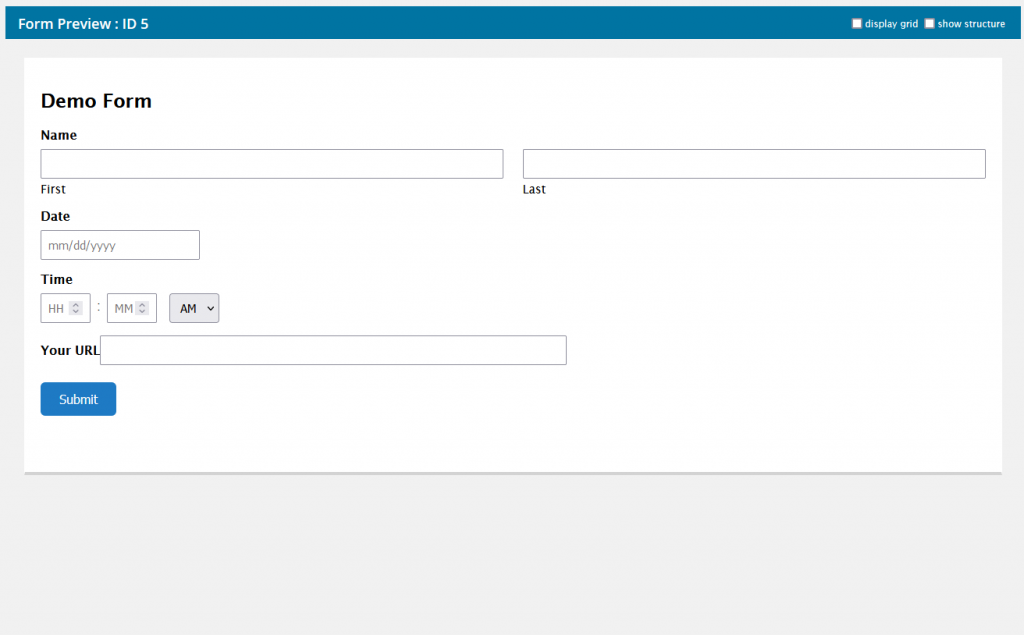
Like that. Now you can change the pages on your site the way you wanted, using one of the most popular construction plugins of the WordPress platform.

Conclusion
That’s the simple way to add extra custom fields to your Gravity Forms. Together these two plugins can be an extremely versatile tool to bend your site in the exact form you wanted in the fastest way possible.
As you can see, creating profile forms in conjunction with Gravity is a fairly simple task which requires no coding skills at all. And our simple but really powerful Profile Extra Fields plugin allows you – a site owner – to collect additional information about your audience without much effort.

