It often happens that when looking for any information on the Internet, we’re confronted with the fact that needed information is only on foreign sites, but you cannot understand anything because you don’t know a foreign language.
We agree that there are a lot of services where you can copy and paste the text that you want, and get the right translation. But would it be so efficient? We believe that people who really love their job, do it efficiently. Therefore, in our article, we will focus on how to make your website more modern and functional for the foreign user.
In order to create a multilingual website, you can use two different approaches.
The first one is to apply the automatic translation of your website in selected languages. The second one is to install a plugin that will give you the opportunity to translate a particular page of the website on a foreign language manually.
Speaking about the first approach, machine translation, it has many flaws. Machine translation is much worse than manual translation. The probability that the person just simply won’t understand even a half of what you wanted to say in your blog is high. Also what is important, there is a risk that you’ll show your bad side, your website will look cheap and not enough developed. None of the major corporations will do machine translation for their content.
Manual translation with the plugin can fix all these bugs, but of course, if you don’t speak the language it will cost you money. Or, you can order a translation of your website content from freelancers, and it will cost much cheaper.
Install Multilanguage Plugin
In our article, we will talk about how to install and use the Multilanguage plugin for your website on the WordPress platform.
The first thing you need to do is to find the Multilanguage plugin and install it.
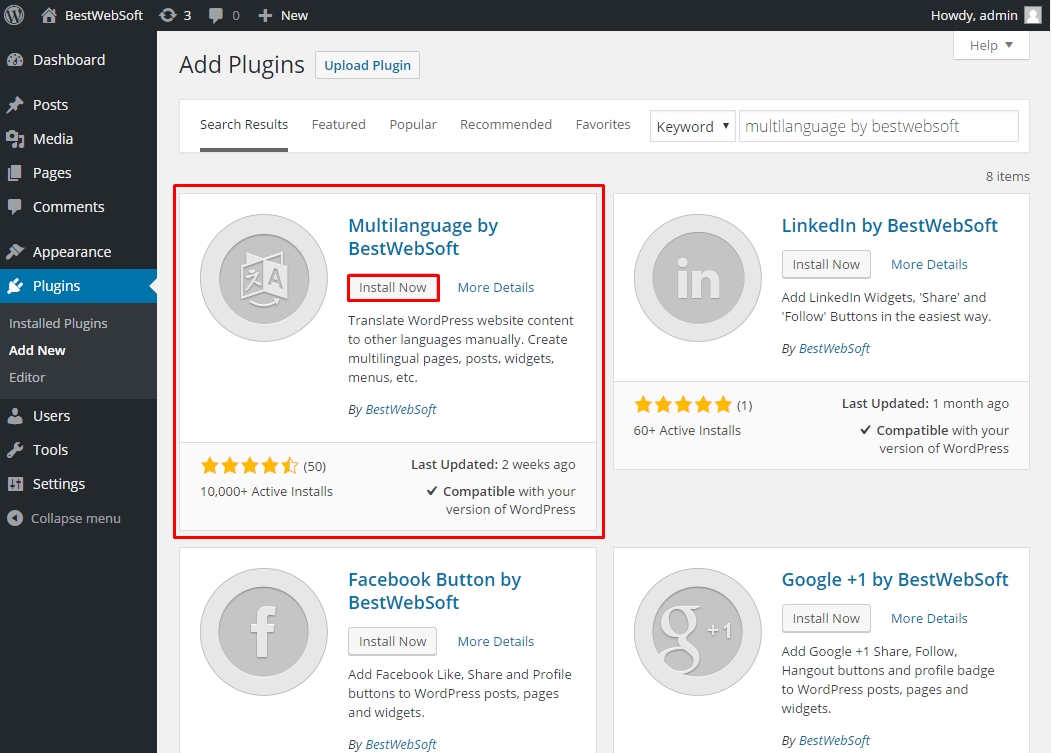
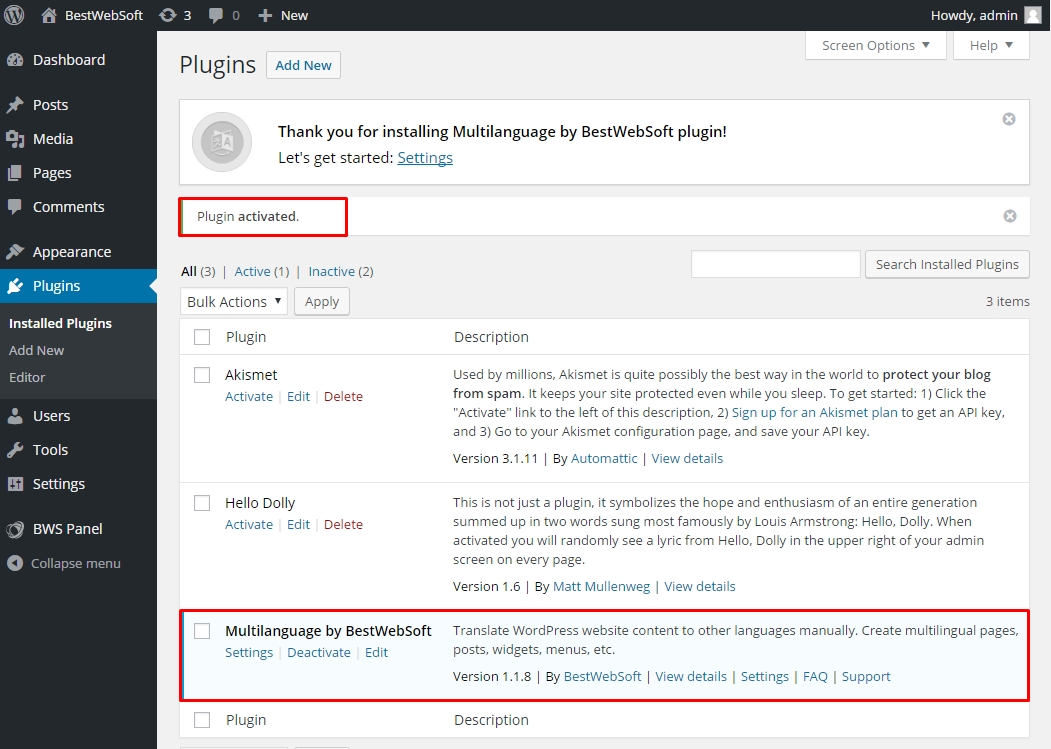
The easiest way is to login to your WordPress admin dashboard, select Plugins > Add new. Type in search field Multilanguage by BestWebSoft, press Enter and select an appropriate plugin.
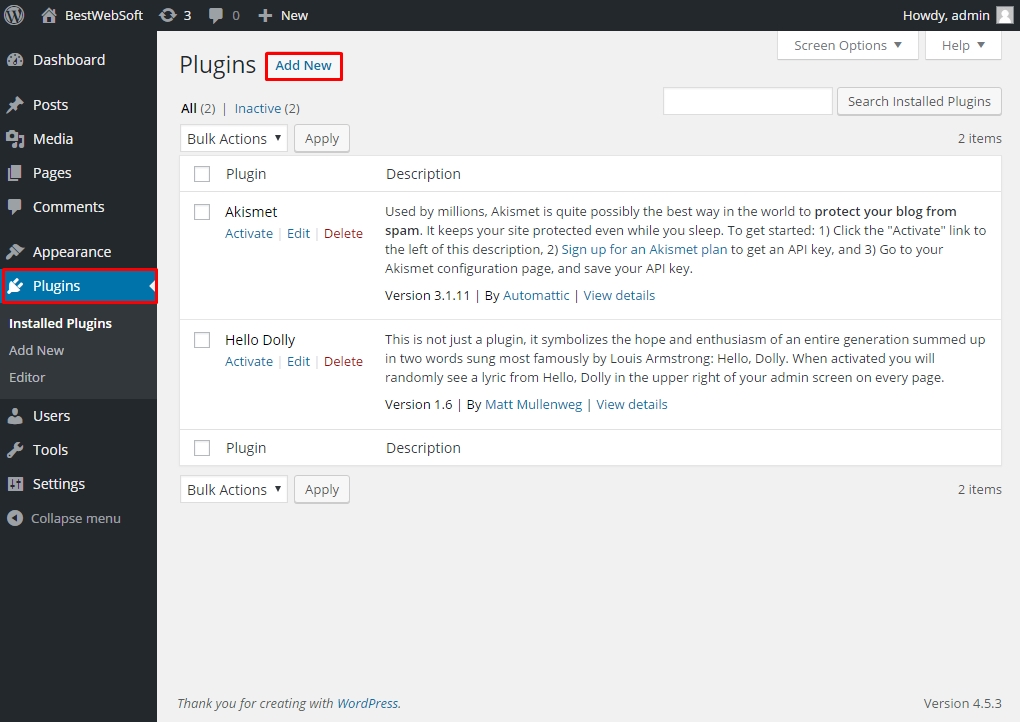
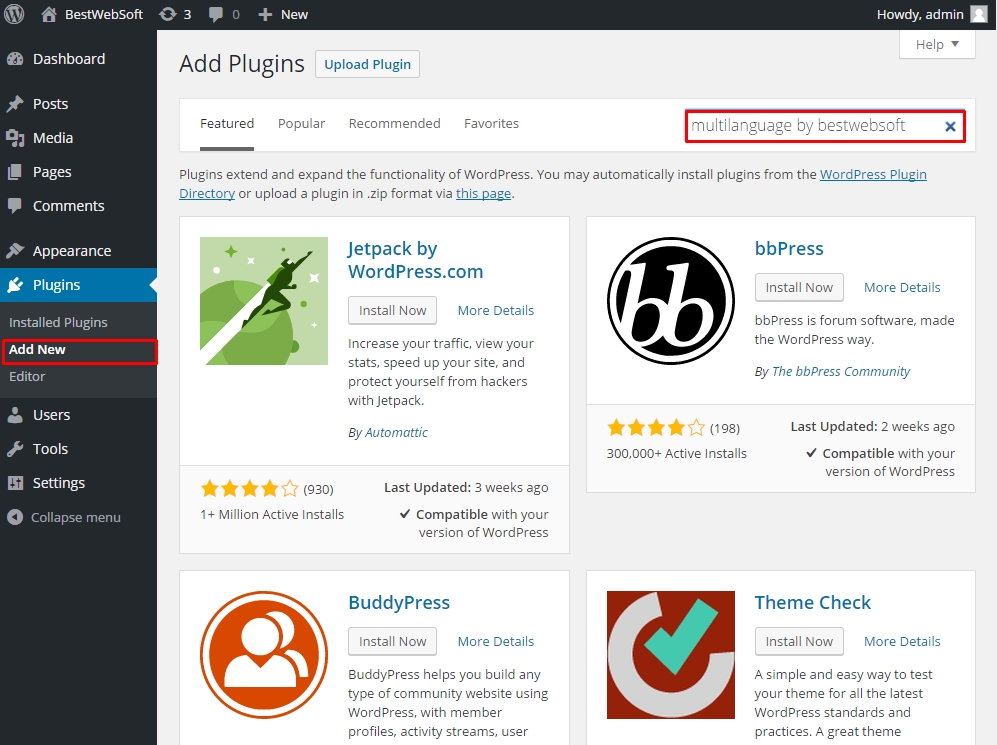
Click Install Now and Activate Plugin.
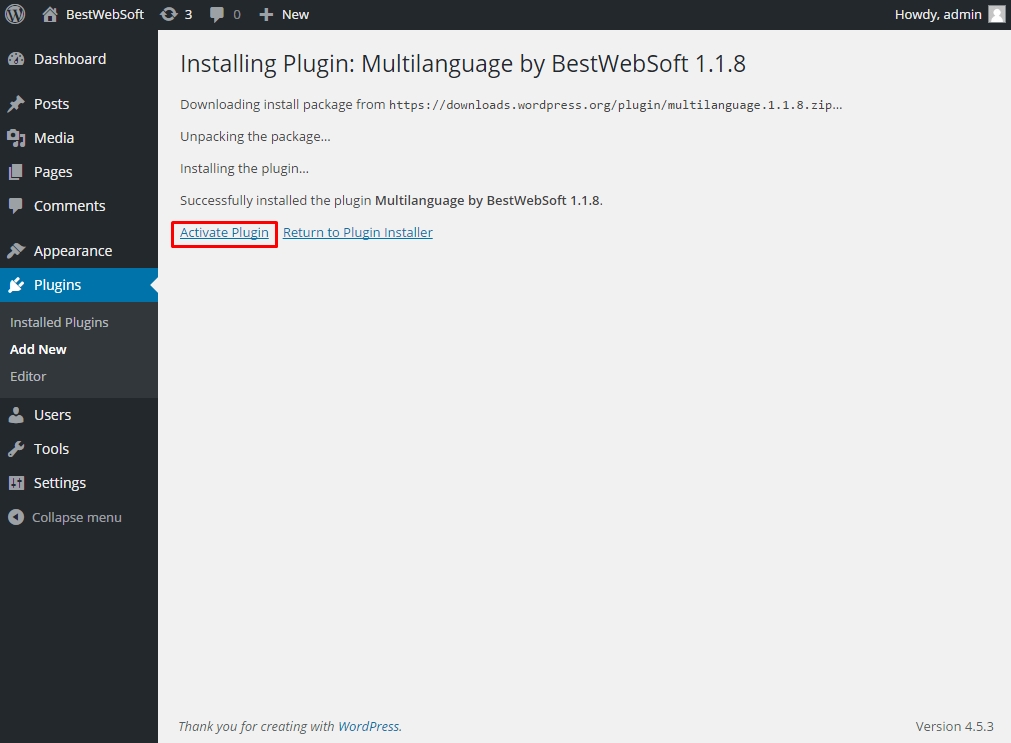
Great! The plugin is installed and you can see it among other plugins under the Installed Plugins section. There you can also see the Settings section.
Configure & Translate
Let’s configure the plugin settings now.
Go to Settings.
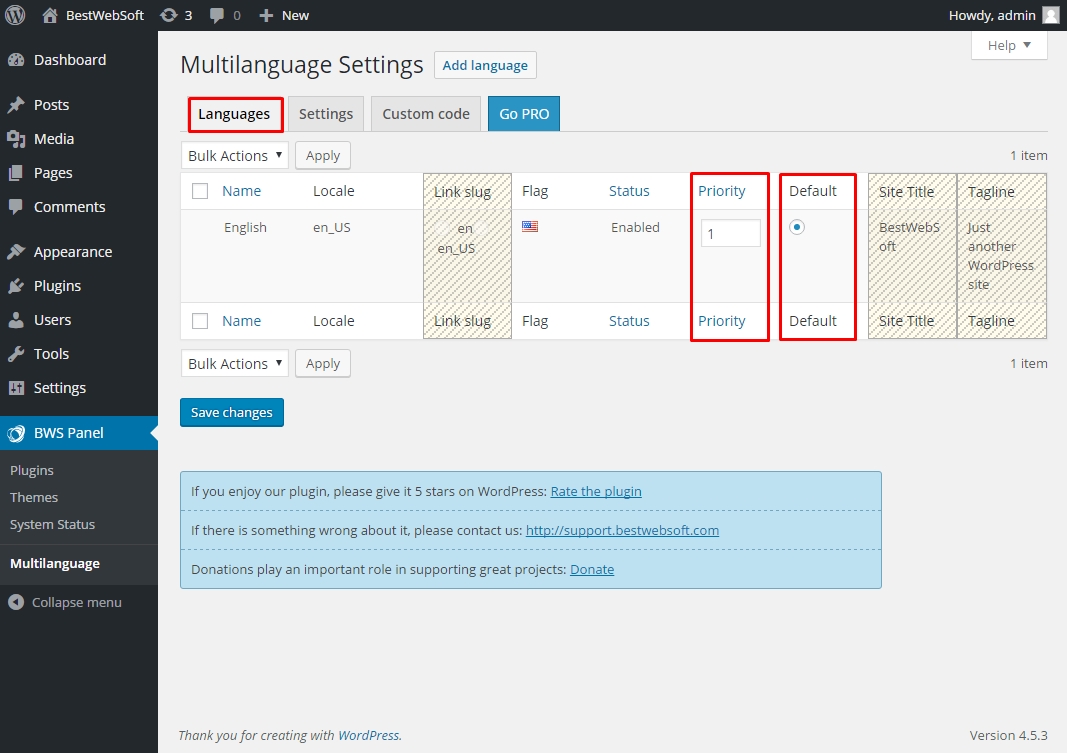
Here, you will see four tabs: Languages, Settings, Custom code, and Go Pro.
Open the Languages tab. Here you can add the languages you want to see on your website, set the default language and select secondary languages.
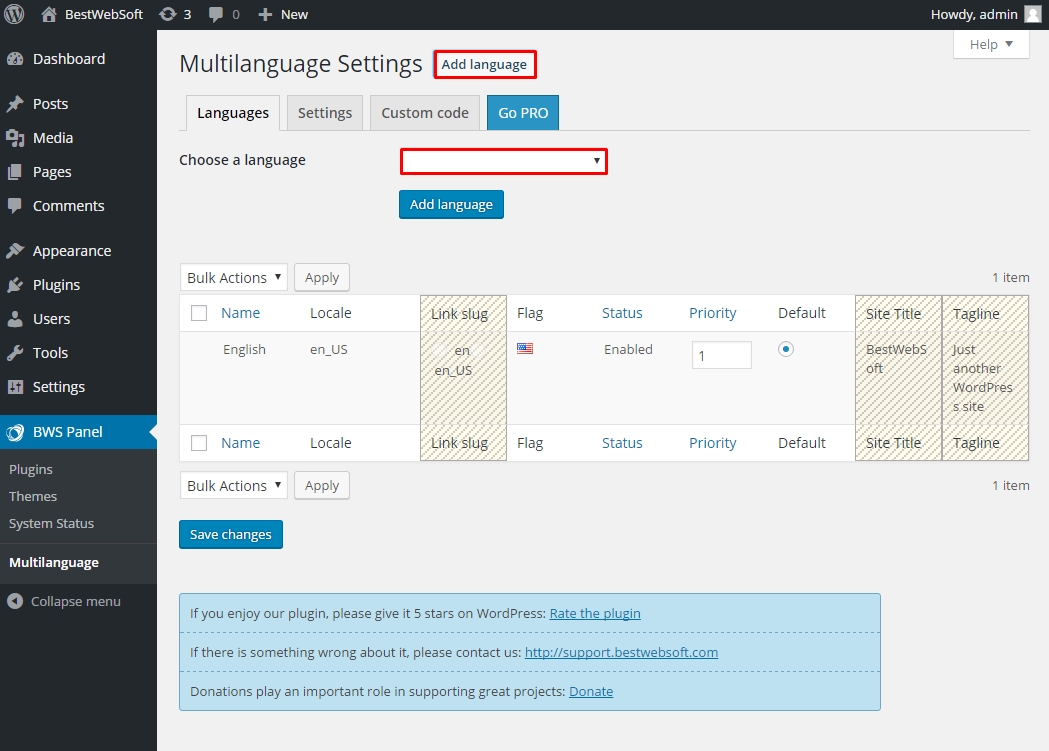
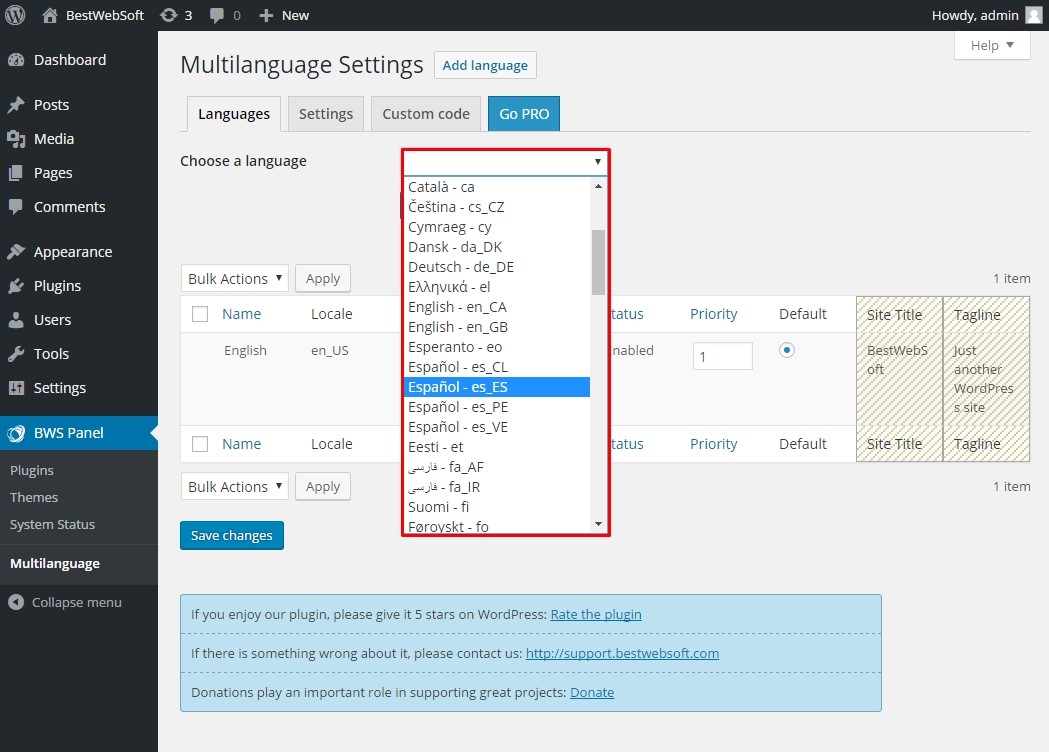
To add a new language, click the Add language button. Click the Choose language select field, and choose the desired language from the list of available languages. Click Add language. You first language is added.
As the example, we’ve added two languages: Spanish and Russian. You can also set the priority of those languages and select the default one.
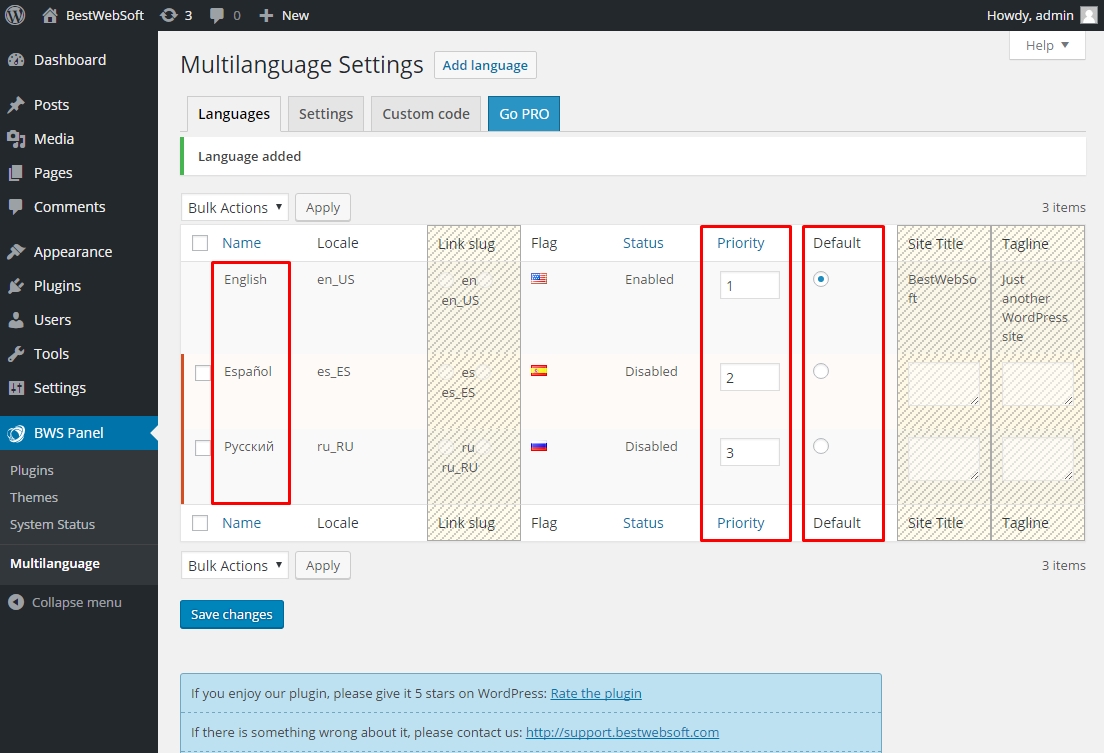
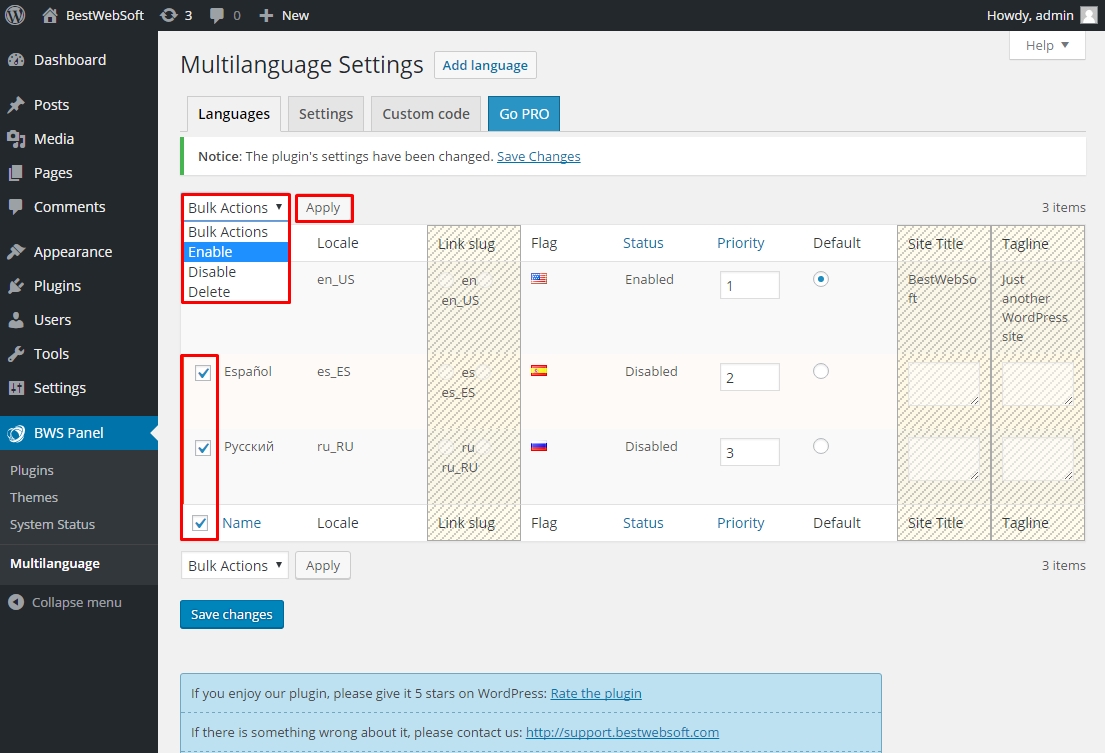
To enable languages, select them, choose Enable from the bulk actions select box, click Apply and Save changes.
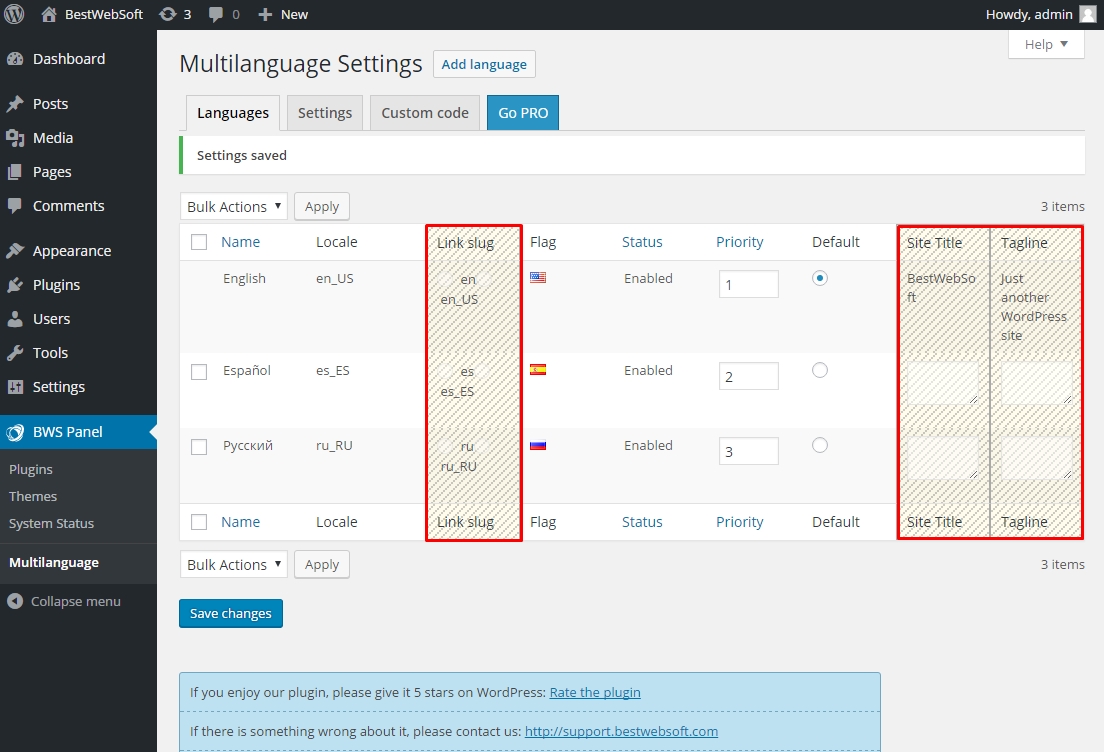
You could also see three disabled columns. The first one changes the Link Slug, the second one changes the Site Title, and the last one is for the Tagline.
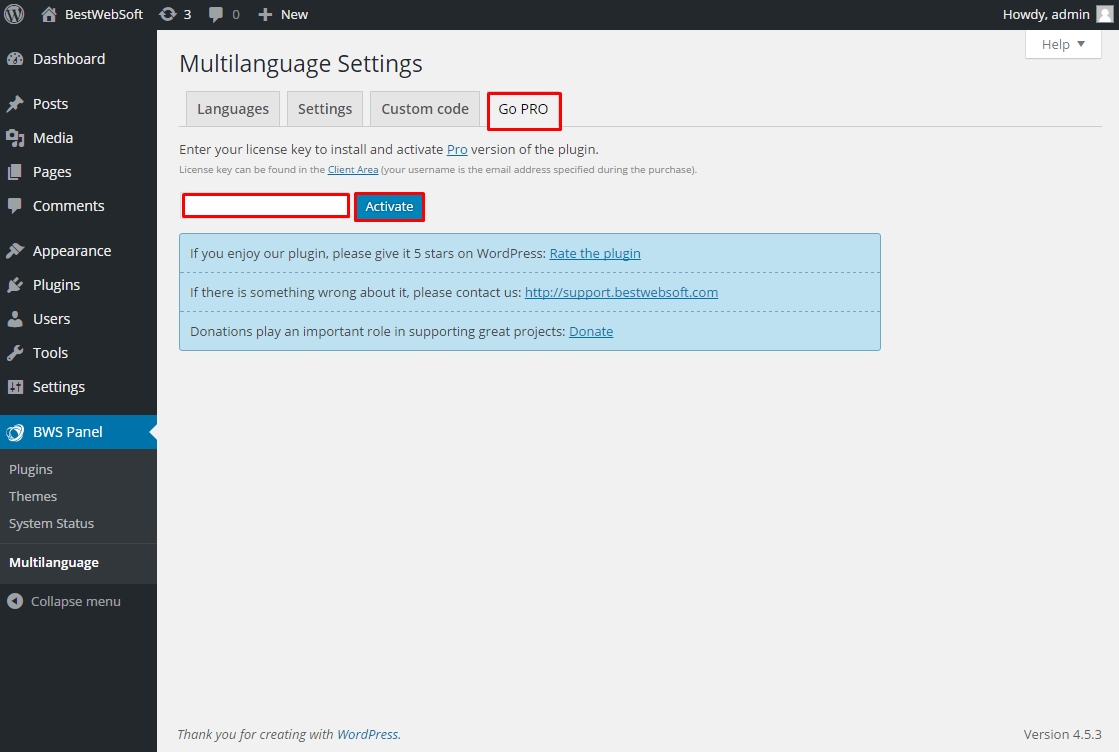
All these tabs are available in Multilanguage Pro version of this plugin. Paste your activation key in the Go Pro tab to enable the Pro features.
Go back to Languages tab and you will see that now all options are available. Insert or type in the Site Title, select Link slug, and type in the Taglines.
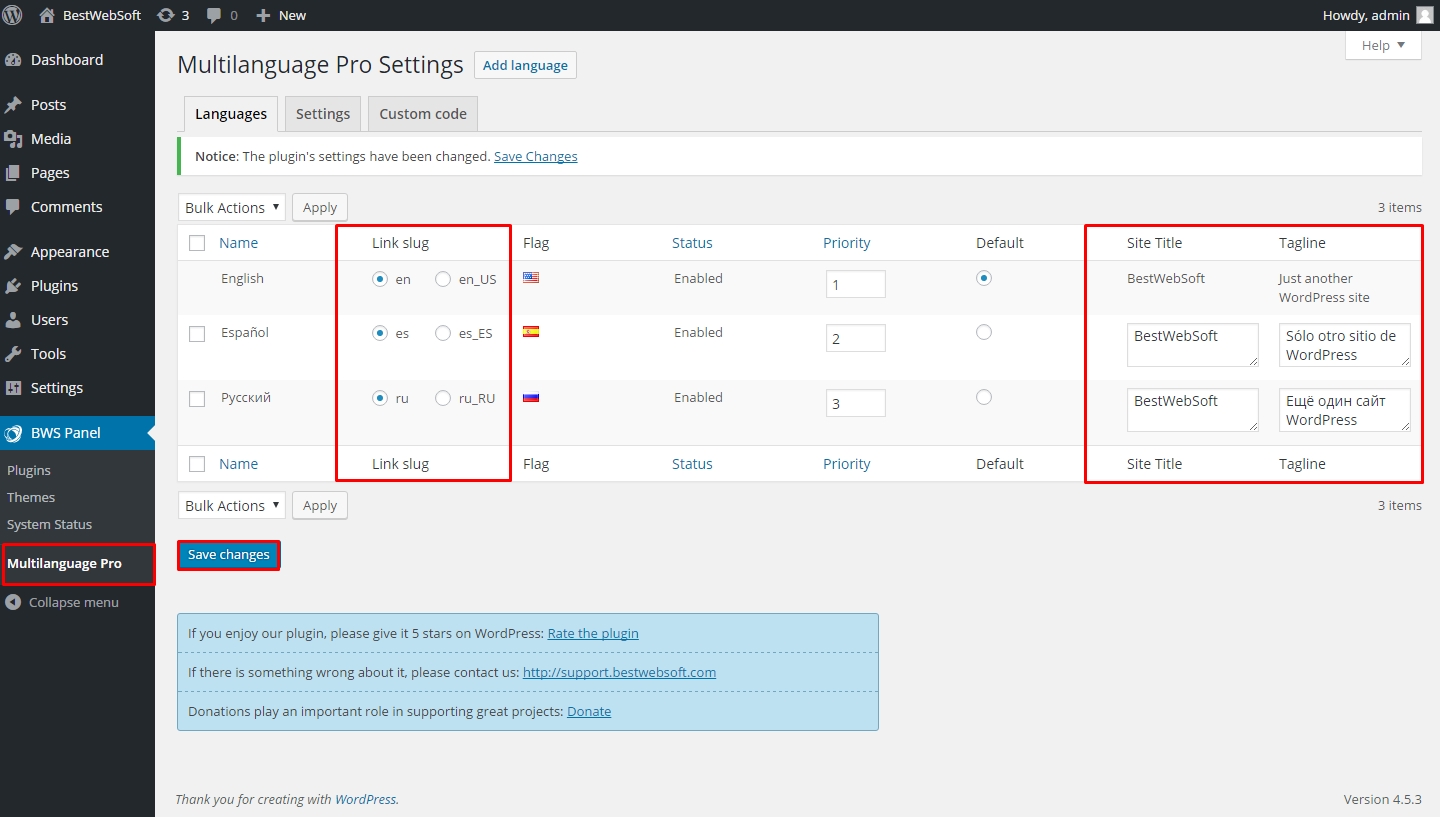
Save the changes.
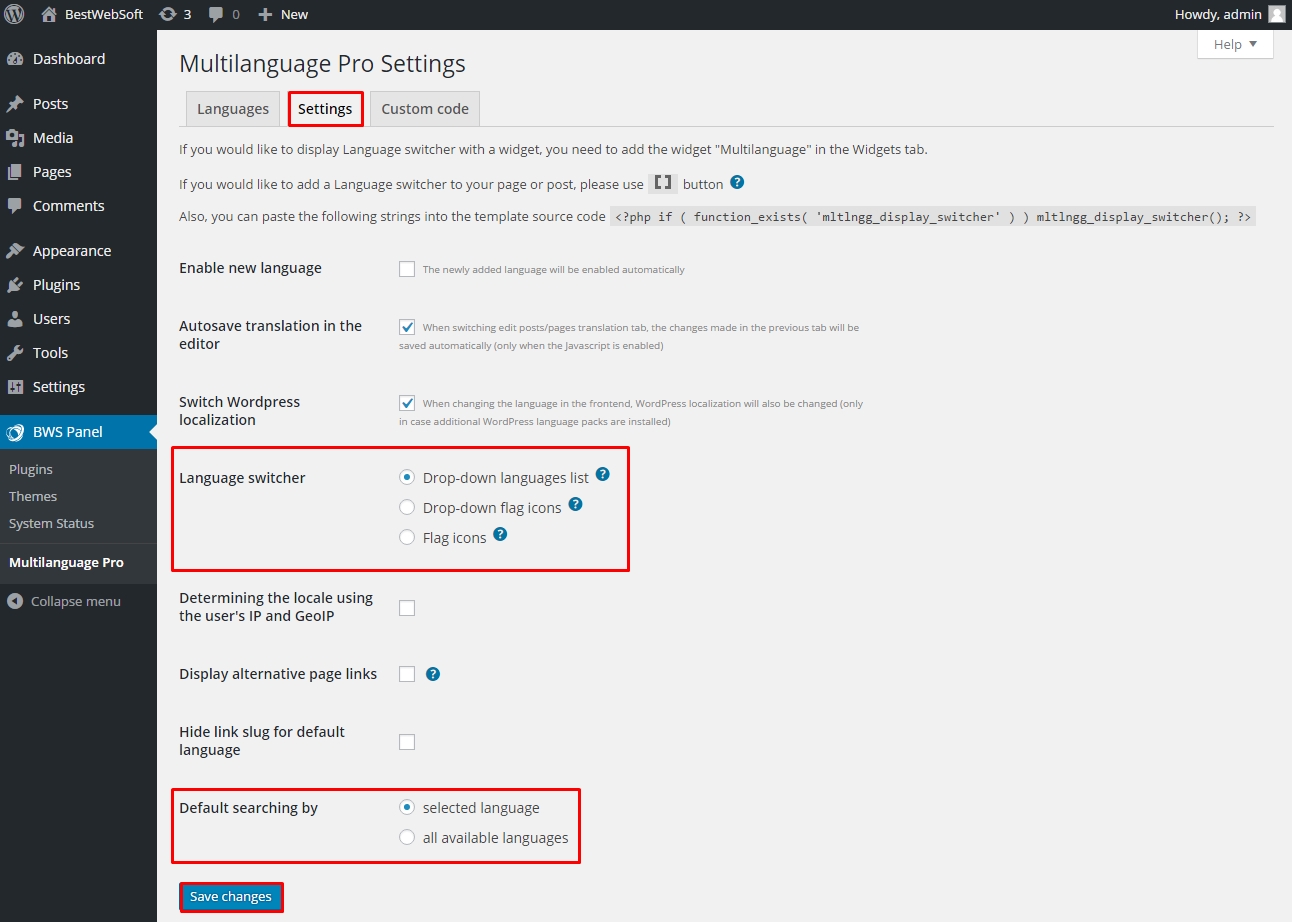
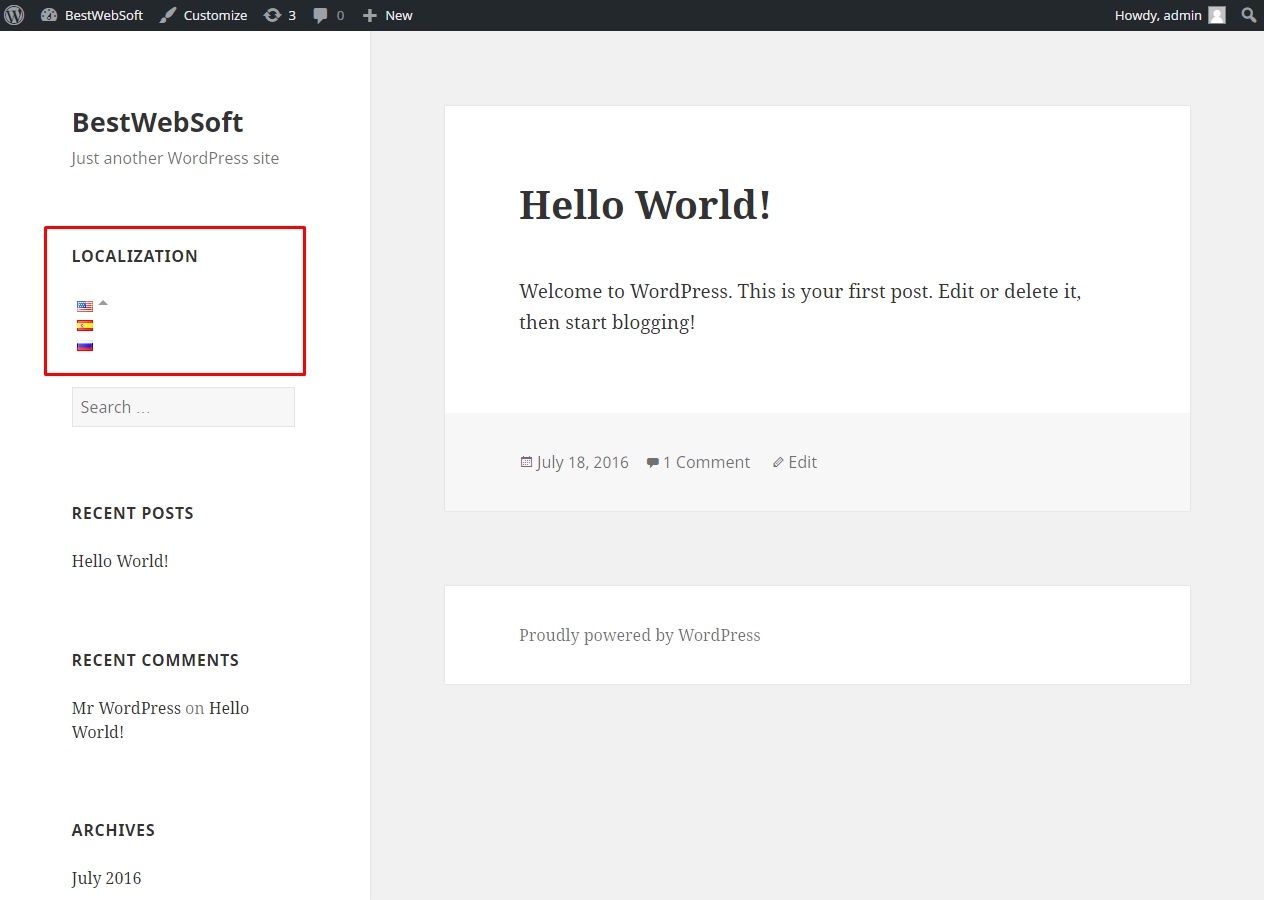
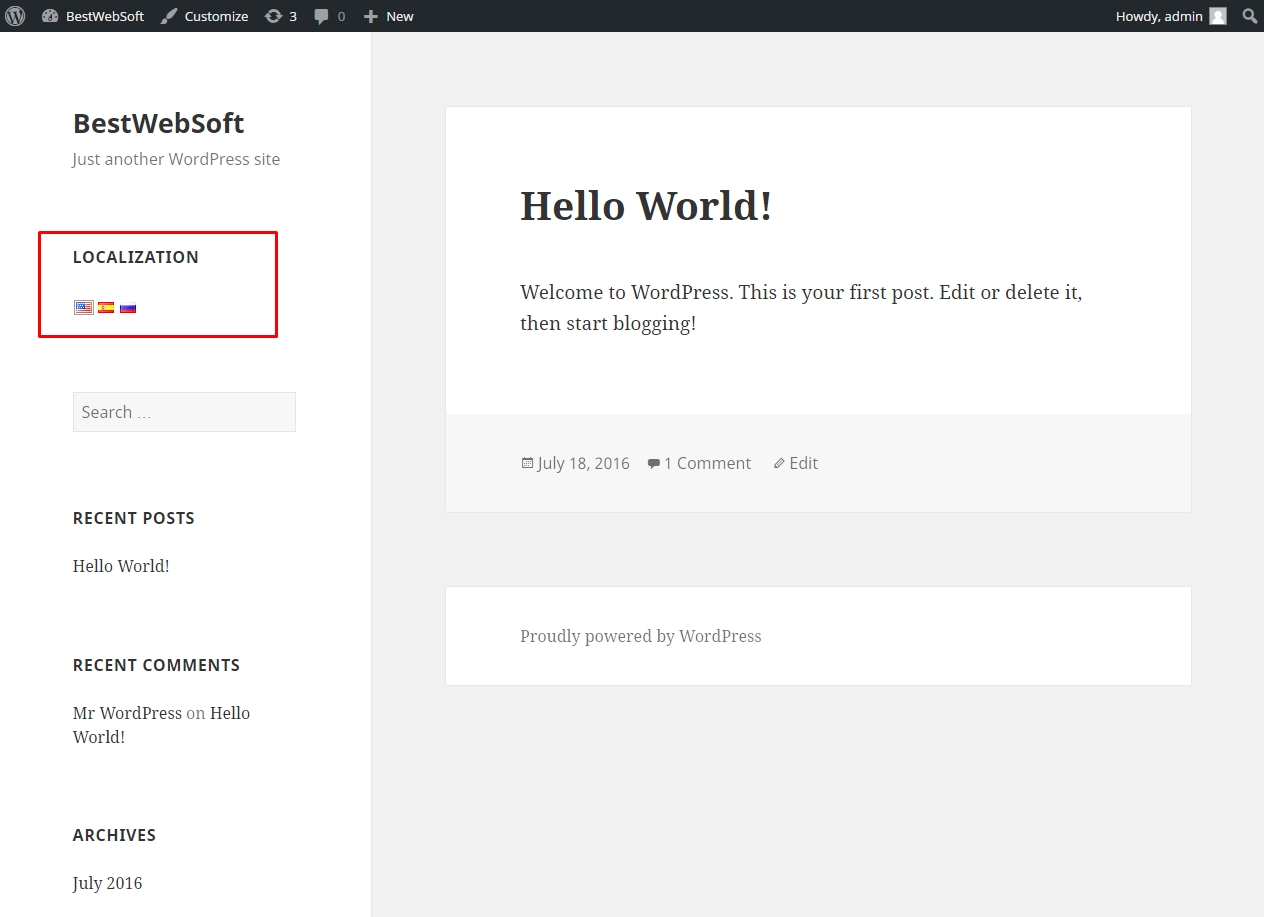
Next, go to the Settings tab. Here you can choose the language switcher. Under the Language Switcher section, you can select the options: Drop-down languages list, Drop-down flag icons, Flag icons. Choose your default website search language in the Default searching by section. Save changes.
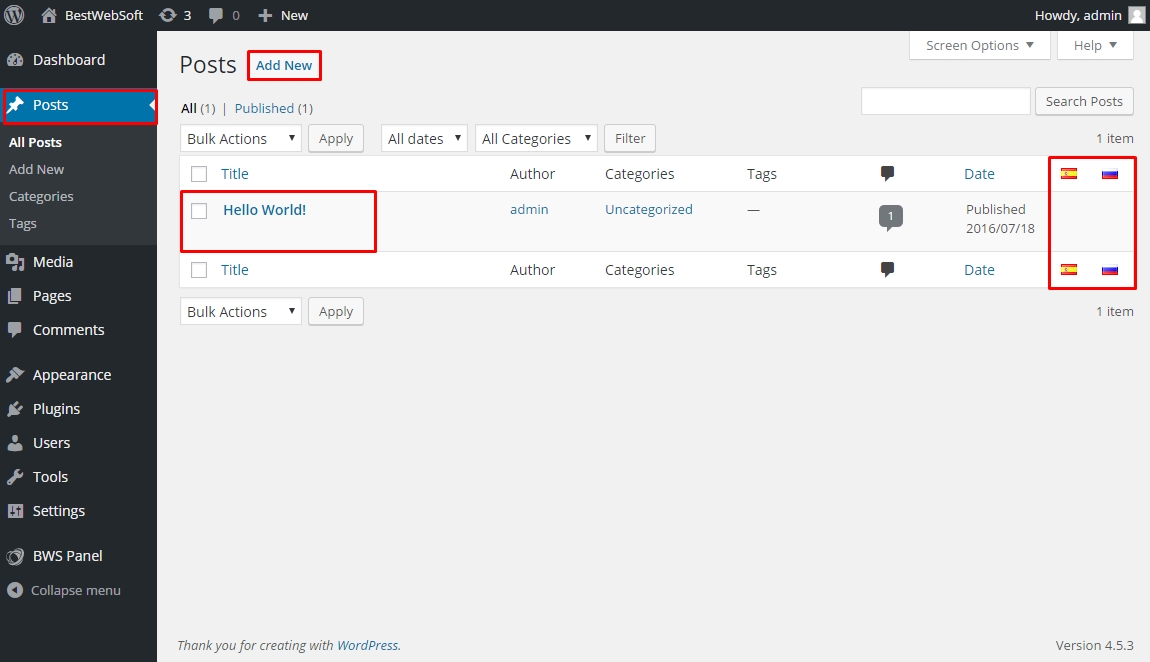
Let’s translate your first post now. Navigate to Posts > Add new or All posts, there you will see a list of available posts with all the languages added.
Select the language tab (Spanish, Russian, etc.), enter the translated title and translated content.
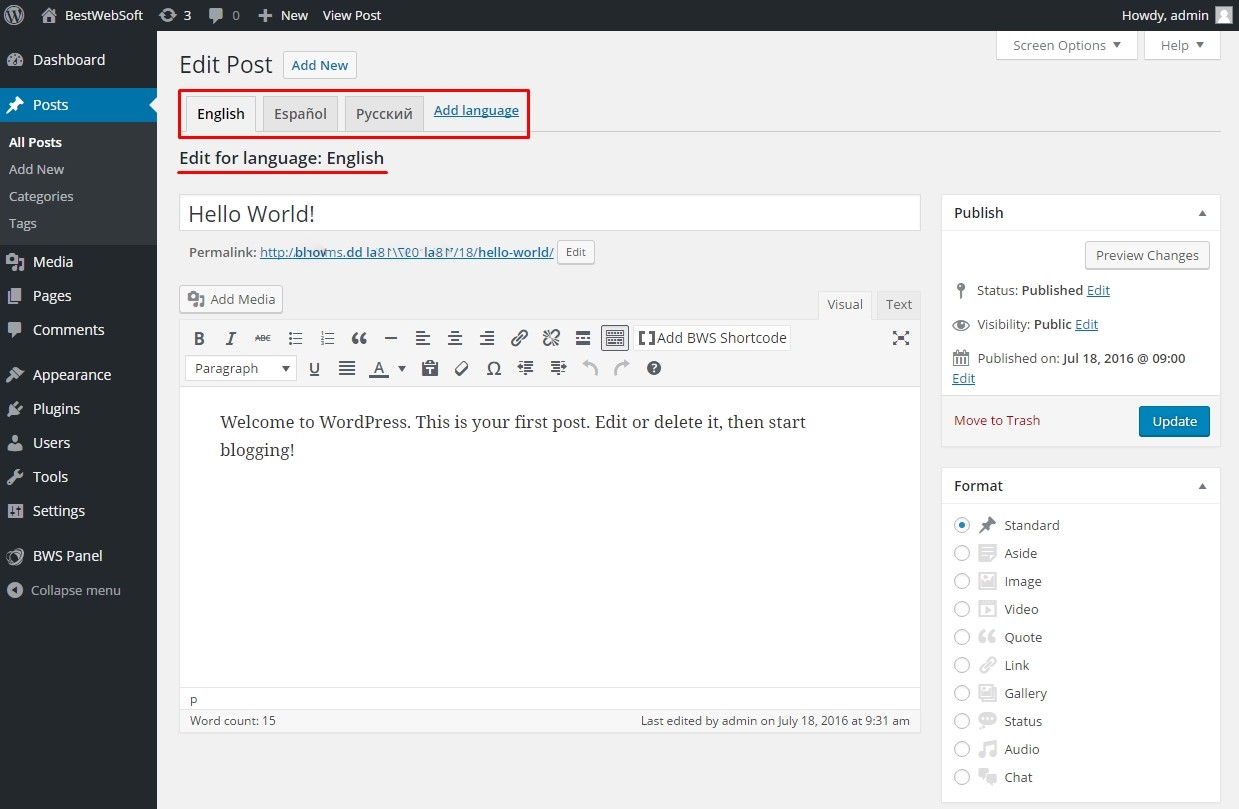
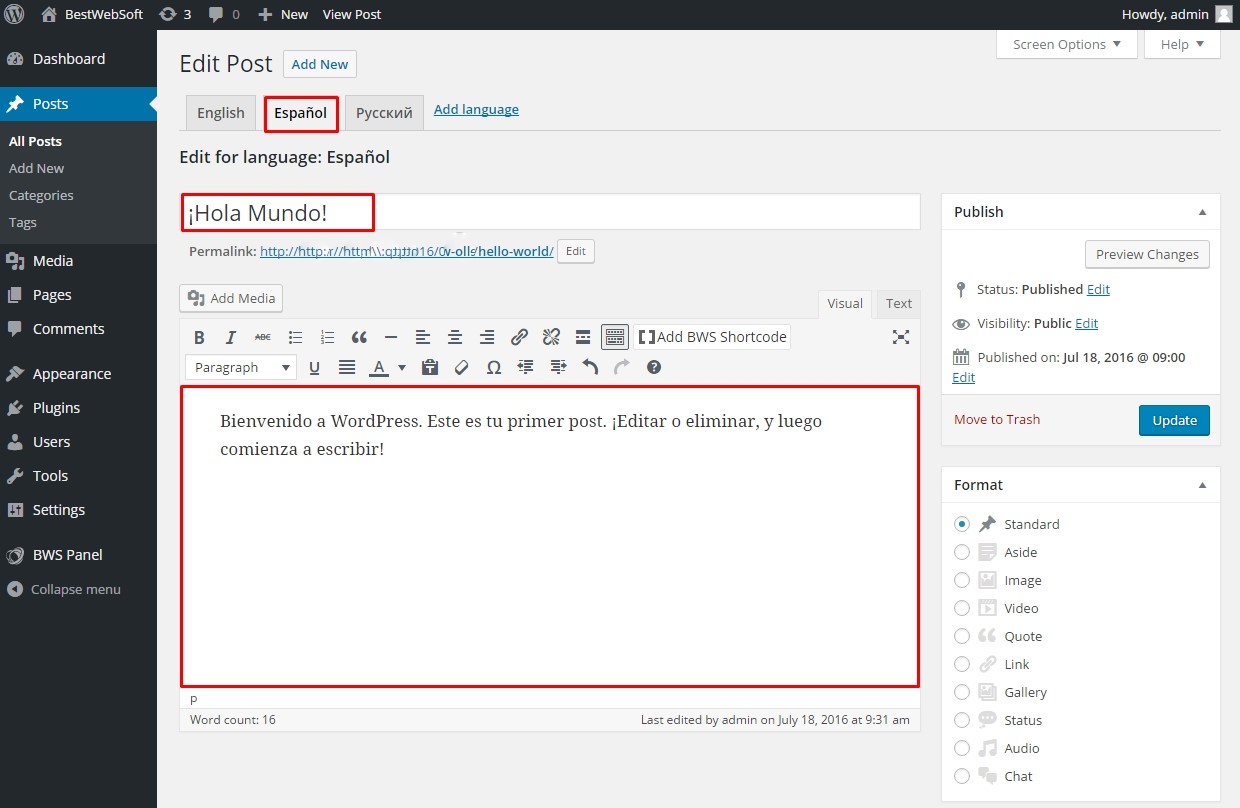
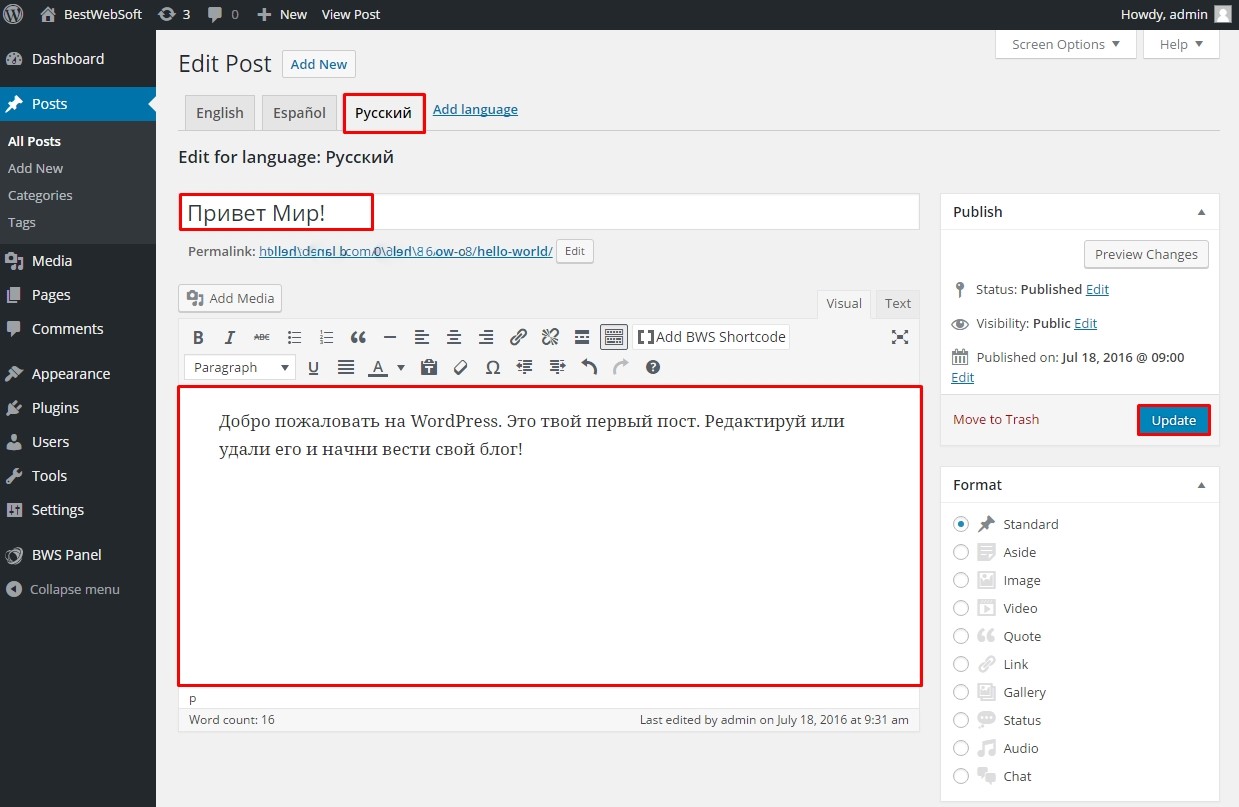
Save changes or update your post.
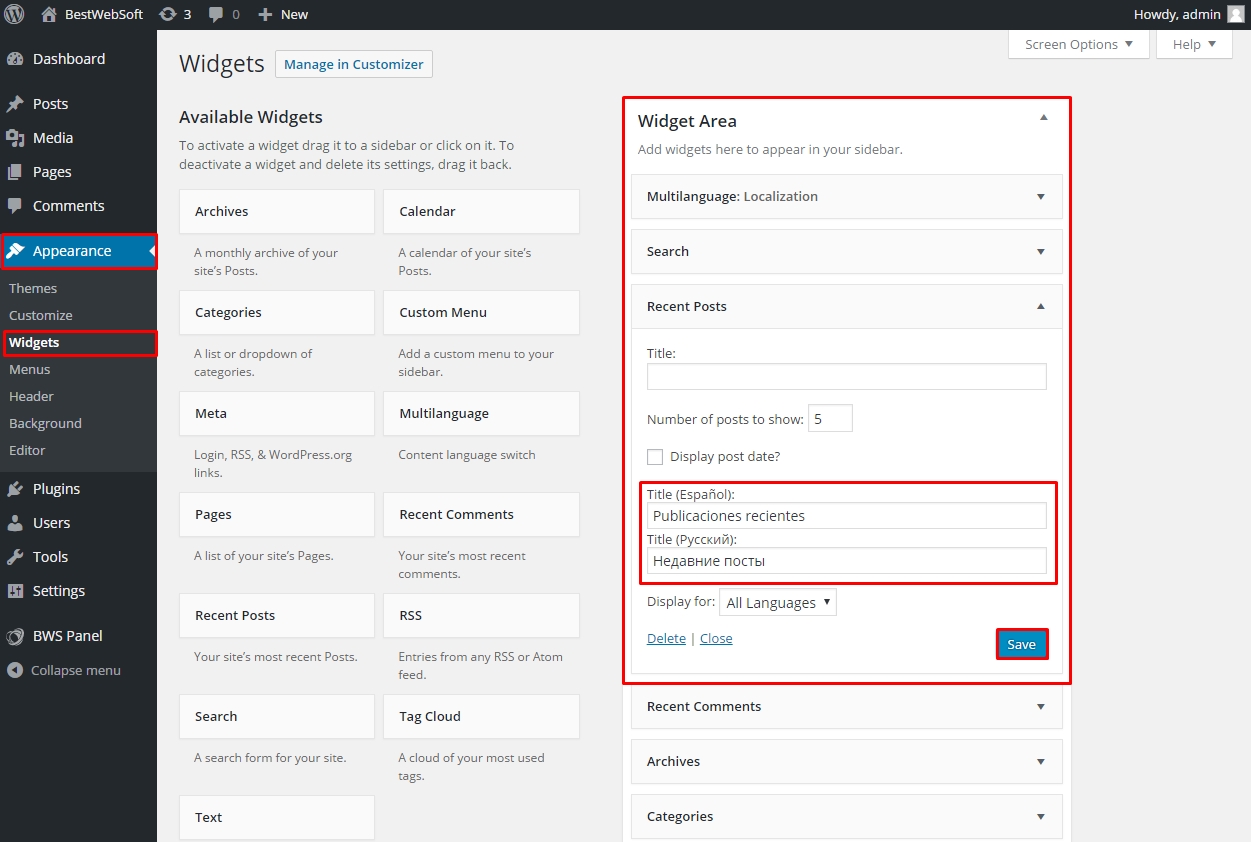
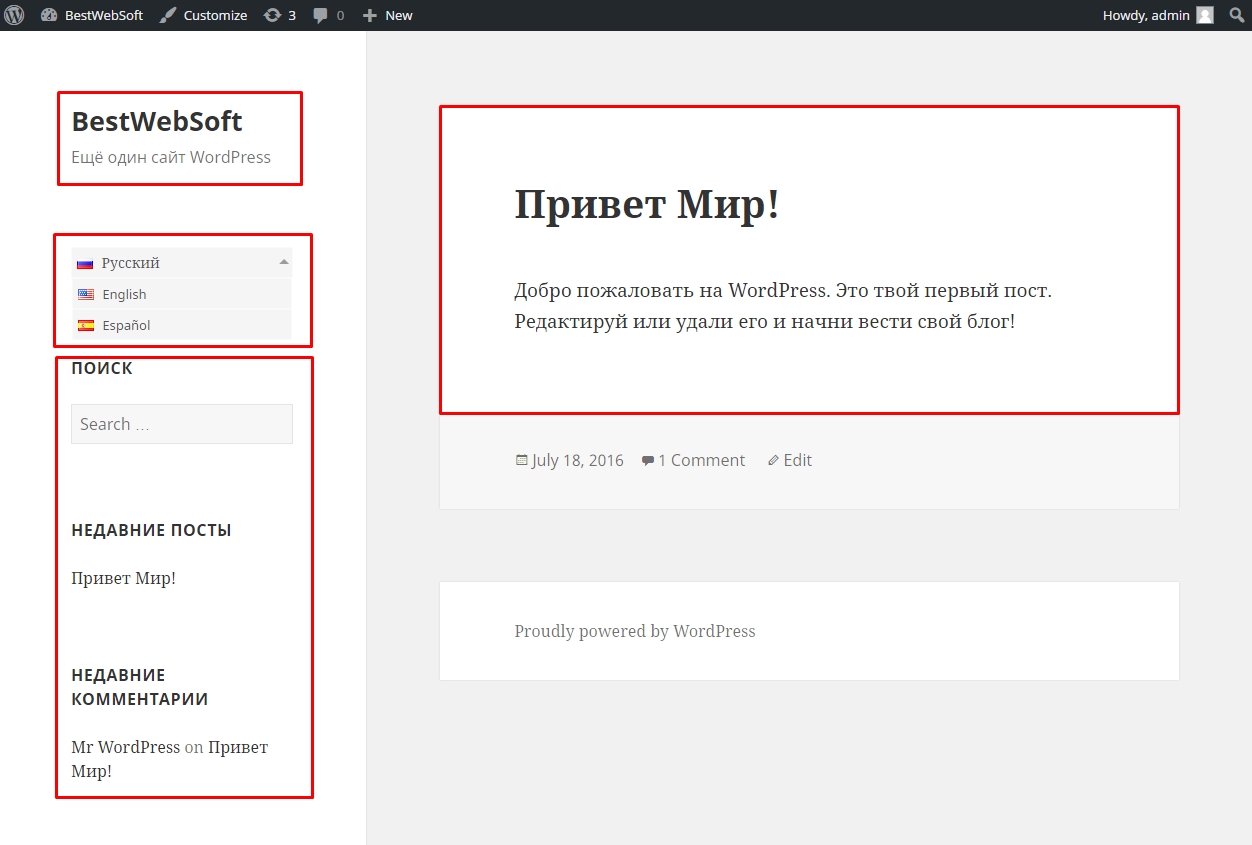
Now let’s translate your sidebar widgets too. Navigate to Appearance > Widgets and here you’ll see the Widget Area, choose the categories you want to be translated and write the translation for them. Save changes.
Click Visit Site and you will see how your translated post looks on live.
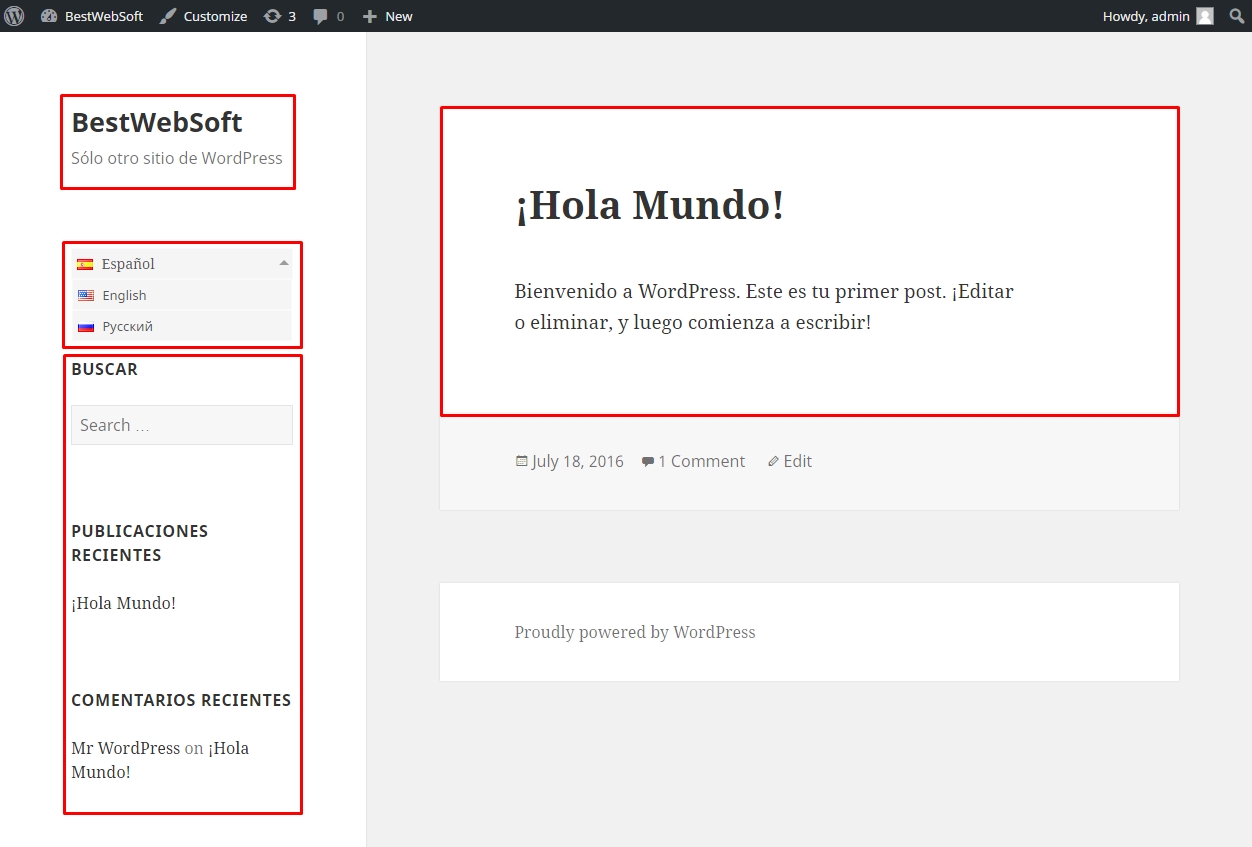
If you want to change the Language Switcher, go back to the Appearance > Widgets > Widget Area. Click Multilanguage: Localization, and choose the needed type of the language switcher.
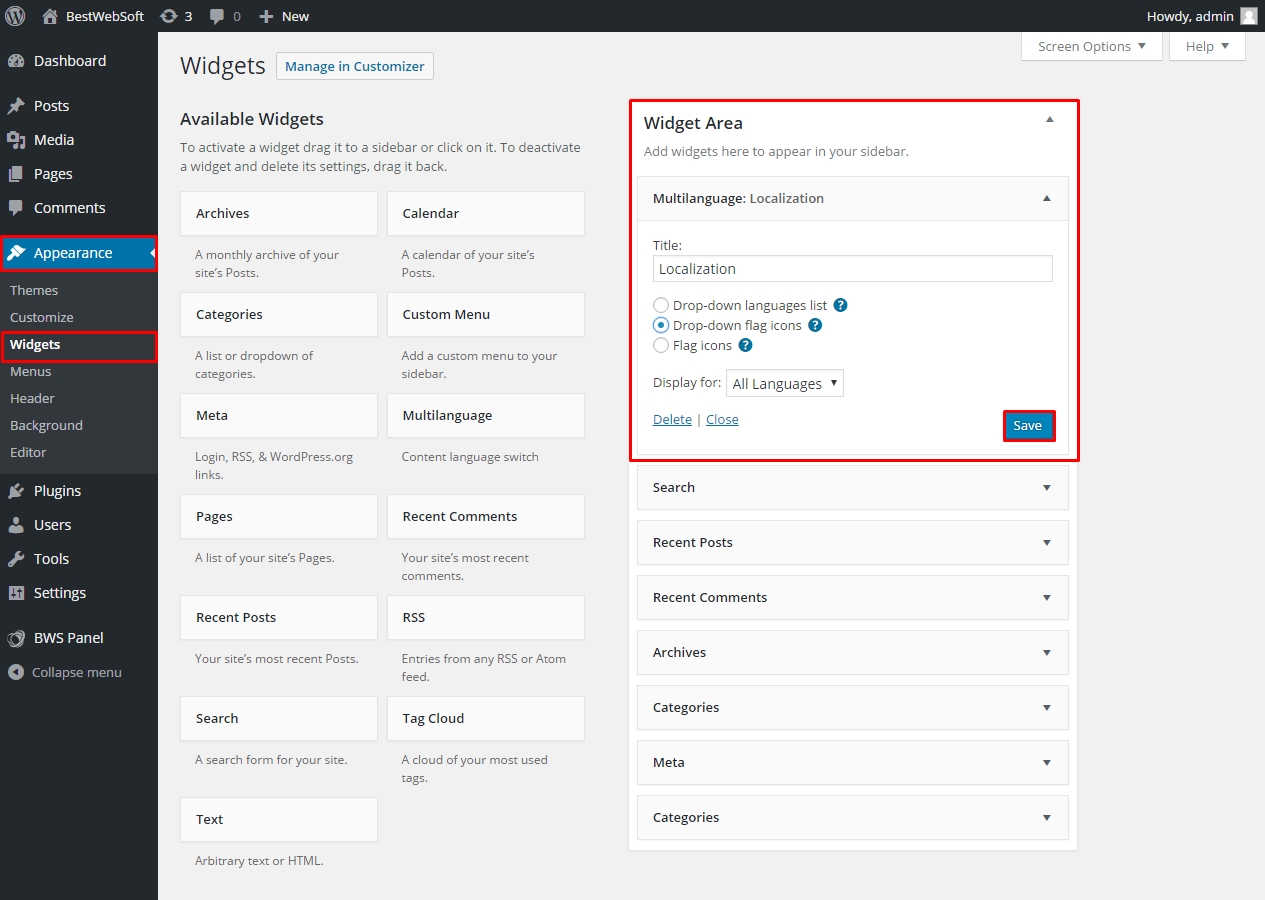
Save all changes and see how your website looks now!
Conclusion
Creating your website multilingual will help your visitors to read posts in their own languages, attract new visitors, and share thoughts with their friends in different countries. It’s a great opportunity for people to know about you and your product. Become up-to-date right now! Enjoy your multilingual website with a Multilanguage plugin by BestWebSoft!
If you liked this article, then please subscribe to our Twitter to receive updates about latest releases, useful tips, and company news!
