Navigating the intricate world of online business, BestWebSoft recognizes the immense value of every competitive edge. Our solution? The Multilanguage plugin. With a multilingual website, you can broaden your audience reach, supercharge your multilingual SEO, and drive your sales figures higher.
The Multilanguage plugin has been an effective tool for several years, helping users incorporate manually translated content to various aspects of their site such as pages, posts, widgets, menus, custom post types, taxonomies, and more. This paves the way for a truly global and multilingual online presence.
In line with our commitment to continual improvement and user satisfaction, we’ve now enabled Multilanguage compatibility with the Divi Builder plugin. This is perfect for users who have a penchant for crafting top-notch page designs.
Integrating Translated Content into Pages Created Using Divi
1. First and foremost, install and set up both plugins. To work with the Divi builder you will need the Pro version of the Multilanguage plugin. You can use the link to purchase at the end of this article. Refer to this article for guidance if you encounter any hiccups during the process. Don’t forget to update plugins to their latest versions.
2. Head to the settings page, then proceed to “Pages” => “Add New”. Add a page title in your chosen language, then toggle to another tab and add a title in a different language. Hit the “Publish” button.
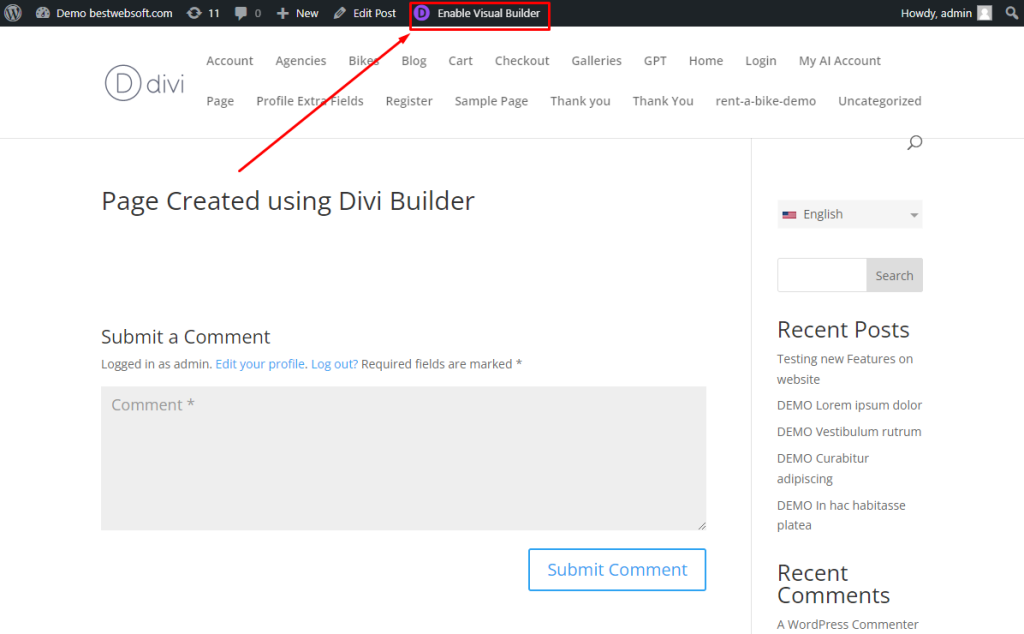
After that, you can start adding the content to the page. Start from the default language. After switching the language before switching to DIVI editing, you need to save the post by pressing the Update button. Then click on the “Enable Visual Builder” button.
3. Save changes, go back to the web page where you plan to start inputting content with Divi and click the “Enable Visual Builder” button.
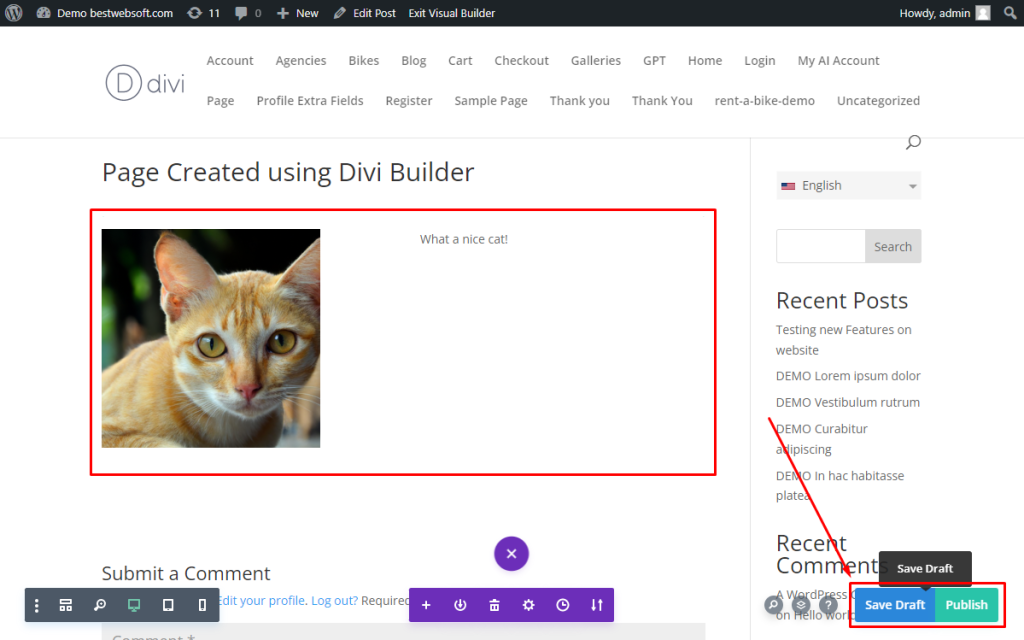
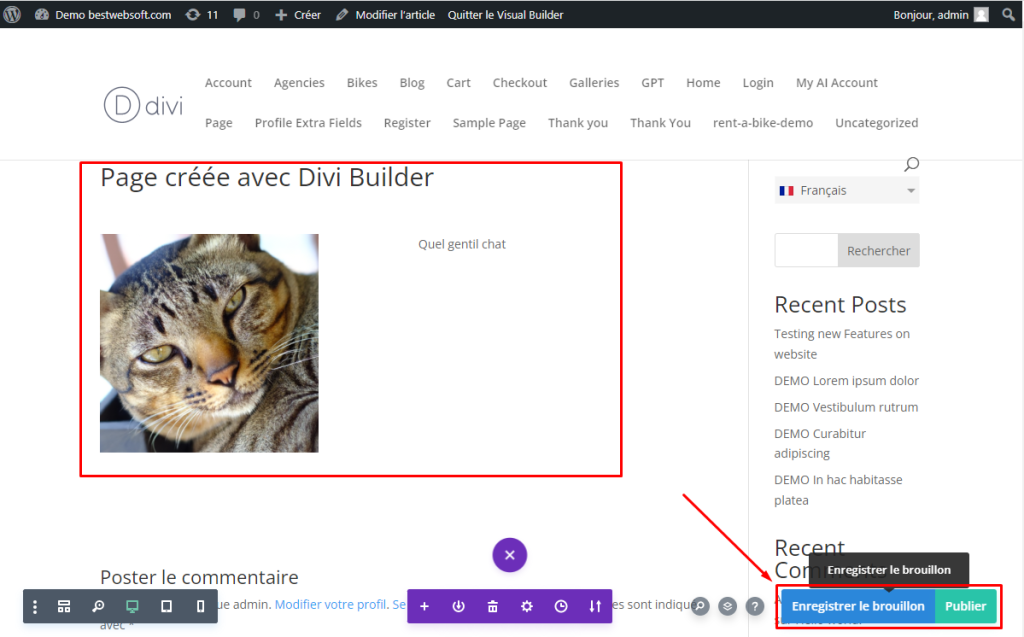
4. Tailor your page to your liking using Divi and click the “Save Draft” or “Publish” button.
5. Click the “Exit Visual Builder” button to go back to the saved web page.
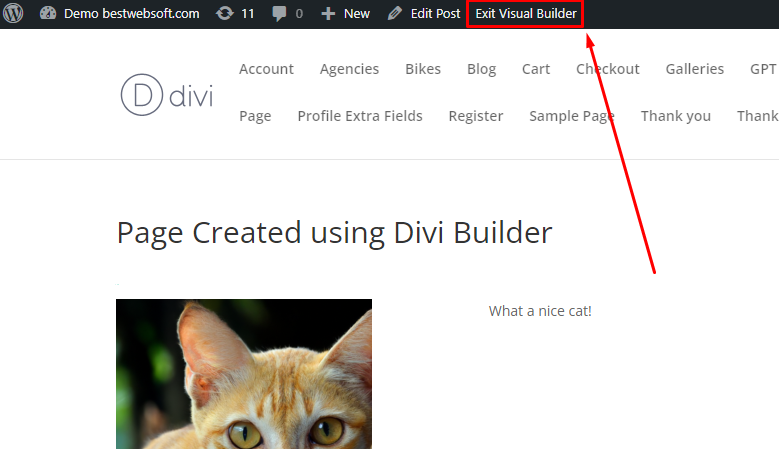
6. After that, you need to switch to the regular editor by clicking on Edit Post.

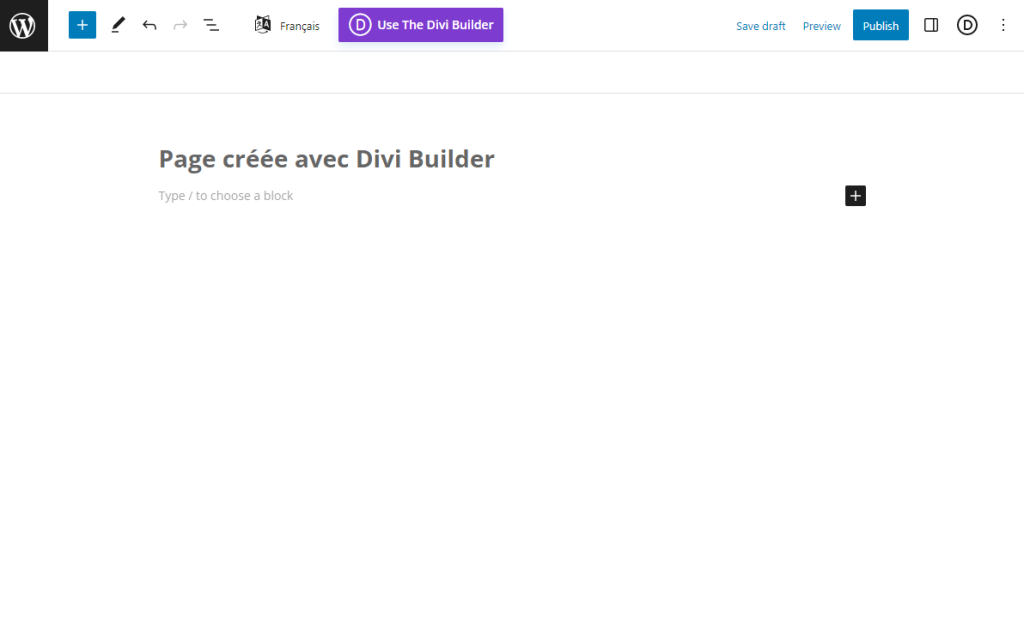
7. Select the next language in the switcher press the Update button and then click the “Use Divi Builder” button.
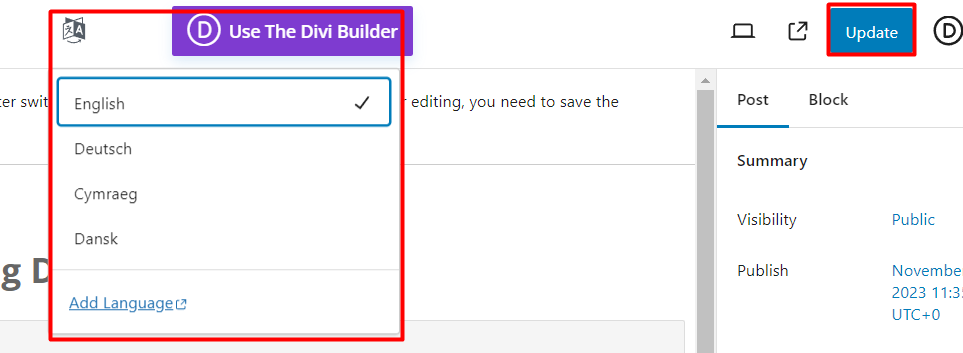
8. Translate all the text and visual content on your page manually and click the “Save Draft” or “Publish” button.
9. Just like before, click the “Exit Visual Builder” button to go back to the saved web page.
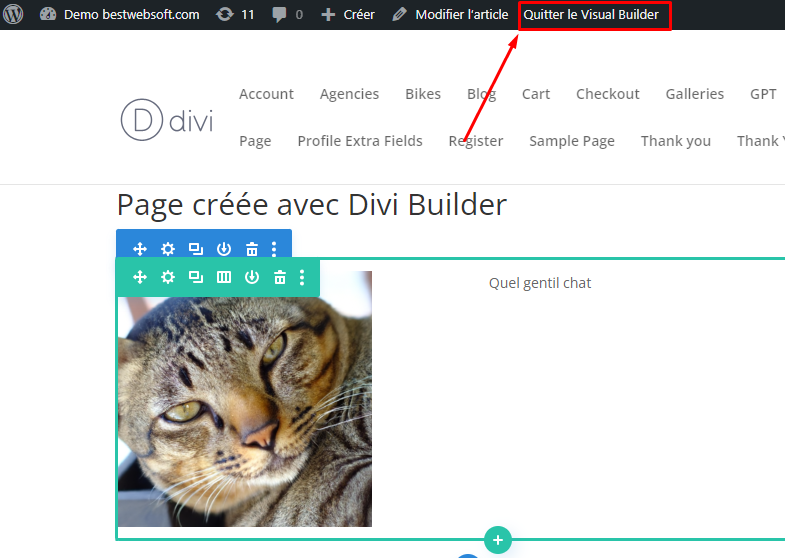
10. Lastly, click the “Update” button to save the changes to the post.
Hats off to you! You’ve successfully translated your first page designed using the Divi Builder!
Summary
As we’ve shown, transforming your website into a multilingual platform is not as complex as it may seem. Just adhere to the steps outlined above and you should sail through smoothly.
The Multilanguage plugin is an excellent resource for diversifying your WordPress website into various languages. It empowers your visitors to consume content in their preferred language, contributing to a wider audience, improved multilingual SEO, and higher sales.
With our latest feature, Divi Builder compatibility, you can build and maintain your multilingual website without any design restrictions.


