WordPress should always be updated to the latest version. You will receive a message informing about an update in your WordPress Admin Screens whenever a new version of WordPress is released. In order to update the system, you have to click the link included in the message.
WordPress can be updated in two ways, so you are free to choose the one that best suits your needs. One-click update is the easiest method, which will work fine for the majority of people. However, in case WordPress fails to upgrade, or you wish to participate more actively, the update process can be performed manually.
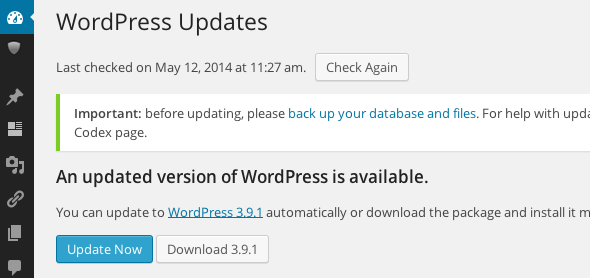
We recommend you to back up your website before you start updating WordPress. This way, your website can easily be restored in case any issues appear. Browse the WordPress Backups section for thorough instructions on making a backup.
To apply minor and security updates in later versions of WordPress, such as 3.8+, you don’t have to do a stroke of work. Instead, most websites are nowadays able to do it for you, automatically applying these types of updates in the background. If your site supports one-click updates and does not require entering FTP credentials, then updating from 3.8 to 3.9.1 or later versions will be problem-free. However, for major feature releases, you will still have to hit “Update now”.
One-click updates are generally featured in versions of WordPress, such as 2.7+. So, to launch the update, all you have to do is navigate to the Dashboard > Updates screen, or simply click the link in the new version banner (if available). Once you moved to the “Update WordPress” page, hit the “Update Now” button, and the process will begin immediately. That is about everything you have to do, no extra actions are needed from now on. Once the update is over, you will have the up-to-date version ready-to-go.
The majority of servers have no problems with one-click updates. However, proper functioning is only possible when the following technical criteria are satisfied:
1) File ownership: The user under which your web server executes must own all your WordPress files. This means that the actual owner of your WordPress files should be the same as the user under which your web server executes. However, it may happen that the user of the web server (which passes by the name “web”, “apache”, “nobody”, “www” etc.) is not the owner of your WordPress files. Most commonly, the FTP user, which uploaded the initial files, actually owns WordPress files. In case the user under which your web server executes and the owner of your WordPress files do not correspond, a dialog box requesting “connection information” will appear, and you may notice that, regardless of your attempts to enter anything in that box, upgrading WordPress via clicking the “Upgrade Now” button will be impossible.
2) File permissions: The user under which your Apache server executes should ensure that WordPress files are writable either by an owner, or by a group.
Please note that the web server should NOT be the owner of the WordPress files on shared hosts. Still, if it turns out that multiple users own different files in the install (which can happen, for example, if the files are re-uploaded and deleted through different accounts), it is essential that the files are made group writable (for instance, 775 and 664 instead of the default 755 and 644). Generally, the server environment should be taken into consideration, and file permissions should be adjusted accordingly (for example, the shared host RackSpace CloudSites suggets 770 and 660 for multiple FTP users, or 700 and 600 for a single FTP user). For more information, check the file permission section (note that for some files and folders stricter permissions are needed).
In case the “failed update” nag message appears, use FTP to delete the .maintenance file from your WordPress directory. When done, the message should be removed.
If the one-click update fails to work for you, there’s no need to panic! There is always a manual way to upgrade the system.
Here is the short variant of instructions, but if you want more details, have a look at the extended upgrade instructions. If you struggle with the Three Step Update, we recommend you to examine the in-depth update instructions.
These instructions presuppose that your blog’s URL is http://example.com/wordpress/.
- Download the most recent WordPress zip (or tag.gz) file.
- Unpack this zip file.
- Deactivate plugins.
- On your web host, remove the outdated wp-admin and wp-includes directories (via your shell access or FTP).
- With the help of your shell access or FTP, upload the new directories in place of those that were deleted at the previous stage, i.e. wp-admin and wp-includes directories.
- Move the individual files from the new wp-content folder to wp-content folder that already exists, choosing to overwrite the existing files. Make sure you do NOT delete your wp-content folder. Also, files and folders in the existing wp-content directory, other than the ones being overwritten by new files, should NOT be deleted.
- Next, upload all new loose files available at the root directory of the new version to WordPress root directory that already exists.
NOTE: all outdated WordPress files should be replaced with the recent ones in the root directory, wp-admin and wp-includes directories and sub-directories (for instance, wp-login.php, index.php files etc.). No need to worry about your wp-config.php file, though, it will remain secure.
However, you should be careful when it comes to copying the wp-content directory. We recommend to make sure that you do not replace the entire wp-content directory, but only copy the files from inside this directory. As this is the place you will find your plugins and themes, you might want to keep them. In case you have customized, yet did not rename classic or default themes, make certain you don’t overwrite these files, as in that case you will lose all changes made. (However, you can do so, if you wish to compare them for fixes or new features).
Finally, if you want to find out if any useful settings have been introduced with the new update, check the wp-config-sample.php file. You are free to add useful new settings to your own wp-config.php file.
Remove .maintenance file from your WordPress directory if you had to upgrade manually as a result of the auto-upgrade failure. When done, the “failed update” nag message will no longer be shown.
Go to your main WordPress admin page that can be found at /wp-admin. At this point, the system may ask you to login once again. In case a database update is required at this stage, WordPress will identify it, and you will receive a link to a URL that will look like this: http://example.com/wordpress/wp-admin/upgrade.php. All you have to do is follow the link and follow the instructions on the page. This will upgrade your database to become compatible with the newest code. It is strongly recommended that you do this as soon as you can after Step 1.
In case you have caching enabled, the changes will be applied and visible to users a lot faster if you choose to clear the cache at this stage. If you don’t, chances are you will notice an old version number in page footers when you decide to check if the upgrade went as planned, and this can be quite confusing.
At this point, your WordPress installation is successfully upgraded. There hardly is a more simple way to update WordPress without using Subversion.
Consider doing something nice for yourself now. Write a blog post telling about your success in updating, read an article or a book you had to set aside before, or merely take a breath and let the world pass you by.
Now that your update is complete, you are free to log in and activate your Plugins. Try clearing cookies in the browser you are using if there are any difficulties with logging in.
In case something goes wrong, the first thing you have to do is check the extended upgrade instructions and go through every step suggested there. Since the most frequent issues that may appear are also covered on that page, with that information you may be able to fix the problem.
If an update process triggers any problems, you can always go back to the previous version of WordPress by restoring your backup and replacing the new files with the old ones from the release archive.

