
In today’s ever-evolving online environment, staying ahead of the curve is crucial for maintaining a competitive edge. As website owners and administrators, it’s vital to continuously enhance our platforms to ensure maximum engagement and satisfaction for our users. With the recent introduction of a groundbreaking feature in the Pinterest plugin for WordPress, the possibilities for enriching user experience have expanded exponentially.
This latest addition empowers users to seamlessly integrate custom pinboards into their websites, elevating not only functionality but also the overall appeal of their online presence. Whether you’re a seasoned WordPress user or just starting out, this guide is designed to be your comprehensive companion, providing step-by-step instructions and insights to help you leverage this innovative feature effectively.
By the end of this guide, you’ll be well-equipped to effortlessly create, manage, and optimize custom pinboards, unlocking a world of possibilities to enhance your website’s engagement and captivate your audience like never before. Let’s embark on this journey together and unlock the full potential of the Pinterest plugin for WordPress
Step 1: Installing and Activating the Pinterest Plugin:
To get started, head over to your WordPress dashboard and click on the “Plugins” section. From there, you’ll want to find the Pinterest plugin. If you haven’t already installed it, go ahead and do so now. Once it’s installed, make sure to activate the plugin so you can access all its features and unlock its full potential.

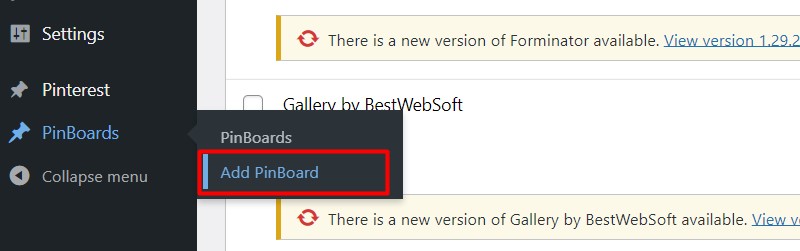
Step 2: Adding Custom Pinboards:
Within the WordPress admin panel, find the “Pinboards” > “Add Pinboard” section.
To create your own custom pinboard, start by providing a title and URL. You can enter your Pinterest user ID, name, pin link, and image. This allows you to tailor each pinboard to your specific preferences and content, providing a unique experience for your audience.
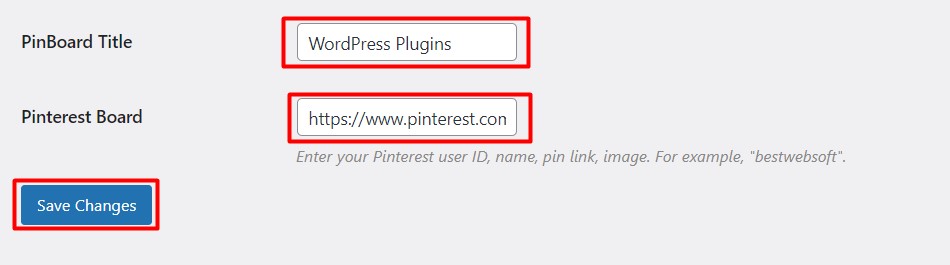
Once you’ve finalized your pinboard, simply save it, and the plugin will take care of the rest by automatically generating a shortcode for you. This shortcode can then be used to seamlessly embed your pinboard onto your WordPress site, making it easily accessible to your audience.

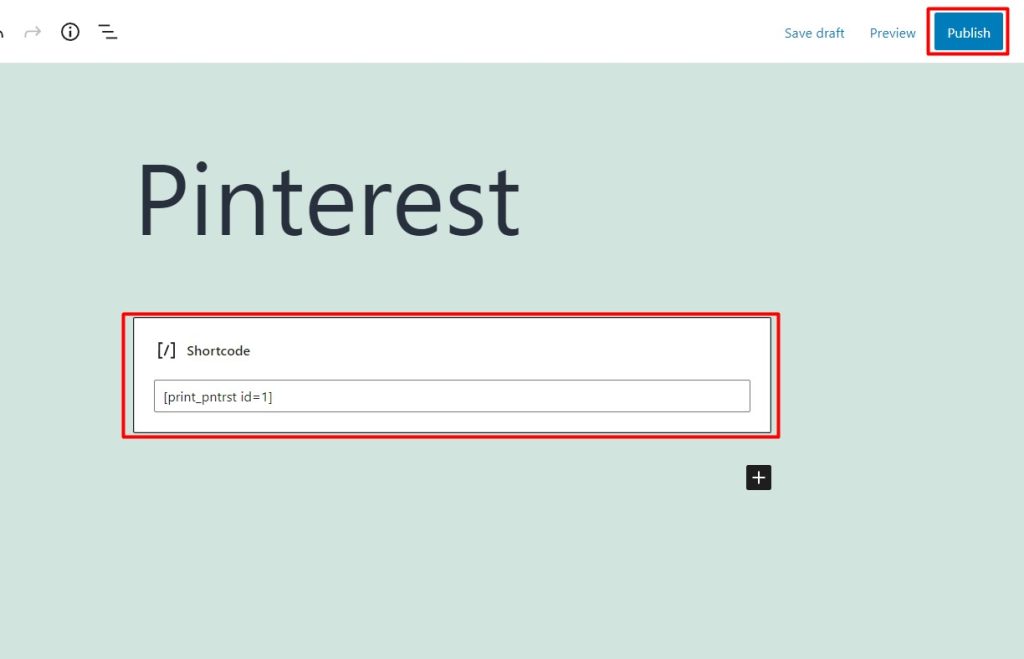
Step 3: Embedding Pinboards onto Your Pages:
Next, select the specific page or post on your WordPress site where you’d like to showcase your pinboard. Once you’ve made your choice, simply insert the shortcode that was generated for your pinboard into the content of that page or post. Finally, don’t forget to update or publish your page to ensure that the pinboard goes live on your site for your visitors to enjoy.
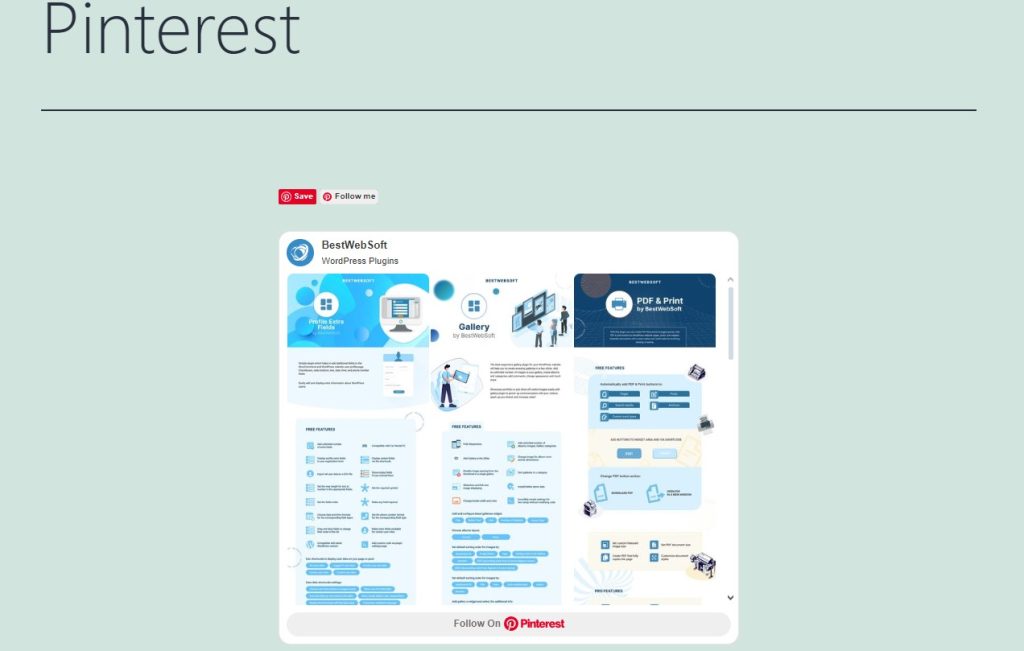
View the page or a post. The result may look the following way:
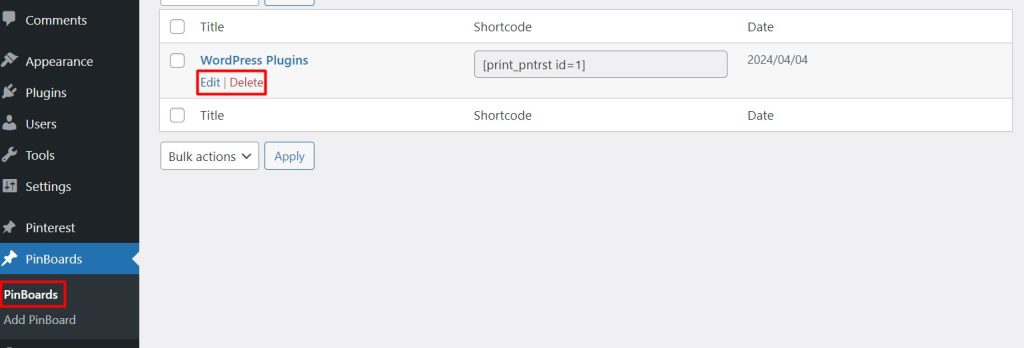
Step 4: Managing Your Pinboards:
To manage your pinboards, head to the “Pinboards” > “Pinboards” section within your WordPress admin panel. From there, you can access the list of all your pinboards. Feel free to edit or delete any pinboards as necessary to keep your content up to date and relevant to your audience.
Conclusion
In summary, the addition of custom pinboards to the Pinterest plugin for WordPress presents an exciting opportunity to enhance your website’s functionality. By following this guide, you’ll seamlessly integrate custom pinboards into your site, providing users with a richer and more engaging experience. With this feature, you can curate content, promote products, and inspire your audience, ultimately fostering stronger connections and driving higher levels of interaction.