The 404 error in WordPress is one of the most common errors you will find on the web. However, that doesn’t make it any less annoying or off-putting when it appears on your own website. The good news is that fixing it is relatively easy and the process is well-documented for WordPress sites.
What is a 404 Error in WordPress
A 404 error is a message that appears when you try to access a page that the browser cannot find. Depending on the browser you are using, the message may be subtle.
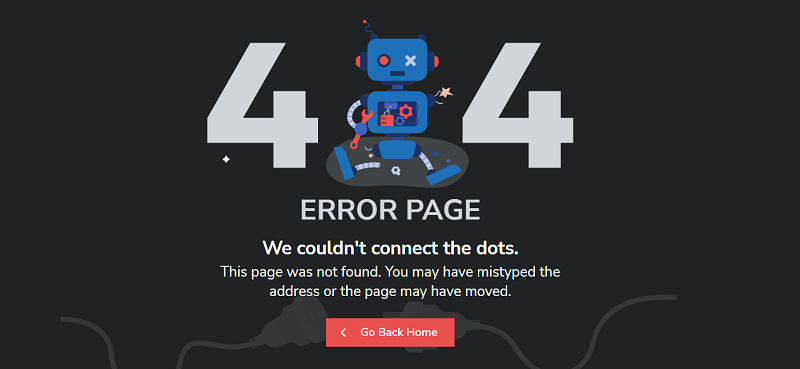
These standard error messages can be quite vague and any website can set up its own 404 error page. This is not required, but it lets visitors know that the site is working and that the only problem is the specific page they are on.
Regardless of how it looks, there are many things that can cause WordPress to receive a 404 error message. These include:
Invalid URL. In some cases, the error may be in an extra letter written in the URL of the page.
Caching issues. Sometimes the browser may cache the page you’re trying to access, and until you find it, you’ll see a 404 error even if the site works for everyone else.
A problem with the domain name server (DNS) configuration. Your domain information may not have been updated in DNS yet, so you’re seeing an error when trying to access one of your site’s pages.
Compatibility issues with WordPress. In some cases, plugin or theme issues can affect how WordPress generates URLs and permalinks for your site. Then, if someone tries to access a URL that no longer works, a WordPress 404 error is thrown.
It is important to understand that the 404 error is not unique to WordPress. It can happen regardless of the platform your site is on. However, if you use WordPress, you have an advantage because there are many ways to solve this problem.
Why 404 Errors are Important
404 errors create several problems for a website beyond simply preventing access to pages. First, they create a poor user experience.
If your site has a lot of these errors and they aren’t fixed quickly, they can eventually turn users away. In the worst-case scenario, these visitors could end up on a competing website, causing you to lose your clients.
404 errors can also hurt your SEO. Search engine bots won’t index a page that returns a 404 error because they think it doesn’t exist.
What to do Before Fixing a 404 Error in WordPress
In the following sections, you will be editing some files on the WordPress backend. It’s best to back up your site beforehand – just in case.
After that, you will need to download and set up an FTP client. For example, FileZilla or WinSCP as they are free and offer all the features you might need. Then, when you’re ready, you can start fixing WordPress 404 errors.
How to fix the 404 Error in WordPress
In some cases, WordPress not found pages soon disappear on their own. This usually happens if they are caused by a mistake with your hosting provider. Before doing any serious troubleshooting, we recommend that you try refreshing the site, and giving it five or ten minutes to get things fixed.
If the error persists, there is a problem with your site. In this case, let’s look at the three possible solutions one by one.
Reset Your Permalinks in WordPress
One of the most common causes of a WordPress 404 error is a problem with the way WordPress generates permalinks. As you may know, WordPress offers several options for formatting the links on your posts and pages. For example, you can configure the platform to use simple number bindings, or specify the name of each record as a URL:
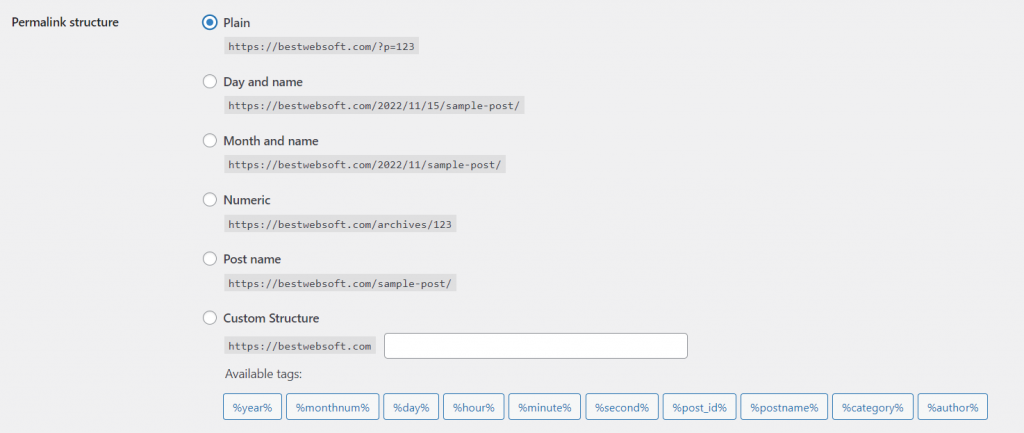
In any case, the first thing to do when you encounter a 404 error in WordPress is to reset your permalinks. There are two ways to do it, one is through the control panel (Console) and the other is through FTP. If you have access to the control panel, follow the instructions in this section. If not, you need to go to method number two.
If you can access the dashboard, start by going to the Settings > Permalinks tab. Take note of the structure your website is currently using. You will need to change it temporarily to restore WordPress permalinks, but it will only change it for a moment.
Select Plain under General Settings and click the Save button at the bottom of the page:
The page will reload. You can then go ahead and select your old permalink type and save your changes again. That’s all you need to reset your WordPress link structure.
Now try browsing your website as usual. Check the pages that previously gave the 404 error. If the error goes away, you’re good to go!
Restore the .htaccess File in WordPress
When you make changes to the WordPress permalink structure, they are saved in a file called .htaccess. This file defines how WordPress will interact with your server and how URLs for pages are generated.
If you don’t have access to the control panel, you will need to manually edit the .htaccess to reinstall the permalinks. To get started, access your site via FTP and navigate to your WordPress root folder.
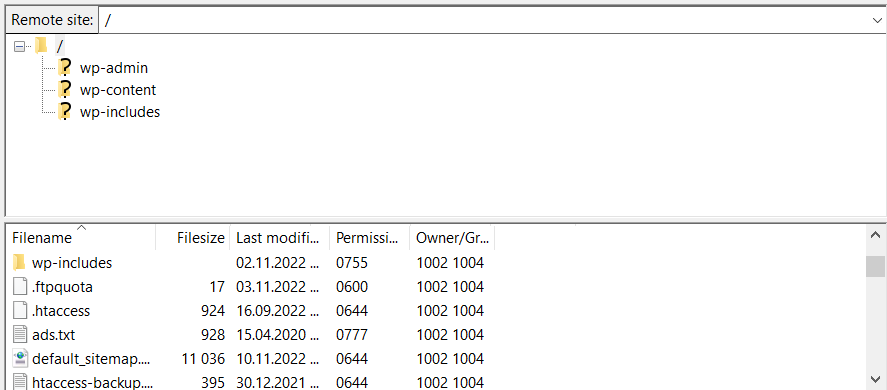
Open this folder and locate the .htaccess file. If you are using FileZilla, you need to right click on the .htaccess file and select View/Edit. Now you can make the changes you want.
If you don’t understand what all the code in this file is for, don’t worry. You should not make any changes unless you are 100% sure of them. However, what you can do is use a WordPress .htaccess code that looks like this:
# BEGIN WordPress
<IfModule mod_rewrite.c>
RewriteEngine On
RewriteBase /
RewriteRule ^index\.php$ - [L]
RewriteCond %{REQUEST_FILENAME} !-f
RewriteCond %{REQUEST_FILENAME} !-d
RewriteRule . /index.php [L]
</IfModule>
# END WordPress
This is a default .htaccess file without any additional strings. It will delete any changes made to your permalinks structure. Let’s go ahead and create a backup of the contents of the old .htaccess file and replace it with the code snippet listed above.
After that, save the changes and close the file. Accept file replacement, and that’s it! Simply install your WordPress permalinks manually without breaking anything in the process.
At this point, try to return to your site again. The 404 error should go away, which is already great news. However, you can still go back to the old permalink structure if you don’t like numeric URLs.
Remember that you can change the way you see permalinks by going to the Control Panel and the Settings > Permalinks tab. Choose the structure your site was using before the 404 error and save your changes. Then everything should work normally again.
All the indicated actions can also be done with the help of the Htaccess plugin.
Disable Themes and Plugins in WordPress
As mentioned above, sometimes your plugins and themes can affect the structure of your WordPress, depending on your settings. If you tried one or both of the above methods and the 404 error still persists, please disable your themes and plugins.
There are two ways to do this, depending on whether you have access to the control panel or not. If you have access, go to the Plugins > All Plugins tab and follow this process for each of your plugins:
- Click the Disable button below the plugin name.
- Check your site to see if the 404 error persists.
- If the error persists, reactivate the disabled plugin.
- Go to the next plugin on the list and repeat the process.
Your goal is to disable each plugin one by one. You can disable them all at once, but in most cases only one plugin causes problems. If disabling one of your plugins fixes the problem, you have three options. You can check if an update is available and temporarily disable the plugin until it is available or replace the plugin with an alternative one.
If you’ve checked all of your plugins and none of them seem to be causing the problem, you’ll also need to make sure your active theme isn’t causing a 404 error. This process is much faster because you only need to check one theme. Go to the Themes tab and change your active theme to something else:
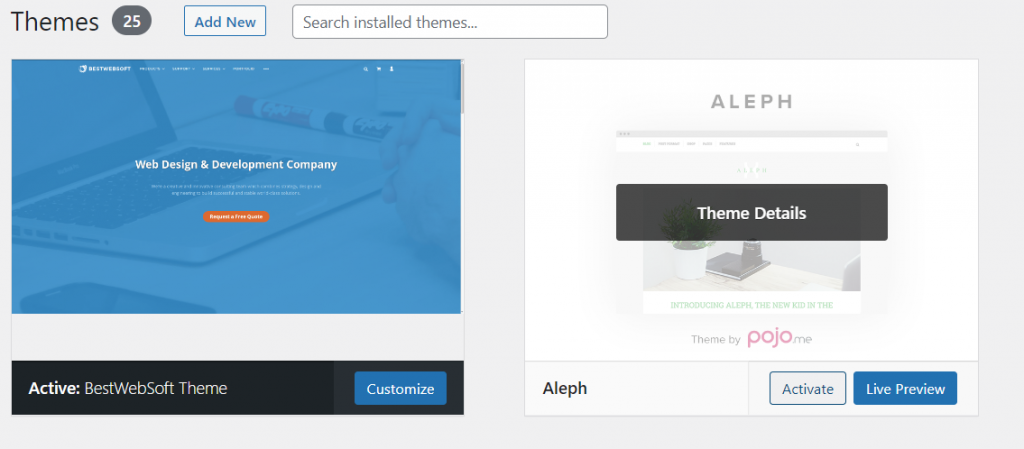
Now check if the 404 error is gone. If so, you have to choose again between checking for an update or checking for a new theme. Switching themes in WordPress can be a bit of a hassle, but it is ultimately necessary if your current theme is causing bugs.
If you don’t have access to the control panel, you can disable the theme and plugins manually via FTP. To do this, go to your site using FileZilla, then go to the public_html/wp-content directory. Here you will find several folders, two of which are named plugins and themes respectively:

First, go to the plugins directory. You will notice that each plugin has its own folder. Select one of these folders by right clicking on it and selecting the Rename option:
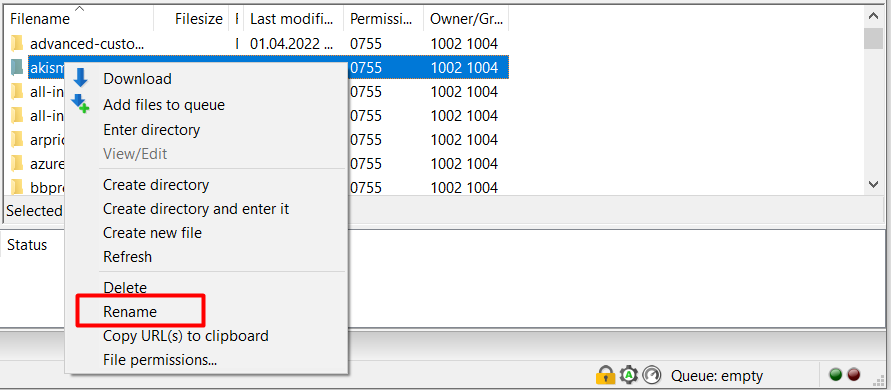
Rename the folder to something like akismet.disabled so you can easily identify it. Simply renaming the plugin folder is enough for WordPress to disable it. Now check if the 404 error is gone. If not, change this folder back to its old name and repeat this process for each subsequent plugin in the folder.
If one of your plugins is causing the error, you now know how to fix it. However, if it turns out that the 404 error is not caused by them, you can go to the wp-content > themes directory. Find the folder with the active theme and rename it the same as the plugins:
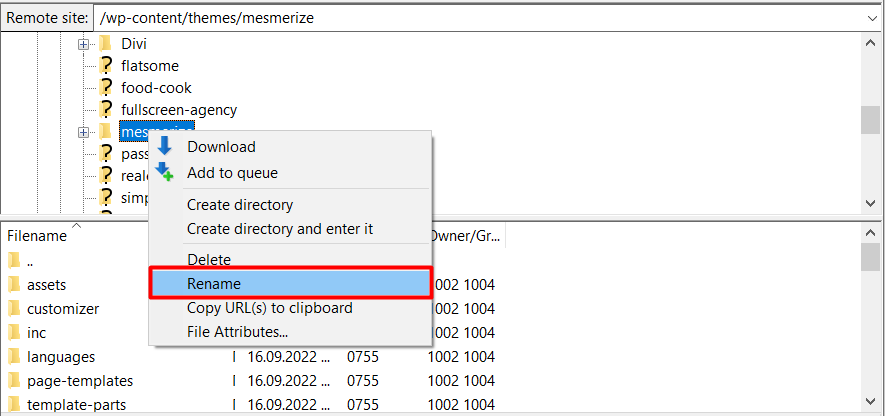
Since WordPress always needs an active theme, disabling yours will cause the platform to use one of the ready-made default options. This may affect the appearance of your website, but don’t worry, it’s temporary.
If the error goes away, you may need to choose a new theme. However, if it isn’t, restore your theme’s old folder name so that WordPress can recognize it again.
Conclusion
A 404 error may seem simple, but it can do a lot of damage. If your visitors can’t find the pages they’re looking for, they might start looking elsewhere, and why would you? This means lost traffic and possibly reduced conversions.
Fortunately, there are many ways to fix this problem in WordPress, including disabling themes and plugins, rebuilding your .htaccess file, and resetting your permalinks.


